Premium Quick Start Guide
←
→
Page content transcription
If your browser does not render page correctly, please read the page content below
Premium Quick Start Guide
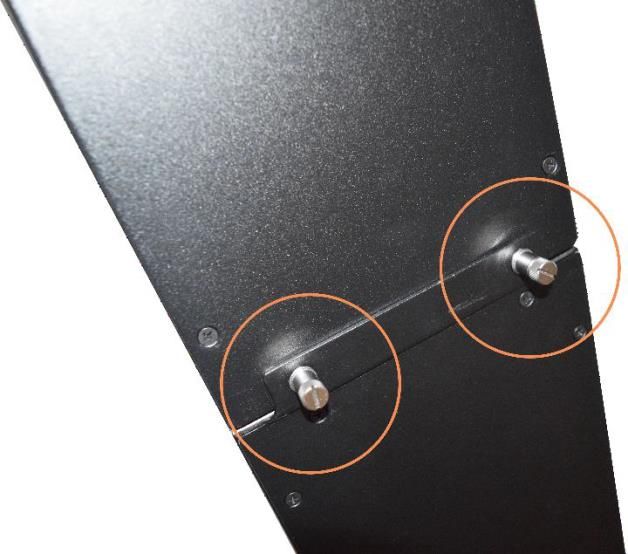
Table of Contents

Included Parts ................................................................................................................................................................... 2

Assembly Instructions: ..................................................................................................................................................... 3

Camera Setup .................................................................................................................................................................... 7

Startup Instructions .......................................................................................................................................................... 9

Login Instructions............................................................................................................................................................ 10

Import License................................................................................................................................................................. 11

Add Portal ....................................................................................................................................................................... 12

Aligning Camera .............................................................................................................................................................. 12

                                                                                                                                                     1|Page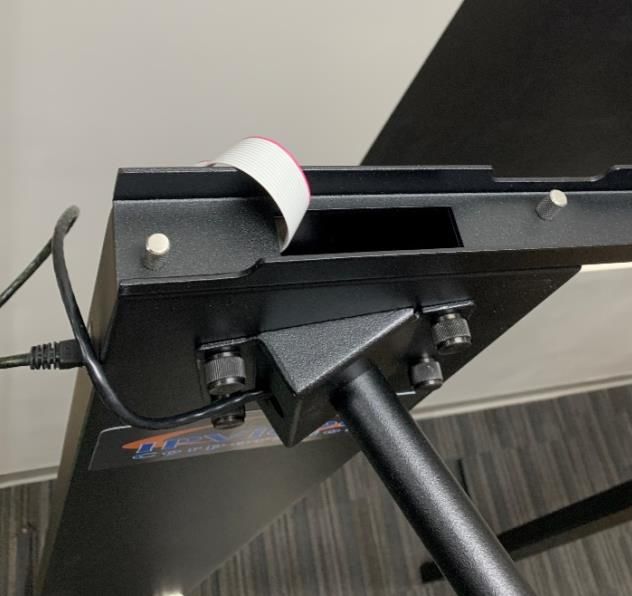
Included Parts
    • 2x ViewScan monolith pillars
   •   2x ViewScan feet
   •   1x ViewScan brace crossbar bottom channel
   •   1x ViewScan brace crossbar cover
   •   1x ViewScan power supply
   •   1x C7 Power Cable
   •   6x Leveling screws for feet and monolith
   •   4x Large threaded wing screw for legs
   •   4x Black thumb screws for camera boom
   •   4x Silver thumb screws for crossbar
   •   4x Silver captive thumb screw for monoliths
   •   1x Traveling case (Optional)
   •   1x Handheld wand
   •   1x Camera boom
   •   1x PoE camera
   •   1x PoE switch
   •   1x PoE switch power supply
   •   3x Ethernet patch cables
   •   1x Laptop
   •   1x Laptop power supply

                                                     2|Page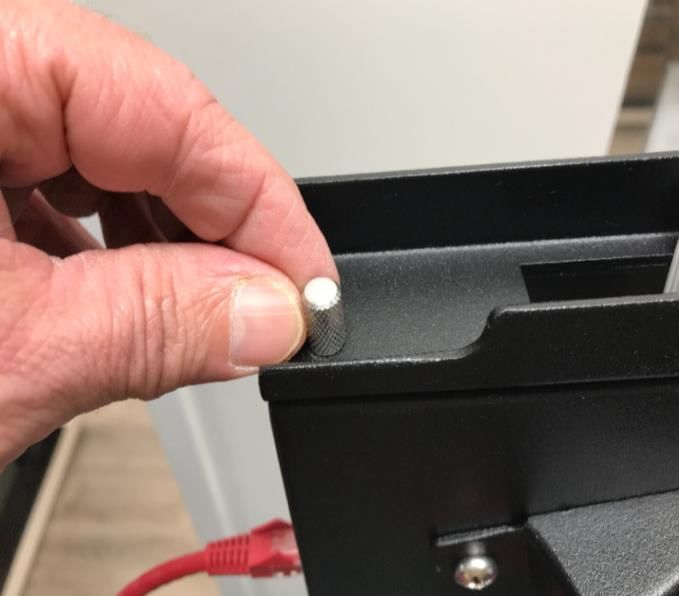
Assembly Instructions:
     1. Install leveling screws in ViewScan feet.

     2. Mount ViewScan feet to ViewScan monolith pillars using large thread wing screws.

     3. Unfold ViewScan monoliths and install silver captive thumb screws to secure
        them in the unfolded position.

                                                                                      3|Page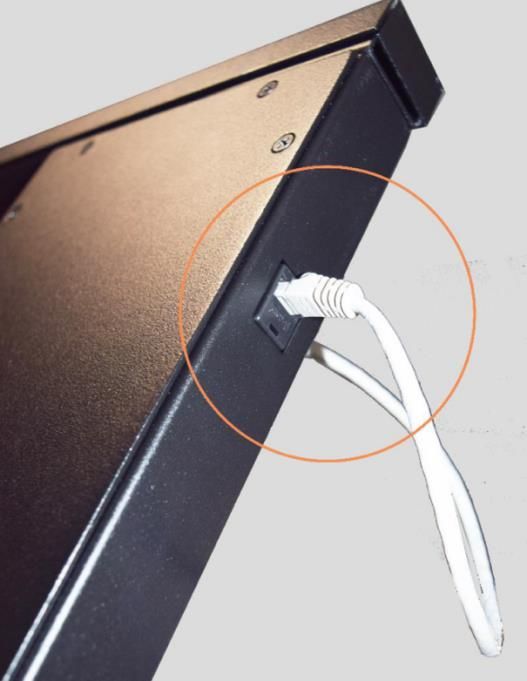
4. Feed the cables through the ViewScan brace crossbar bottom channel on either side in
   the provided cutout.

5. Connect top crossbar to Monolith using x4 silver thumb screws

                                                                               4|Page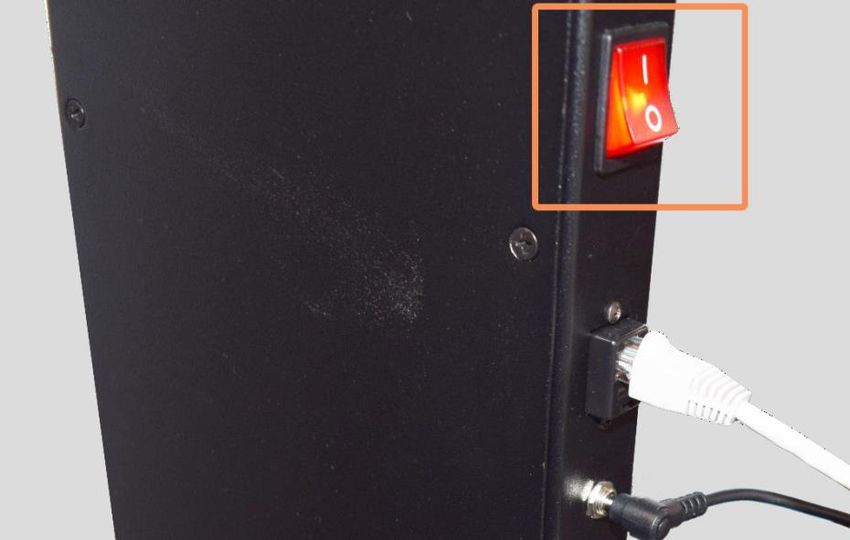
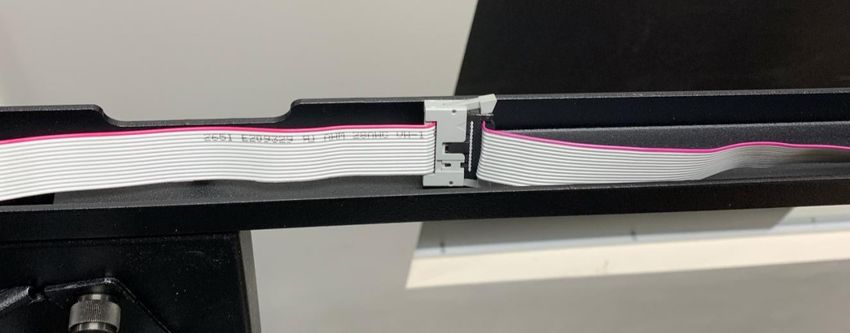
6. Connect cables on either side of the ViewScan brace crossbar with the data cable.

7. Plug an ethernet cable into the ViewScan monolith’s top (Scanner) RJ45 terminal
   and terminate into either the provided PoE network switch or local network.

8. Plug an ethernet cable into the ViewScan monolith’s bottom (Camera) RJ45
   terminal and terminate into either the provided PoE network switch or local
   network.

                                                                                 5|Page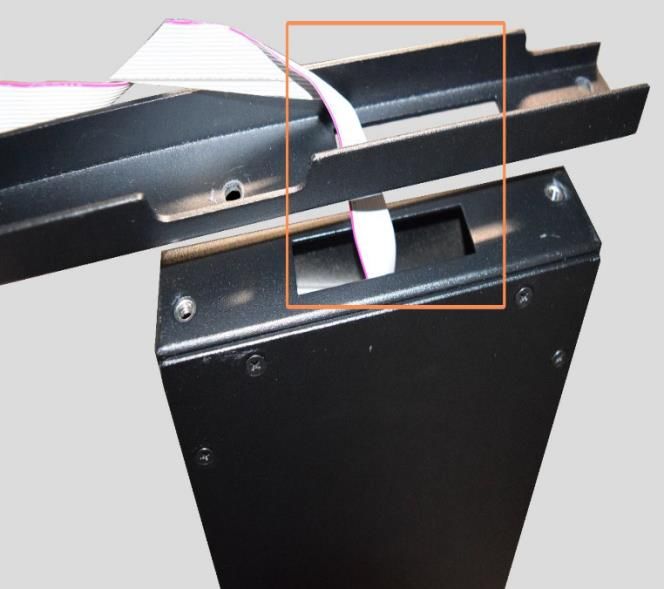
9. Connect the provided 12V DC power supply into the ViewScan.

10. Turn on ViewScan power using the switch located on the side of the unit.

                                                                               6|Page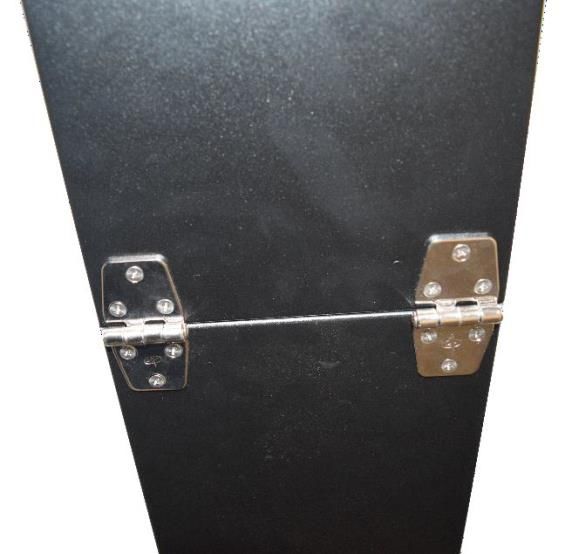
Camera Setup
    1. Attach the camera boom to the pillar that you are applying power and data to using the Large
       black knurled thumb screws.

    2. Connect the ethernet cable running through the boom to the side of the
       ViewScan monolith right next to the boom mounting location.
    3. Connect an ethernet patch cable from the laptop to the provided PoE network switch.

    4. Refer to the figure below for logical layout.

                                                                                    7|Page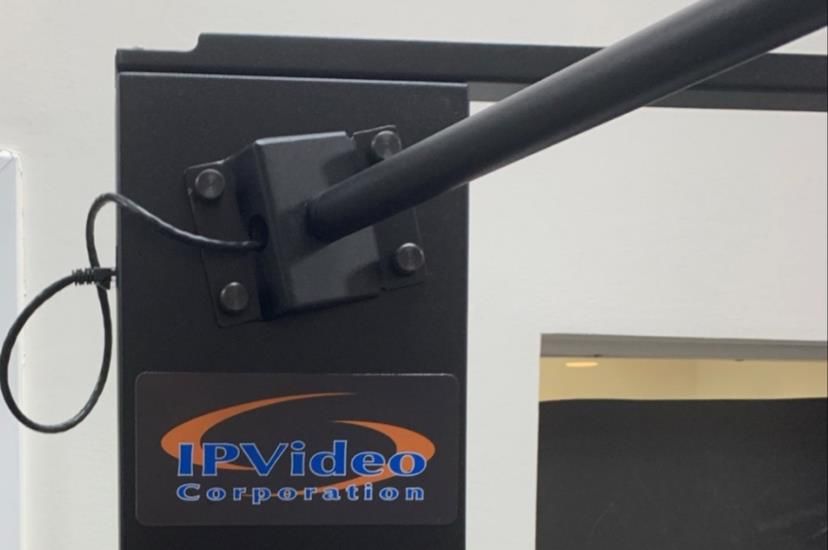
8|Page
Startup Instructions
     1. Turn on the Laptop and start the ViewScan Controller from the desktop.

     2. When it opens wait for it to connect to the Server.
        a. If a server connection is unsuccessful click Start Server. Allow the controller to
           make a connection while the server starts up.

     3. Once connected it will change the server status icon to green.

                                                                                      9|Page
Login Instructions
1. Visit the Web Page by opening the ViewScan Web Portal shortcut on the desktop.
2. Sign in with the set admin credentials, these are changed on the first login.
3. You will be prompted to accept and EULA & to change the password. Complete both.
Note: Store the new password in a safe place.
10 | P a g eImport License
A ViewScan license allows for the application to run on a designated system. If you do not
currently have a license, please reach out to our support for one.
1. Log into the Web Portal and visit the Settings page, then Other, then License File
Upload.
2. Choose the license file with the type ‘vs_license’.
3. Click Upload License. A message will appear and alert you of a valid license format.
11 | P a g eAdd Portal
1. Log into the Web Portal and visit the Settings page, then Portals then Add Portal.
2. Fill in the given Portal attributes with or without a camera then click Confirm.
• The Portal should now be visible on the controller.
3. Check that the Monolith & Camera is turned on and go to the ViewScan Controller.
4. Check the box next to the name of the Portal.
5. Click Start Scanner.
• Allow the scanner to fully initialize until the status icons turn green.
6. In a few short moments, the portal will start, connect to the server, start up the
camera & scanner, and will be ready to take passengers.
7. To take a snapshot or to stop a portal click the corresponding button.
8. To view scans from any networked computer, open the Web Portal and select a
portal from the dropdown.
Aligning Camera
1. If a scanner is not already active check the box next to a name in the Controller.
2. Click Start Scanner.
• Allow the scanner to fully initialize until the status icons turn green.
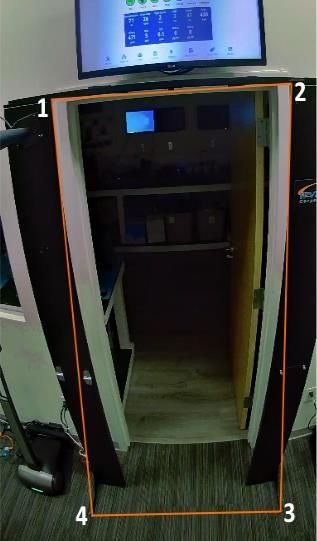
12 | P a g e3. Visit the Web Portal and click Settings, then Camera, then Align ViewScan Camera.
4. Click the following locations in this order:
• Top-Left inner corner
• Top-Right inner corner
• Bottom-Right stabilizing foot edge
• Bottom-Left stabilizing foot edge
5. Click Confirm Alignment, then Save Camera Settings
and finally Restart Scanner.
6. Allow the Scanner to perform a quick Restart.
7. Either walk through the scanner or take a Snapshot
from the Monitor or Controller to confirm proper
alignment.
13 | P a g eYou can also read