ACE-HIGH MP3 RECORDER SOFTWARE WINDOWS INSTALLATION INSTRUCTIONS
←
→
Page content transcription
If your browser does not render page correctly, please read the page content below
ACE-HIGH MP3 Recorder Software
                  WINDOWS Installation InstructionS
ACE-HIGH MP3 Recorder is software designed for recording audio from the computer sound
card to hard disk in MP3 or WAV file formats. ACE-HIGH is not currently supported for
Windows 7.
System Minimum Requirements:
   • Windows 98/ME/NT/2000/XP
   • Pentium 133MHz CPU or higher
   • 32MB RAM
   • 100MB free disk space
   • Sound card
   • Microphone/speakers or headsets
Note: Administrative or Power User equivalent privileges are required on your Windows
login account in order to install the software. To save your recording files on a network drive
or a file service, you must have adequate file access permissions (read/write/change/modify)
on the destination folder.
Order and Download: The software may be purchased and accessed at:
http://www.mp3-recorder.net/mp3recorder/
Ordering instructions are available by clicking Buy Now on the above web page. Usually the
registration code information is emailed to the buyer after purchasing. This email also includes
a software setup download link. It is strongly suggested that you use the download link in the
email to acquire the setup application. If you encounter any problems during this download,
please contact the vendor for help and instructions.
Once you have successfully downloaded the setup application file and have received your
registration information for your license copy, follow the steps below:
   1. Double-click the downloaded setup application to launch the setup. The following pop-up
      is displayed:

   2. Click Yes to continue.

                                                          1
                                                © 2012 The College Board.
                               Visit the College Board on the Web: www.collegeboard.org.
3. Click Next to select the default destination directory.
4. Click Next to add shortcuts to the program menu.
2
© 2012 The College Board.
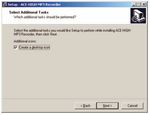
Visit the College Board on the Web: www.collegeboard.org.5. Click Next to add a shortcut to the desktop.
6. Click Install and then Finish to complete the installation as shown. Leaving
the “Launch ACE-HIGH MP3 Recorder” box checked will launch the recorder.
3
© 2012 The College Board.
Visit the College Board on the Web: www.collegeboard.org.Configuring the recorder:
This is the recorder main window:
1. Click Help on the top menu bar and select Register to register the player.
4
© 2012 The College Board.
Visit the College Board on the Web: www.collegeboard.org.2. Type the Name and Code information provided you in the email sent by the vendor
and then click Register to complete registration.
3. Click OK in the success message box.
If you encounter any problem during the registration process, make sure that you have
typed the codes correctly, or contact the vendor via email for help. (AP Technical Support
has no control over the registration process and will not be able to help you with any
problem encountered during this procedure.)
4. Click the Options icon in the Tool menu, then click the MP3 tab on this window:
5. Click Default and then click Apply.
5
© 2012 The College Board.
Visit the College Board on the Web: www.collegeboard.org.6. Click on the Name Rules tab, make sure that no boxes are checked (see below) and click OK.
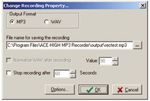
7. Click File in the menu bar and select Change Recording Property.
8. Select MP3 as your Output Format if not selected already.
Click the button next to the “File name for saving the recording” box, which will display
the drive selection window.
6
© 2012 The College Board.
Visit the College Board on the Web: www.collegeboard.org.9. Select the network drive targeted to save audio recordings in this window as shown:
Note: Do not forget to assign proper file access permissions to the appropriate users on
the network drive destination folder, enabling them to read/write/change/modify files at
this location.
10. Type “rectest” for File name and then click the Save button.
11. Click OK to save your changes.
7
© 2012 The College Board.
Visit the College Board on the Web: www.collegeboard.org.12. Click the Device drop-down menu and select Microphone as the recording input device:
13. Adjust the recording volume to 50 using the volume slider.
The player is now ready for use. Do a sample test recording using the microphone
or headset.
a) Click the Record button and speak the following sentence in your microphone:
“This is a test recording. Testing microphone 123.”
b) Click Stop and then Play to hear the test recording. If the recording is clearly
audible, then you have successfully completed the recording test.
If you are installing this software on multiple PCs, repeat the above steps for
each installation.
If you experience any technical problem during installation or configuration of this
recommended software product only, assistance will be available to your school’s staff.
Email: AP-MP3Recordertech@ets.org
Phone: Call the toll-free AP Coordinator hotline at 877-274-6474 and select the menu option
for “technical assistance to install and use AP audio software for the world language and
Music Theory exams.” Schools outside the United States and Canada should call 609-771-7300.
Customer service is available from 8 a.m. to 8 p.m. ET. Outside of these hours, you may wish to
send an email.
8
© 2012 The College Board.
Visit the College Board on the Web: www.collegeboard.org.You can also read


