SALESFORCE INTEGRATION - Product Guide 1 - Broadvoice
←
→
Page content transcription
If your browser does not render page correctly, please read the page content below

SALESFORCE INTEGRATION
Product Guide            1

Table of
    Contents

               3    Introduction

               4    Features

               4    Requirements

               5    Installation & Setup
               12   Placing Calls
               12   Receiving Calls
               13   Creating New Records

2
INTRODUCTION
This integration is intended for b-hive users who use Salesforce
as their CRM and want to gain efficiencies by having inbound and
outbound calls tracked automatically in Salesforce.

                        +                                          3
FEATURES                                                                      REQUIREMENTS
    Inbound record matching                                                        Active Broadvoice b-hive account
    The calling party number is matched against Salesforce accounts,
    contacts, leads, and cases allowing a user to quickly access the right area   	User(s) must have an integration-enabled Pro seat
    Outbound click-to-call                                                        	Active Salesforce account (Professional, Enterprise, and Unlimited)
    Calls can be originated from Salesforce records with a single click

    Call dispositioning                                                           	Integration users added to Salesforce call center
    Identify the outcome of each call using a consistent pick-list

    Call notes
    Add notes to each call activity on the fly

    New records
    Create new leads or cases easily from the embedded app

    Activity logging
    Time, duration, and direction of each call is stored

    Record-linking
    link to b-hive call recordings and voicemails within Salesforce

4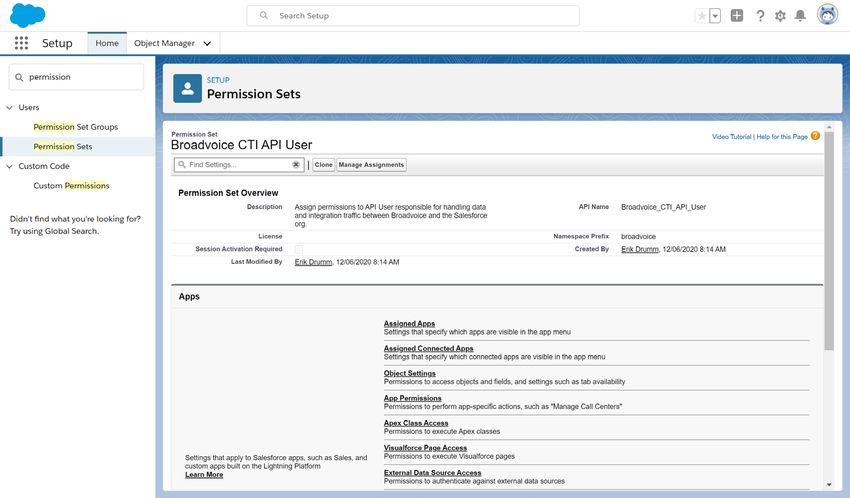
1
                                                                                              2
INSTALLATION & SETUP
ENABLING B-HIVE USERS
Users needing the ability to use the Salesforce integration must be enabled
in the b-hive account by an account admin.
                                                                                  3
    1. Select the Settings tab
    2. Select the Integrations tab
    3.	Select Salesforce from Integrations drop-down
    4.	Select Inbound /Outbound for all users needing
        access
    5.	Copy API Key for later use

                                                                                          5

                                                                              4

                                                                                                  5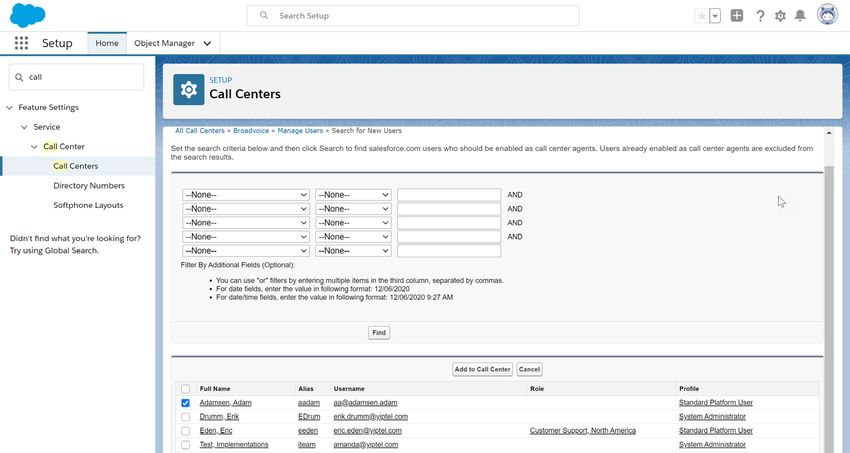
INSTALLING IN SALESFORCE
                                                                               1
    The Broadvoice integration can be located in the Salesforce AppExchange.
    Once found, follow the below steps for installation.
                                                                                       2

       1. Select Install for Admins Only
       2. Click Install
       3.	Grant third-party access and select Continue

                                                                                   3

6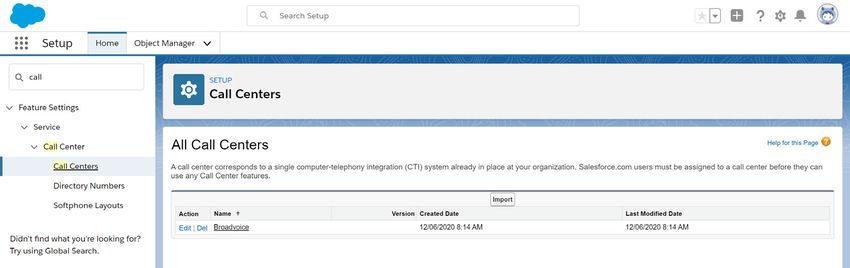
Then click on the App Launcher icon in the upper left-hand corner
(Lightning) and choose Broadvoice Setup. This will begin a simple wizard.
Walk through the following steps to complete.
                                                                                1

   1. Click Get Started
   2.	Paste the API Key located on the b-hive
       integrations page
   3.	Click Authorize
                                                                            2

                                                                                    3
                                                                                        7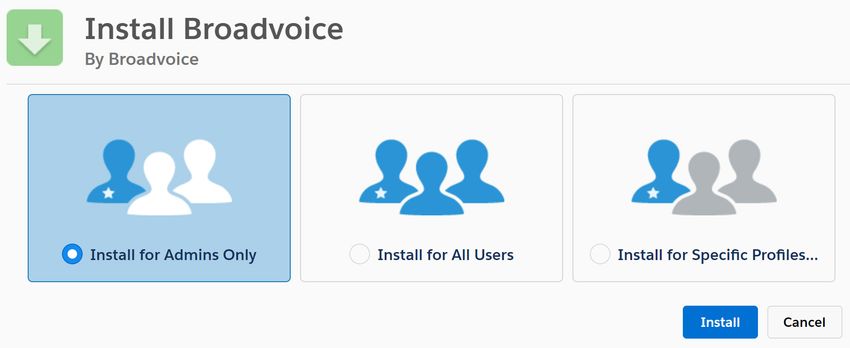
Then you’ll need to add the CTI Softphone to the app your
    company uses within Salesforce (Lightning Only)
                                                                1

                                                                                2
        1. Find App Manager in Setup
        2.	Choose Edit from the drop down to the right
            of the app you use
        3.	Select Utility Items                                        3
        4.	Add Open CTI Softphone
        5.	Click Save
        When complete, click Back in the upper righthand            4
        corner to return to setup.

    * Note: Changing the Softphone Label to ‘b-hive’ or                    5
       ‘Broadvoice’ can help identify its location for users.
8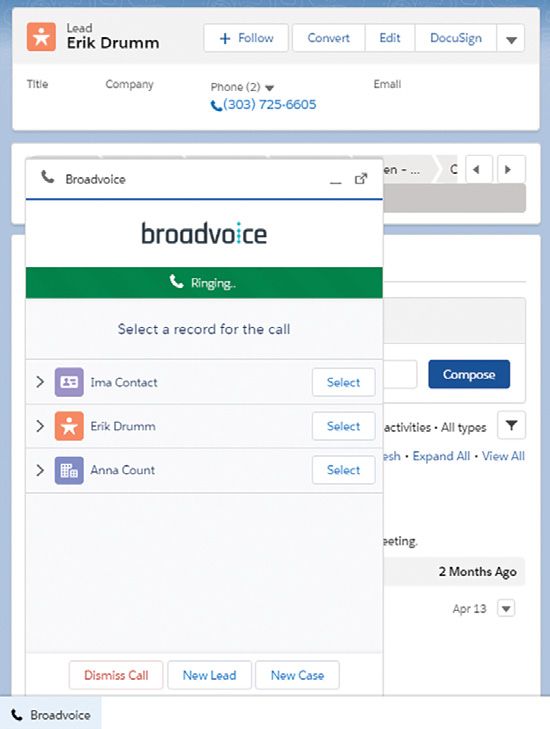
1
ENABLING SALESFORCE USERS                                        2
You’ll need to designate which users you would like to
have access to the Broadvoice CTI.                           3

   1. Select Call Centers under Setup
   2. Click on Broadvoice
   3. Click Manage Call Center Users
   4.	Find the users and add them to
       the Call Center

                                                                 4

                                                                     9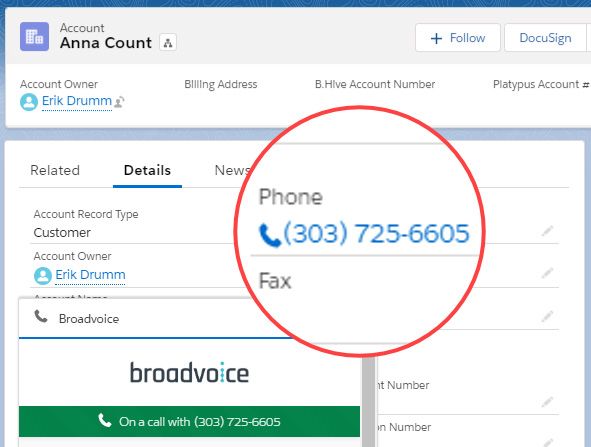
VERIFYING INSTALLATION
     To ensure the package has been set up correctly, click Home (Classic)
     or launch the appropriate application from the App Manager and click
     the phone icon in the bottom left-hand part of the screen (Lightning).
     You should see a login screen with a Broadvoice logo.

                                                                                          Classic       Lightning
     CREATING CUSTOM VIEWS
     As a Salesforce admin, you can create custom layouts as well as
     designate which views are available to specific user roles. Available
                                                                                      4
     call fields are: length, type, result, comments, recording URL and
     voicemail URL. First search for Object Manager within Setup and
     select the Task object then follow these simple steps below:
                                                                              1

        1. Select Page Layout and click on Task Layout
                                                                                  2
        2. Add a section named Call Details
                                                                                                    3
        3. Add the desired call-related fields
        4. Click Save

10
PROFILE PERMISSION SETS
The CTI package requires user profile access to many fields. For some
organizations, these fields might be restricted based on the configuration of
Salesforce. To easily grant access, you can assign permission sets provided
upon installation of the CTI package.
API User
The API User Permission Set allows Salesforce administrators or
API Users to link custom elements to your b-hive account. To add,
navigate to Permission Sets in Setup, and assign to the desired user.
Broadvoice User
The Broadvoice CTI Permission Set allows access to missed calls
which is a custom object available with the CTI. To add, navigate to
Permission Sets in Setup and assign to the desired user(s).
11PLACING CALLS
Navigate to the record you would like to have the call activity logged in
and click the phone icon next to the number you wish to dial. This will
initiate a call to your devices. Answering will then place the call. The
CTI will show you on a call with the number. Here, you can add a call
disposition and/or notes for future reference and click Save Details.
To add additional notes to a call, simply type the notes and click Save
Details again. To bypass call logging, simply click Dismiss Call at the
bottom.
RECEIVING CALLS
Incoming calls will attempt to match the calling party number with
records in Salesforce. These records can be contacts, accounts, leads,
or cases. If multiple records are matched, click Select next to the record
you would like to have the call activity saved in. Clicking on the name will
give basic detail so you can select the correct record. Once you select the
record, you can add a call disposition and/or notes for future reference
and click Save Details. If you need to add further notes to a call before
it is ended, simply type the notes and click Save Details again. To bypass
call logging, simply click Dismiss Call at the bottom.
* Calls received while on an active call will be designated as ‘missed calls’.
12CREATING NEW RECORDS
You can easily create new leads or cases from inbound calls with
the click of a button. Once the lead or case is created, you can
then add a call disposition and notes to the call activity itself.
Leads
To create a new lead, click New Lead. Lead information
will auto-fill based on the caller ID information if available.
From here, simply add or update contact information,
choose the lead status, and click Create. Once the lead is
created, you can add information related to the specific
call activity for reference later.
Cases
To create a new lead, click New Case. The phone number
will auto-fill based on the caller ID information if available
and the channel will pre-fill to Phone. From here, add
the subject and status. Optionally, you can search for an
account or contact to associate the case with. Once the
case is created, you can add information related to the
specific call activity for reference later.
1314
You can also read


