Fantastic Formations - Marble Arch Caves
←
→
Page content transcription
If your browser does not render page correctly, please read the page content below
RagingFormations
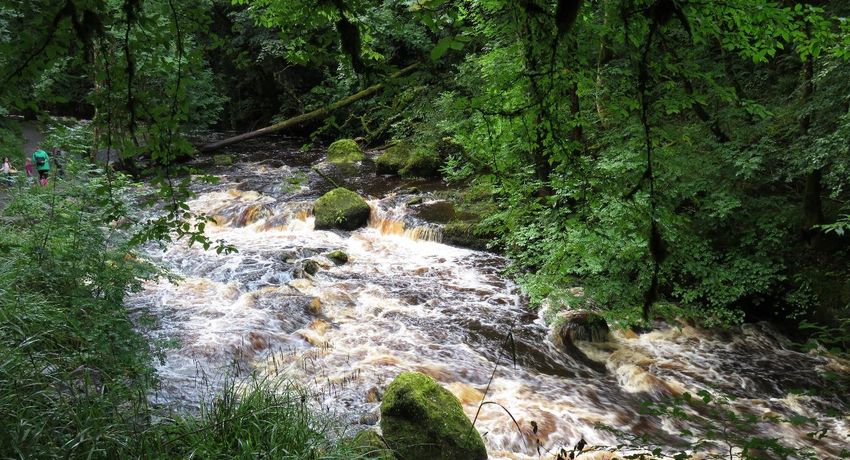
Fantastic Rivers
The Marble Arch Caves are delighted to be part of the Northern Ireland Science Festive 2021. This year we
are happy showcase three practical science experiments and demonstrations to help both teachers and
students to get hands-on experience with engaging activities based around the themes of caves.
These activities form part of our teacher resource packs, available to download from our website at
https://marblearchcaves.co.uk/2021/02/08/delve-into-the-deep/. Within these packs you’ll find our practical
experiment cards, lesson outcomes, instructions and methods, class questions, our lesson outline/plan and
our plenary ideas.
To help teachers and students with their experiments the Marble Arch Caves team have also created a
series of three videos, to demonstrate the activities and to aid student learning with some background
information and ideas for extension activities. The three experiments are Fantastic Formations, Slippy
Sinkholes and Raging Rivers. These can be accessed via Youtube at;
https://www.youtube.com/channel/UCRUTEghQ06RYoFCfNNneuiA.
This activity is designed to help students gain a greater understanding of rivers and how they flow.
Rivers form one of the most dynamic environments on the planet and are responsible for many of the
processes which shape and sculpt the very land we see before us today.
Freshwater which flows across the landscape can erode material, it can transport load of all shapes and
sizes, and deposit material in many interesting ways. Many of favourite above ground features such as
waterfalls and plunge pools also exist underground. Without rivers we wouldn’t have the force of water
which have carved out many of the caves we find in Northern Ireland.
Here you find a list of items and materials students will need in order to begin building their very own river
model. We have also provided a list of key words which students can research before they begin, so that they
get an idea of the features and process which occur in river environments. By demonstrating how rivers flow
we can draw conclusions on how rivers have the energy and power to create caves. These terms are also
covered in our linked YouTube tutorial https://youtu.be/nykNFH5mSsI.
● Aluminum pan, a tray or shallow dish. ● River
● Sand, small stone, pebbles, wood chips. ● Flow
● Water. ● Erosion
● A jug or bottle with a narrow opening. ● Drainage
● Aluminum foil. ● Deposition
● Bucket or sink. ● Current
● Tape. ● Meander
● Scissors. ● Source
● A nail, or hole making tool. ● Mouth
● A book or box to lift the tray. ● Bedload
● Paper towels.
● Blue food colouring.
Tick ()
I can;
1. Follow written instructions following a demonstration.
2. Design a project using the internet as a reference.
3. Describe what has happened using keywords.
4. Record my findings.
5. Suggest improvements for making the model more like a local river.
1. Find pictures of rivers online and select one to inspire you. This can be a local river or one from a
different part of the world.
2. Get a long sheet of aluminium foil, and fold it in half lengthwise along a meter rule.
3. Fold the sides up so that you get a long ‘u’ shaped piece of foil, like a gutter.
4. Put bends and meanders into the foil river to simulate a natural river course.
5. Place the river into the tray and tape it down securely. Using blue-tac also works, but make sure it’s
firmly in place.
6. Put sand, soil and pebbles (or similar materials) around the river, just as you see in your image.
7. Pierce some holes where the river exits the aluminum tray. This will act as a drain.
8. Place the end of the river over the sink or a bucket, and lift the start of the river above it using a box or
books to simulate a sloping landscape.
9. Use some blue food colouring to dye some water in a jug. Pour water into the start of the river and
record what you see happening. What is the flow like? What happens when load is added e.g. stones?You will need: Aluminum turkey pan/shallow dish, sand/ pebbles, Water, a bottle with a narrow opening or a jug, aluminum foil, a bucket or available sink, tape, scissors, a hole making tool, books or boxes to raise the tray, a container to catch water, paper towels, blue food colouring. Rivers are an important part of our landscape. They supply water, are used for transportation and many major cities, such as Paris, London, and New York are located along rivers because of this. A river’s shape is decided by how the water interacts with the earth below it. Rivers can form caves. Let’s try to find some aerial pictures of rivers to see what kind of shapes they can be (Google). Using the photographs of rivers for inspiration, demonstrate folding a length of aluminium foil into a long trough shape, then make curves by pinching in the foil at the inner edges of the bends. The river sides have to be high enough to not be overtopped, and level with each other. The sides of the foil represents the banks of a river. Demonstrate how to safely pierce holes in the aluminium tray, using a nail/ toothpick and a large piece of blue-tac or a cutting board on the other side, or assign an adult to do this if necessary. ● Be extremely careful when piercing the drainage holes at the end of the tray. ● Make sure that you don’t accidentally tear the tin foil when making the riverbed. ● Experiment with the texture of the riverbed. Will the river move faster if it's smooth or crinkly? Take the completed rivers and drop a teaspoon of sand into the flow at the top of the river. What do you think is happening? Is there anything else that we could try? What do you think might happen if we drop in a pebble? Why? Investigate the features found on rivers; waterfalls, meanders, oxbow lakes etc. 1. How does the water move in your river? 2. What difference does changing the angle of the river make? 3. If you put a small amount of sand in the river, what happens to it? 4. What happens with heavier things like a pebble? 5. How are rivers different from lakes or oceans? 6. What would if the banks of the river failed? Flooding?
Name: _______________

What do I think will        I think that…….
happen when the water is
poured into the river?

Why do I think this might   This will happen because…….
happen?

What happened when the I found that……….
water was added?

Why do I think this         This happened because…….
happened?
You can also read