Vinyl Sheet Installation Instructions - Contents English Français
←
→
Page content transcription
If your browser does not render page correctly, please read the page content below
Vinyl Sheet
Installation Instructions

Contents

    English                Français   Español   Português

interface.com

InterfaceFLOR, LLC
1503 Orchard Hill Road
LaGrange, GA 30240
1.800.336.0225 ext.56511
                                                1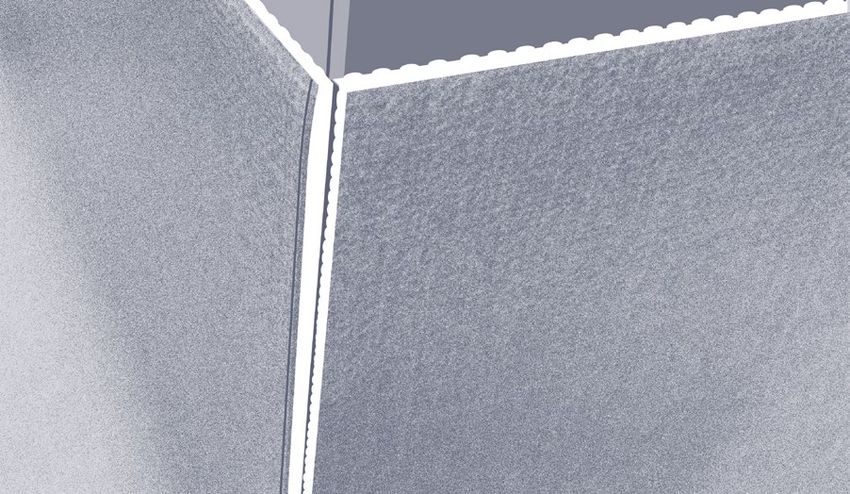
Vinyl Sheet Installation Instructions                                                                                                       Rev. 2/05/2021

Contents

General Installation Guidelines
Product Inspection
Warnings
Recommended Tool List
Conditioning
Concrete Moisture Testing
Water Droplet Test
Mat Bond Test
Substrate Preparation
Installation
XL Brands VS95 Adhesive
Precautions
Flash Coving (Boot Method)
Heat Welding

General Installation Guidelines

Interface® Vinyl Sheet flooring products are to be installed by nora® Approved Installers or INSTALL (International Standards & Training Alliance)
resilient certified installers for the specific requirements of the project. These Vinyl Sheet Installation Instructions cover the typical projects and
circumstances where vinyl sheet flooring is to be installed. If you need assistance, please contact the Technical Department at 1.800.332.NORA.
The procedures and recommendations described in these Vinyl Sheet Installation Instructions are developed to provide the best opportunity for a
successful vinyl sheet flooring installation. Any deviation from these guidelines may result in an installation failure.
All appropriate Safety Data Sheets (SDS) and these Vinyl Sheet Installation Instructions must be read and fully understood prior to installing any vinyl
sheet product.
All vinyl sheet flooring products are intended for appropriate indoor use only, in high stress commercial and industrial sectors. Must be installed
using recommended adhesives. The use of any other manufacturers’ adhesive is not permitted and will void the warranty. It is the responsibility of the
installer to determine the suitability of the substrate being covered.
Unless stated otherwise follow the specific requirements of ASTM F710 “Standard Practice for Preparing Concrete Floors to Receive Resilient
Flooring”. For copies of any of the ASTM standards, practices, or test methods please visit www.astm.org.
When concrete slabs have or are suspected of having ASR (Alkali Silica Reaction) present or hydrostatic pressure, do not proceed; contact the
Technical Department.
The prepared substrate must be smooth and ridge free. Use an appropriate patching compound or self-leveling underlayment following the
manufacturer’s instructions. Patching or underlayment compounds must be moisture, mildew, and alkali resistant. The compounds must provide a
minimum of 3000 psi compressive strength when tested in accordance with ASTM C109/C109M “Standard Test Method for Compressive Strength
of Hydraulic Cement Mortars - Using 2-in. or 50mm Cube Specimens” or ASTM C472 “Standard Test Method for Physical Testing of Gypsum, Gypsum
Plasters and Gypsum Concrete”. Warranties should be obtained from the manufacturer of the installed product.
Any specific requirement for level or flatness must be agreed upon by the owner, end-user, general contractor, and flooring contractor prior to the
flooring installation.
Moisture testing as per ASTM F2170 “Standard Test Method for Determining Relative Humidity in Concrete Floor Slabs Using in situ Probes” is mandatory.
A water droplet test for absorbency of the concrete or cementitious substrate is always recommended.
Mat Bond tests are required. This test determines the compatibility of the vinyl sheet flooring with the substrate and may provide an indication of the
presence of excessive moisture or other contaminates.

                                                                              1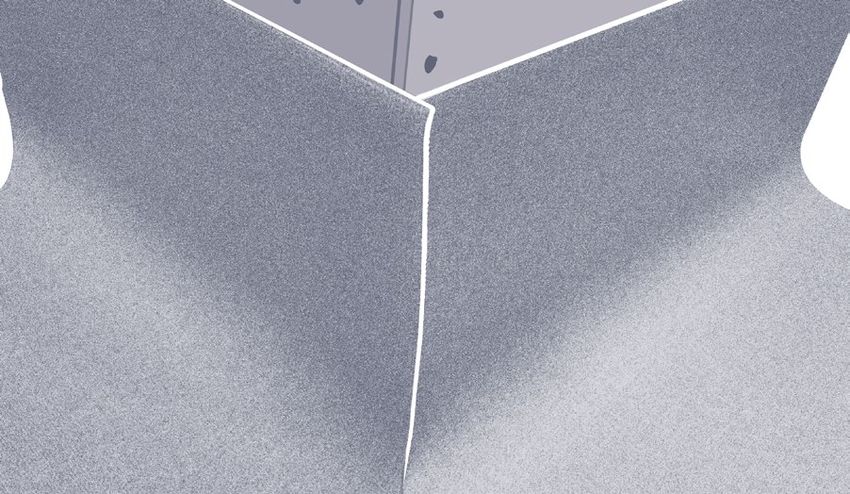
Product Inspection

PRIOR TO INSTALLATION, THE FLOORING CONTRACTOR MUST INSPECT INTERFACE VINYL SHEET FLOORING AND ACCESSORIES TO
VERIFY THE MATERIAL MEETS THE ORDER SPECIFICATIONS. IF THE WRONG PRODUCT OR COLOR IS INSTALLED, INTERFACE WILL NOT
BE RESPONSIBLE FOR CORRECTING THE PROBLEM.
All labels indicate product style, pattern, color, and run number. Verify the product style, pattern and color are accurate and match the specifications for
each area of the installation.

Warning

Do not sand, dry sweep, dry scrape, drill, saw, shot blast, mechanically chip or pulverize existing resilient flooring, backing, lining felt, asphalt “cutback”
adhesive or another adhesive, as these products may contain asbestos fibers and/or crystalline silica. Avoid creating dust. Inhalation of such dust is
a cancer and respiratory tract hazard. Unless positively certain that the product is a non-asbestos containing material, you must presume it contains
asbestos. Regulations may require that the material be tested to determine asbestos content. Various local, state, and federal government agencies
have regulations governing the removal of in-place asbestos-containing material. If you contemplate the removal of a resilient floor covering structure
that contains (or is presumed to contain) asbestos, prior to proceeding, you must review all applicable local, state, and federal regulations and obtain
assistance from a qualified remediation consultant or contractor including to ensure compliance with those regulations. The RFCI's (Resilient Floor
Covering Institute) “Recommended Work Practices for Removal of Resilient Floor Coverings” is a defined set of instructions that addresses the task of
removing all resilient floor-covering structures, including adhesive and adhesive residues. For more information, contact RFCI directly at www.rfci.com
or 706-882-3833.
Occupational Safety and Health Administration (OSHA) has amended its existing standards for occupational exposure to respirable crystalline silica.
OSHA has determined that employees exposed to respirable crystalline silica at the previous permissible exposure limits, face a significant risk of
material impairment to their health. For more information go to https://www.osha.gov/silica/

Recommended Tool List

• Commercial floor sander with dust shroud and vacuum port
• 7-inch handheld grinder with dust shroud and vacuum port
• HEPA (High Efficiency Particulate Air) filter vacuum cleaner with cyclonic separator
• Diamond grinding plates for floor sander
• Patching compound and/or self-leveler
• 4-inch razor scraper
• nora® knife or similar
• Adhesive trowels
• Steel square and straightedge
• Heat welding gun with 3N Classic Nozzle 4MM WDD S65
• Seam grooving tools (push and pull type), 3mm
• Mozart heat weld trimming knife
• Utility knife with hook and straight blades
• 100 – 150 lb. three-section floor roller
• Measuring tape
• Personal Protection Equipment (PPE) in accordance with OSHA guidelines

                                                                               2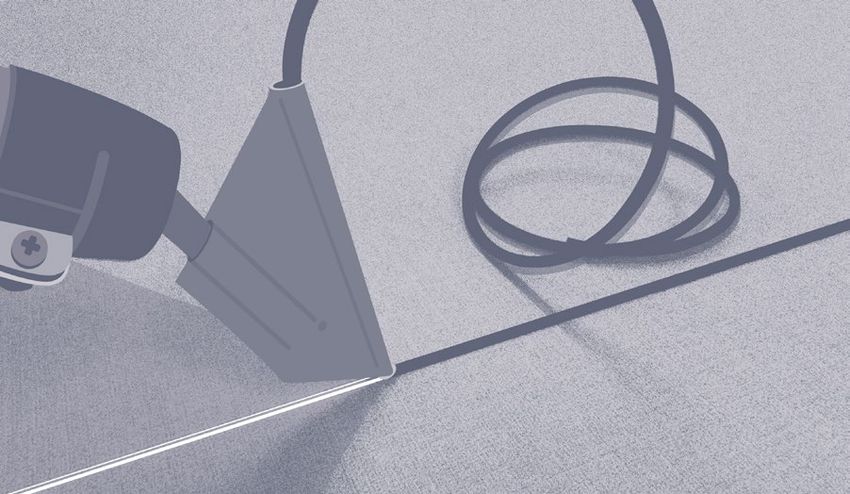
Conditioning

The flooring, adhesives, and accessories must be acclimated in the recommended environmental conditions for at least 48 hours prior to installation.
Areas of the flooring subjected to direct sunlight, for example through doors or windows, must be covered using blinds, curtains, cardboard, or similar
materials for 24 hours before, during, and for a period of 72 hours after the installation to allow “wet” adhesives to cure.
The installation area must be fully enclosed, weather tight, and climate controlled between 63°F and 75°F and 40% to 60% ambient relative humidity
(RH) for at least 48 hours prior, during and 72 hours after installation (do not use gas fueled blowers). All substrates must be climate controlled
between 63°F and 75°F.
If this is not possible, contact the Technical Department.
Avoid conditions where dew point allows for the condensing of moisture on concrete substrates. The substrate must be at least 5°F above dew point
to be considered acceptable.
Example: If the ambient conditions are 70°F and 65% RH, the dew point is 57°F, you must not proceed with the installation. The surface temperature
must be a minimum of 62°F. Dew point calculation charts are available on the internet.

Concrete Moisture Testing

Moisture testing is required on all concrete slabs prior to installation, regardless of age or grade level, and must comply with the moisture requirements set
forth herein.
Moisture conditions must be determined by testing the slab with a testing apparatus that conforms with ASTM F2170 “Standard Test Method for Determining
Relative Humidity in Concrete Slabs Using in situ Probes”. If for any reason you are unable to drill into the concrete, please contact the Technical Department.
See chart for specific requirements.

 Adhesive                                                                             Moisture Limit

 XL Brands VS95 Adhesive                                                              Up to 95% RH

NOTE: On or below grade concrete substrates must have a working vapor retarder. Concrete compromised by ground water intrusion and/or Hydrostatic
Pressure are not acceptable substrates. There should be no visible signs of water or water marking.
If the moisture test results exceed the maximum allowed, then the installation must not proceed until either the moisture content drops to an acceptable
level or an effective moisture mitigation system is used that conforms to ASTM F3010 “Standard Practice for Two-Component Resin Based Membrane
Forming Moisture Mitigation Systems for use Under Resilient Floor Coverings” and installed following that manufacturers written instructions.
All written requirements for product application, including, but not limited to moisture testing protocols, must be met for Interface warranty eligibility.
NOTE: Moisture tests reflect only the conditions of the concrete at the time of testing. Stated moisture limitations must be maintained before, during and
at all times following installation to avoid installation and product failures and to preserve warranty coverage. If the concrete moisture test results are
outside of the stated allowable limits, STOP and DO NOT PROCEED with the installation. Contact the Technical Department before proceeding.

                                                                                  3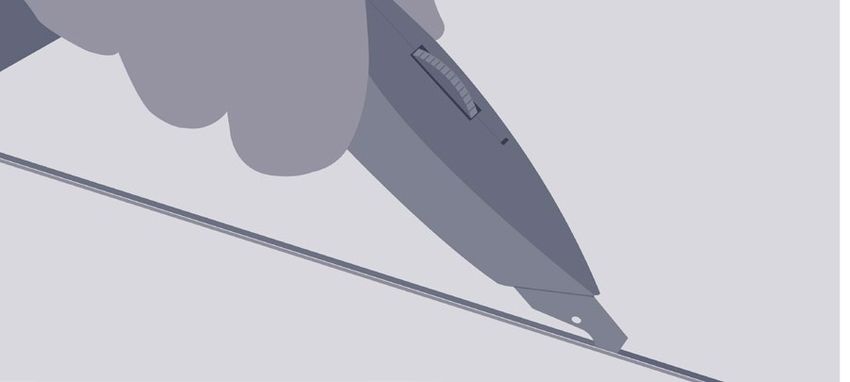
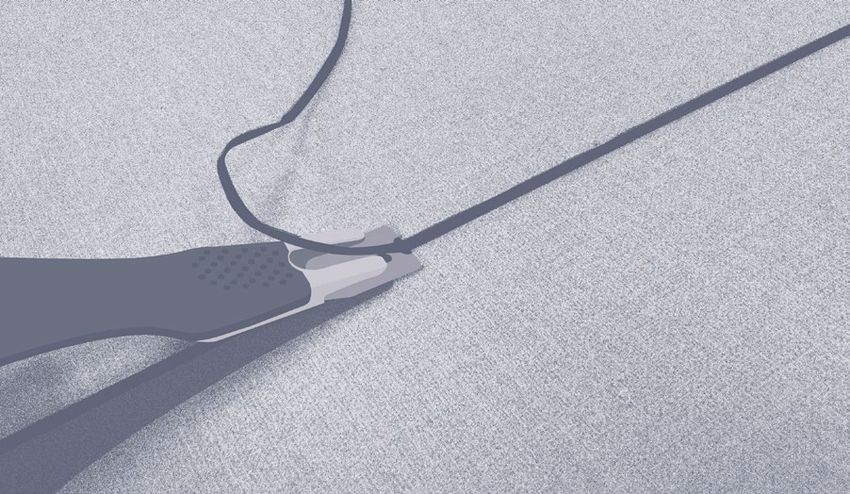
Water Droplet Test

                                                                     When using XL Brands VS95 adhesive it is mandatory that the substrate be absorptive.
                                                                     To confirm this, the installer must perform a water droplet test in a sufficient number of
                                                                     places throughout the project. To perform the test, place a 1/4 inch size drop of water
                                                                     (Image 1) on the substrate surface using a water dropper after the substrate surface
                                                                     has been prepared as planned. The water must begin to absorb ≤ 5 minutes to be
                                                                     considered absorptive. (Image 2).
                                                                     Absorptiveness affects the drying time within a concrete substrate, expected open
                                                                     and working time of the adhesive. The adhesive open time will decrease on porous
                                                     Image 1         substrates, and areas subjected to air flow such as in the vicinity of open doors or
                                                                     windows. It is the installer’s responsibility to understand the working characteristics
                                                                     of the adhesive in all areas of the project and to make any necessary adjustments in
                                                                     preparation or installation techniques to achieve a secure bond.

                                                     Image 2

Mat Bond Test

Mat Bond tests are necessary to determine the compatibility of the flooring system to a variety of substrates and may provide an indication of the presence of
moisture. It is the responsibility of the installer to determine the suitability of the substrate being covered and how many Mat Bond tests need to be performed.
The specified adhesive should have been determined based on the space operations and existing substrate. In the event of a failed bond test, contact
your Sales Representative for adhesive recommendations.
The areas and products to be tested must be properly conditioned for 48 hours before and during the testing period. The responsible party must ensure
that the tests are conducted only at a time when substrate and jobsite conditions comply with those requirements which are outlined in these Vinyl Sheet
Installation Instructions and ASTM F710.
Install the bond tests using the specified adhesive in accordance with these Vinyl Sheet Installation Instructions. Do not uplift to check for adhesive
transfer after flooring placement. Use Duct tape or similar to seal the edges of the flooring test sample to the substrate on all sides. Protect the flooring
from foot traffic for 12 hours and rolling traffic for the duration of the test, which must be a minimum 3 days (72 hours). Place tests at appropriate
locations near walls or in light traffic areas. It is recommended that each test plot should be 2 ft. x 2 ft.
To evaluate the adhesive, the tests must be physically peeled by hand. The success or failure is determined by the test administrator’s visual interpretation
and the amount of physical effort required when removing the floor covering.
Cut a two-inch wide strip from the center of the test sample, and then slowly peel up from one end. Wet or soft indicates the substrate is either still too
wet, or the surface of the concrete is non-absorptive. Typically, the point of failure should occur cohesively; there should be a majority of adhesive on
both the substrate and a slight residue on the back of the flooring. If the majority of the adhesive is on the material backing, there is either insufficient
mechanical preparation or a contaminant on the substrate or the substrate has too much moisture. If the majority of the adhesive remains on the
substrate, the adhesive dried too much before placement, or the result of insufficient rolling. If the failure occurs within other components of the flooring
system, there may be a problem with those components, preparation, or application method. If the flooring requires a great deal of effort to pull up, for
example where it cannot be removed intact, the bond test can be considered successful providing no sign of moisture is found.

Substrate Preparation

CONCRETE SUBSTRATES
For new construction, the General Contractor must provide a structurally sound concrete substrate that conforms to ASTM C33/C33M “Standard
Specification for Concrete Aggregates”. Concrete substrates must not be subject to shrinking, curling, cracking, or moving in any way prior to the
application of flooring. Interface accepts no liability for a failure or complaint due to slab movement of any kind. Vinyl sheet flooring products must
not be installed over expansion joints; use an industry standard expansion joint assembly.
All on and below-grade concrete substrates require a confirmed permanently effective vapor retarder with a low permeance (≤ 0.10) having a minimum
thickness of 10 mils and meets the current requirements of ASTM E1745 “Standard Specification for Water Vapor Retarders Used in Contact with Soil or
Granular Fill under Concrete Slabs”. It must also be placed directly underneath the concrete, above the granular fill or use an effective moisture mitigation
system that conforms to ASTM F3010 “Standard Practice for Two-Component Resin Based Membrane Forming Moisture Mitigation Systems for use
Under Resilient Floor Coverings”.
                                                                             4
Substrate Preparation (Continued)
NOTE: When using adhesive all concrete substrates must be absorptive (see water droplet test) when used under hospital beds and high traffic areas.
Do not use wax or oil-based sweeping compounds.
OSHA Respirable Crystalline Silica standard for construction must be followed. Do not prepare concrete without a dust collection system that meets
OSHA requirements. Contact tool manufacturers for dust collection system requirements before performing any concrete preparation. Do not broom
sweep areas. Use a HEPA vacuum with reverse pulse air filter cleaning or cyclonic separator to clean concrete subfloors as recommended by OSHA.
The concrete must be clean and smooth enough to prevent any surface irregularities from telegraphing through the flooring.
When using a patching or leveling compound over non-absorptive substrates first check suitability with Mat Bond testing. To be considered absorptive
they must be at least 1/8-inch-thick and installed following the manufacturer’s instructions.
NOTE: When mechanical sanding is required certain compounds may become denser and the surface porosity may be diminished. A water droplet test
is recommended to determine the state of absorptiveness (see water droplet test).
Surface cracks, grooves, depressions, control joints or other non-moving joints, and other irregularities must be filled or smoothed with patching or
underlayment compound for filling or smoothing in accordance with the manufacturers written instructions. Patching or underlayment compound must
be moisture, mildew, and alkali resistant. The compounds must provide a minimum of 3000 psi compressive strength. Mechanically remove all laitance,
dirt, debris, and coatings from the fill area. Use a suitable dustless concrete saw with a diamond blade or similar. Do not install over any moving cracks
or joints. If the concrete moisture level is too high contact the Technical Department and the moisture mitigation system manufacturer. Use products
and methods as directed by the moisture mitigation system manufacturer.
Expansion and moving joints must not be covered with any vinyl sheet product. Use a suitable industry standard expansion joint assembly system. In
the event of moving cracks or joints please contact the Technical Department for recommendations.
WOOD SUBSTRATES
All wood substrates must be a total minimum thickness of 1 inch and overlaid with overlapping joints using APA (American Plywood Association) or
EWA (Engineered Wood Association) plywood, single ply construction with fully sanded face grade A or B or using APA/EWA underlayment grade.
Wood panels must be a minimum of 1/4 inch thick.
All wood substrates must conform and be installed in accordance with ASTM F1482 “Standard Practice for Installation and Preparation of Panel Type
Underlayments to Receive Resilient Flooring”.
Wooden substrates must not be in direct contact with concrete substrates, even if built on sleepers. All suspended wood floors must have adequate
under floor ventilation and a permanently effective vapor retarder or membrane placed directly on the ground beneath the air space. Do not install over
any oriented strand board (OSB), particleboard, Masonite, lauan, fire retardant treated plywood, or any similar unstable substrates.
The plywood must be clean, and free of any bond breaking contaminates, this can be achieved by sanding or replacing the plywood with new APA/
EWA plywood. Any gaps or voids must be filled and smoothed with a flexible joint filler. Any ridges must be sanded smooth.
GALVANIZED/STAINLESS STEEL AND ALUMINUM SUBSTRATES REGULAR STEEL SUBSTRATES
Please contact the Technical Department for specific instructions for your installation.
All rust must be removed by sand blasting or other mechanical methods. To prevent the steel from rusting again a rust inhibitor must be applied.
OVER EXISTING FLOOR COVERINGS
Vinyl sheet flooring can be installed over existing smooth finished, non-cushioned backed and securely bonded floor coverings (e.g. VCT, rubber,
linoleum, vinyl.) The existing flooring must not have any voids that could telegraph through the vinyl sheet flooring. Vinyl sheet flooring can also be
installed over properly prepared terrazzo, ceramic, and quarry tile floors.
The responsibility for determining if the currently installed resilient flooring is well-bonded to the substrate and that any texture or embossment will not
telegraph through the new installation rests with the owner, general contractor, and flooring contractor.
To fill voids or surface irregularities, use a patching compound that is suitable for bonding to existing floor coverings. Sand the surface to a smooth
finish as needed. It is important to check with the patch manufacturer for specific priming, mixing and installation instructions. Any product warranties
or performance guarantees are the responsibility of the selected manufacturer.
NOTE: Do not install over radiant heating or raised access floor systems.
5Installation
The material layout should be decided by the architect, designer, and end user.
Woodgrain patterns: Sheets should be a random match so the ends of the plank pattern are offset at least 3" (8 cm).
Seams are prepared using the double cut method.
Dry lay the sheet flooring facing the same direction and overlapping all seams. Do not reverse sheets. Trim or cut down sheets and fit to the walls.
Overlap sheets to align the pattern. If required cut small windows to confirm the pattern is aligned. Use a straight edge and utility knife to cut through
both layers. A nora knife or similar will aid in cutting.
Finish cutting the seam using a hook blade utility knife to provide a very slight undercut.
(Image 3). Carefully remove the excess material. Continue this process one sheet at a
time until the area is completed.
Make relief cuts as required so the sheets lay flat and to avoid tears.
NOTE: Underscribe tools are not recommended for seam cutting.
Image 3
XL Brands VS95 Adhesive
XL Brands VS95 is a water-based acrylic adhesive. Suitable for use in applications on absorptive substrates.
Not suitable for use under static loads as a non-absorptive adhesive.
For non-absorptive installations, once the adhesive reaches a dry to the touch state, the flooring must be immediately installed into the adhesive. If the
adhesive remains open for more than 30 minutes after you reach the dry to touch state, you must remove and replace the adhesive.
NOTE: Prior to beginning the installation, trowel a small amount of adhesive onto the substrate to determine both the open and working time of the adhesive.
Fold back a workable section of the flooring (normally half of the area). Clean the substrate and the back of the flooring.
Apply the adhesive using a 1/32-inch x 1/16-inch U-notched trowel. Coverage is ~ 220 – 260 square feet per gallon pail for a (concrete surface
profile) CSP 1.
The adhesive should be applied evenly without the formation of puddles or voids. Do
not apply fresh adhesive over drying adhesive as this will result in telegraphing of
1/16 1/32 adhesive lines. Replace worn trowels to ensure consistent spread rate. Do not re-notch.
Once troweled, the adhesive open time will depend upon the ambient temperature
1/32 and humidity, substrate absorptiveness and air flow. The adhesive must remain wet
and have full transfer to the back of the flooring; the average open time is ~10 to 20
minutes. To confirm when the adhesive is ready to install, lightly touch the adhesive with
your finger, the adhesive should transfer to your finger and not flatten the ridges. If the
Trowel adhesive becomes too dry and does not transfer to your finger, remove, and replace it.
Do not uplift the flooring to check for adhesive transfer after placement.
Carefully replace the flooring back into position then slowly roll in both directions utilizing a 100 - 150 lb. three-section roller. Re-roll again in both
directions after ~ 30 minutes. Repeat the process for the second half of the area, and then for all remaining areas.
Remove any fresh adhesive from the surface of the flooring with water and a clean cloth. Dried adhesive may be removed using 70% Isopropyl alcohol
and a clean cloth. Do not wash or perform any maintenance of the floor for a minimum of 72 hours post installation to allow adhesive to cure. Refer to
the appropriate SDS for any disposal.
Precaution
Prevent all traffic for a minimum of 12 hours and rolling loads for 72 hours. If required, after 12 hours protect the flooring using plywood or Masonite,
ensuring first that the flooring surface is free of all debris. Lay the panels so that the edges form a butt joint and tape the joint to prevent movement
and debris entrapment underneath them.
6Flash Coving (Boot Method)
Inspect the wall and the intersection between the wall and substrate. Ensure that the wall is dry, smooth, and clean. Repair any gaps and voids using a
suitable smoothed compound. If dusty then prime using a suitable water-based primer, applied with a small roller or paint brush.
Install specified cove stick and cove cap following the manufacturer’s instructions and ensure that the cove cap opening will accommodate the
thickness of the flooring material. Cove stick and cove cap can be installed using water-based contact cement or contact tape.
Dry-lay slightly longer than required lengths of flooring as detailed within this guide for sheets making relief cuts to avoid tears at all external corners.
Push the flooring into the internal corner as far as possible without damaging the flooring. Cut all the external corners using the Boot Method. Do not
trim the perimeter until the flooring is adhered.
EXTERNAL CORNERS
Using a pencil and small straight edge, mark the flooring where the cuts are required
for each boot. Begin at the outside corner at the top of the cove stick and draw a line
at a 45° angle to form the toe of the boot, then ~ 2-inch perpendicular to the wall,
and then complete the boot up the vertical. Using a small straight edge and a straight
blade utility knife, accurately cut and remove the excess flooring (in one piece) from the
external corner following your pencil marks. (Image 4). Keep the excess for use as a
template. (Image 5).
Trace and cut the removed section onto a new piece of flooring. The front edge must
be left long enough to cover the exposed wall surface. The excess will be trimmed after
Image 4 installation to be flush with the wall corner. (Images 6 & 7).
INTERNAL CORNERS
Press the flooring into the corner and cut vertically into the corner. The flooring must
be carefully cut to fit the wall with little to no gaps, providing the heat weld enough
material to bond with the flooring.
WALLS
Install the flooring as detailed in this guide using the specified adhesive up to the cove
stick. Use a strong tape e.g. duct tape to tape corners or areas of concern together
Image 5
to prevent breaking or tearing when folding back the flooring. Taping the corners will
prevent tearing while handling the flooring. Care must be taken to keep the flooring
pressed tightly onto the cove stick during installation while adhering the flooring to
the wall. Trim the flooring to fit the cap strip, internal and external corners. Finish by
inserting the flooring into the cap strip and hand rolling walls.
BOOT
Press and roll firmly into place. Trim the boot to fit the cap strip and insert. Trim the
vertical edge of the flooring using a small straight edge. The result will be a clean,
straight edge that is flush with the wall, with the back of the flooring together, and
ready to be heat welded.
Image 6
Image 7
7Heat Welding
Do not heat weld until a minimum of 12 hours after adhesive application.
Groove the seams using a push, power, or hand-grooving tool, ensure all grooves are clean. The depth of the groove must be a depth of 2/3 of the
material. The width of the groove must be ~ 1/8 inch (3 mm).
Use a 3N Classic Nozzle 4MM WDD S65 nozzle. Preheat the welding gun to 662°F – 752°F (350°C – 400°C). It is recommended to practice welding
on a piece of scrap flooring material first to determine the heat setting and speed, as different heat guns and cable length will affect the temperature.
NOTE: If the weld rod comes out during trimming you welded too fast or the gun is not hot enough. The heat weld and the flooring must melt
together. Turning up the heat too high can cause burning to the edges of the grooved seam. The best method is to run the heat weld gun slower
and at a lower temperature.
Cut a length of the heat weld rod the length of the seam. Proceed to weld the seam
starting at the wall and apply slight pressure to the gun nozzle (nose) to force the
melting rod into the groove. (Image 8). The heat weld rod must have a small bead on
both sides.
Make the first cut of the weld rod warm. (Image 9). Use a Mozart trimming knife with
the 0.5 mm spacer claw to remove most of the weld. Allow the weld rod to cool before the
final trim.
Next, use the Mozart trimming knife (without the spacer claw) and finish trimming the
remainder of the weld. The finished weld should be smooth and on the same plane as the
floor covering.
Image 8
Heat weld all vertical seams and corners.
Image 9
Contact Info
United States/Latin America/Canada
Technical Department
Phone: 603.894.1021, select prompt #3
E-mail: nta@nora.com
8Directives d’installation des feuilles de vinyle Rév. 2021-02-05
Table des matières
Directives d’installation générales
Inspection du produit
Avertissements
Outils recommandés
Conditionnement
Mesure de l’humidité du béton
Test de la goutte d’eau
Essai d’adhérence
Préparation du substrat
Installation
Adhésif VS95 de XL Brands
Précautions
Remontée en plinthe (avec coins en onglets)
Thermosoudure
Directives d’installation générales
Les revêtements de plancher en feuilles de vinyle d’Interface® doivent être installés par un installateur approuvé par nora® ou certifié pour les produits
résilients par l’International Standards & Training Alliance (INSTALL) conformément aux exigences du projet. Les présentes directives traitent
des projets et circonstances typiques pour l’installation de revêtements de plancher en feuilles de vinyle. Pour obtenir de l’aide, appeler le service
technique au 1.800.332.NORA. Les procédures et les recommandations du présent guide ont pour but de maximiser la probabilité d’une installation
réussie. Toute dérogation aux directives pourrait faire échouer l’installation.
Il est impératif de lire et de bien comprendre les fiches signalétiques pertinentes et les présentes directives avant l’installation des feuilles de vinyle.
Les revêtements de plancher en feuilles de vinyle conviennent à un usage intérieur dans les secteurs commerciaux et industriels fortement
sollicités. Ils doivent être installés avec les adhésifs recommandés. L’utilisation de tout autre adhésif est interdite et annulera la garantie. Il incombe à
l’installateur d’évaluer la convenance du substrat à recouvrir.
À moins d’indication contraire, respecter les exigences de la norme ASTM F710, Standard Practice for Preparing Concrete Floors to Receive Resilient
Flooring. Pour obtenir un exemplaire des normes, des pratiques ou des méthodes d’essai de l’ASTM, visiter le www.astm.org.
En présence démontrée ou présumée d’une alcali-réaction ou de pression hydrostatique sur des dalles de béton, stopper l’installation et communiquer
avec le service technique.
Une fois préparé, le substrat doit être lisse et sans stries. Appliquer un produit de ragréage ou une sous-couche autonivelante adaptés en suivant les
directives du fabricant. Le produit appliqué doit être résistant à l’humidité, aux moisissures et aux alcalis. Il doit également offrir une résistance à la
compression d’au moins 3 000 psi, déterminée par des essais effectués conformément à la norme ASTM C109/C109M, Standard Test Method for
Compressive Strength of Hydraulic Cements Mortars (Using 2-in. or [50 mm] Cube Specimens), ou à la norme ASTM C472, Standard Test Method for
Physical Testing of Gypsum, Gypsum Plasters, and Gypsum Concrete. Pour connaître les garanties, s’adresser au fabricant du produit appliqué.
Le propriétaire, l’utilisateur final, l’entrepreneur principal et l’entrepreneur en revêtements de plancher doivent convenir de toute exigence particulière
concernant le niveau ou la planéité avant l’installation.
Il est obligatoire de mesurer l’humidité conformément à la norme ASTM F2170, Standard Test Method for Determining Relative Humidity in Concrete
Floor Slabs Using in situ Probes.
Il est recommandé d’effectuer un test de la goutte pour évaluer le pouvoir absorbant du béton ou du support à base de ciment.
Un essai d’adhérence des matériaux est requis. Il permet de déterminer la compatibilité des feuilles de vinyle et du substrat et pourrait révéler la présence
d’un excès d’humidité ou de contaminants.
1Inspection du produit
L’ENTREPRENEUR EN REVÊTEMENTS DE PLANCHER DOIT INSPECTER LES FEUILLES DE VINYLE D’INTERFACE ET LES ACCESSOIRES
AVANT L’INSTALLATION POUR VÉRIFIER QU’ILS CORRESPONDENT AUX PRODUITS COMMANDÉS. S’IL INSTALLE LE MAUVAIS PRODUIT OU
UN PRODUIT DE LA MAUVAISE COULEUR, INTERFACE NE SERA PAS TENUE DE CORRIGER LA SITUATION.
Les étiquettes indiquent le style, le motif, la couleur et le numéro de lot du produit. Vérifier que le style, le motif et la couleur correspondent aux
produits commandés pour chacune des aires de l’installation.
Avertissement
Ne jamais sabler, balayer à sec, gratter à sec, perforer, scier, grenailler ni écailler ou pulvériser mécaniquement le revêtement de plancher résilient
existant, l’endos, le feutre de garnissage, les adhésifs asphaltiques ou tout autre adhésif existant. Ces produits peuvent contenir de la fibre d’amiante
ou de la silice cristalline. Éviter de produire de la poussière, car celle-ci présente un risque de cancer et un danger pour les voies respiratoires. À
moins d’avoir la confirmation absolue que le matériau en question ne contient pas d’amiante, il faut présumer qu’il en contient. La réglementation peut
exiger que le matériau fasse l’objet de tests pour vérifier la présence d’amiante. Différents organismes municipaux, provinciaux et fédéraux ont mis en
place des réglementations sur le retrait de matériaux contenant de l’amiante. Avant de retirer une structure de recouvrement de plancher résilient qui
contient (ou dont on présume qu’elle contient) de l’amiante, prendre connaissance des réglementations applicables et obtenir l’aide d’un consultant
ou d’un entrepreneur qualifié en matière de mesures correctives pour garantir la conformité à celles-ci. Le document Recommended Work Practices
for Removal of Resilient Floor Coverings du Resilient Floor Covering Institute (RFCI) contient des directives précises pour le retrait de toute structure
de recouvrement de plancher résilient, y compris les adhésifs et les résidus d’adhésifs. Pour en savoir plus, communiquer directement avec le RFCI au
706.882.3833 ou visiter le www.rfci.com.
L’Occupational Safety and Health Administration (OSHA) a modifié ses normes d’exposition professionnelle à la silice cristalline respirable
après avoir déterminé que les limites anciennement admissibles présentaient un risque grave pour la santé. Pour en savoir plus, visiter
https://www.osha.gov/silica/.
Outils recommandés
• Ponceuse commerciale avec pare-poussière et orifice d’aspiration
• Meuleuse portative de 18 cm avec pare-poussière et orifice d’aspiration
• Aspirateur à filtre absolu (filtre HEPA) et séparateur cyclonique
• Meules diamant pour la ponceuse
• Produit de ragréage ou sous-couche autonivelante
• Grattoir à lame de rasoir de 10 cm
• Couteau nora® ou modèle similaire
• Truelles pour adhésif
• Équerre de charpente et règle droite
• Pistolet de thermosoudure à buse classique 3N de 4 mm WDD S65
• Gouges pour joints (de type manuel) de 3 mm
• Couteau araseur Mozart
• Couteau à lame rétractable, avec lame à crochet et lame droite
• Rouleau à trois sections de 45 à 70 kg
• Ruban à mesurer
• Équipement de protection individuelle (EPI) conforme aux lignes directrices de l’OSHA
2Conditionnement
Le revêtement de plancher, les adhésifs et les accessoires doivent reposer dans les conditions ambiantes recommandées pendant au moins 48
heures avant l’installation. Les zones du revêtement de plancher directement exposées au soleil, par exemple près des portes ou des fenêtres, doivent
être protégées par des stores, des rideaux, du carton ou d’autres matériaux similaires au moins 24 heures avant l’installation, durant celle-ci et
pendant les 72 heures qui suivent afin de permettre à l’adhésif humide de sécher.
La zone d’installation doit être complètement fermée et à l’abri des intempéries. La température doit se situer entre 17 et 24 °C, et le taux d’humidité
relative ambiante, entre 40 et 60 % au moins 48 heures avant l’installation, durant celle-ci et pendant les 72 heures qui suivent (ne pas utiliser de
ventilateurs au gaz). Tous les substrats doivent être à une température entre 17 et 24 °C.
Si cela est impossible, communiquer avec le service technique.
Éviter le point de rosée, qui entraîne la condensation de l’humidité sur les substrats en ciment. Pour être acceptable, le substrat doit être au moins 3
°C au-dessus du point de rosée.
Exemple : Si la température ambiante est de 21 °C et que le taux d’humidité relative ambiante est de 65 %, le point de rosée est de 14 °C. Pour procéder
à l’installation, il faut alors que la température du substrat soit d’au moins 17 °C. On trouve des tableaux pour calculer le point de rosée en ligne.
Mesure de l’humidité du béton
Il est impératif de mesurer l’humidité des dalles de béton avant l’installation, peu importe l’âge ou le niveau du substrat. Le résultat doit être conforme aux
exigences énoncées dans les présentes directives.
L’humidité doit être mesurée avec un appareil conforme à la norme ASTM F2170, Standard Test Method for Determining Relative Humidity in Concrete
Floor Slabs Using in situ Probes. Si, pour quelque raison que ce soit, il n’est pas possible de percer le béton, communiquer avec le service technique.
Consulter le tableau pour connaître les exigences précises.
Adhésif Limite d’humidité relative
Adhésif VS95 de XL Brands 95%
N.B. : Les substrats en béton au niveau ou au-dessous du sol doivent comporter un pare-vapeur fonctionnel. L’infiltration d’eau et la pression hydrostatique
rendent la surface inutilisable. Il ne devrait y avoir aucun signe ni aucune tache d’eau visible.
Si l’humidité mesurée excède la limite permise, il faut attendre avant de procéder à l’installation que la teneur en humidité atteigne un niveau acceptable,
ou encore utiliser un dispositif d’atténuation de l’humidité efficace, installé selon les directives écrites du fabricant et conforme à la norme ASTM F3010,
Standard Practice for Two-Component Resin Based Membrane-Forming Moisture Mitigation Systems for Use Under Resilient Floor Coverings.
Toutes les exigences écrites concernant l’application des produits, notamment les protocoles de mesure de l’humidité, doivent être respectées pour que la
garantie d’Interface s’applique.
N.B. : Les mesures d’humidité ne révèlent que l’état du béton au moment où elles sont effectuées. Les limites d’humidité énoncées précédemment
doivent être respectées avant, pendant et en tout temps après l’installation pour prévenir des défaillances ou des problèmes d’installation et pour
maintenir la validité de la garantie. Si les valeurs d’humidité mesurées dépassent les limites prescrites, ARRÊTER le travail et NE PAS FAIRE l’installation.
Communiquer avec le service technique avant de poursuivre.
3Test de la goutte d’eau
L’adhésif VS95 de XL Brands doit être utilisé sur un substrat absorbant. Pour s’assurer
que c’est le cas, l’installateur doit effectuer le test de la goutte d’eau à un nombre
suffisant d’emplacements. Avec un compte-gouttes, il doit déposer une goutte
d’eau d’environ 5 mm (image 1) sur la surface préparée pour l’installation. Pour être
considérée comme absorbante, la surface doit commencer à absorber l’eau dans les
cinq minutes qui suivent (image 2).
Le pouvoir absorbant de la surface en béton influence le temps de séchage, ainsi
que le temps ouvert et le temps d’utilisation attendus de l’adhésif. Le temps ouvert
Image 1 sera moindre sur une surface poreuse et dans les endroits exposés à des courants
d’air, par exemple près de portes ou de fenêtres ouvertes. Il incombe à l’installateur
de comprendre les caractéristiques de fonctionnement de l’adhésif dans toutes les
aires de l’installation et d’adapter les techniques de préparation et d’installation en
conséquence pour assurer une bonne adhésion.
Image 2
Essai d’adhérence
Il faut effectuer des essais d’adhérence pour évaluer la compatibilité du système de revêtement de plancher avec divers substrats et possiblement révéler la
présence d’humidité. Il incombe à l’installateur de déterminer si le substrat à recouvrir convient et le nombre d’essais d’adhérence à effectuer.
L’adhésif devrait être choisi en fonction des propriétés de l’espace et du substrat. En cas d’échec d’un essai d’adhérence, demander des recommandations
d’adhésif au représentant commercial.
Les emplacements et les produits à tester doivent être laissés dans des conditions adéquates pendant 48 heures avant l’essai et durant la période
d’essai. La partie responsable doit veiller à ce que les essais soient effectués sur un substrat et dans un environnement conformes aux exigences
énoncées dans les présentes directives et dans la norme ASTM F710.
Effectuer les essais d’adhésion avec l’adhésif recommandé dans les présentes directives d’installation. Ne pas soulever le revêtement de plancher après
l’installation pour vérifier le transfert de l’adhésif. Utiliser du ruban à conduits ou un produit similaire pour sceller le pourtour de l’échantillon de revêtement
de plancher collé au substrat. Protéger le revêtement de la circulation pendant 12 heures et des objets sur roulettes pendant toute la durée de l’essai, qui
doit être d’au moins 3 jours (72 heures). Placer les échantillons dans des emplacements appropriés (près des murs ou dans des zones peu achalandées).
Chaque échantillon devrait mesurer 61 x 61 cm.
Pour évaluer l’adhésif, retirer les échantillons à la main. L’essai sera considéré comme une réussite ou un échec d’après l’analyse visuelle effectuée par la
personne responsable de l’essai et l’effort physique requis pour retirer le revêtement de plancher.
Découper une bande de 5 cm au centre de l’échantillon, puis tirer sur une extrémité pour la décoller lentement. Si la bande est molle ou humide, cela
signifie que le substrat est encore trop humide ou que sa surface n’est pas absorbante. En règle générale, le mode de rupture devrait être cohésif;
l’adhésif devrait se trouver en grande partie sur le substrat, avec un léger résidu sur l’endos du revêtement de plancher. Si l’adhésif se trouve en majeure
partie sur l’endos, cela indique une préparation mécanique insuffisante, la présence d’un contaminant sur la surface ou un excès d’humidité dans le
substrat. Si la majeure partie de l’adhésif demeure sur le substrat, cela indique que l’adhésif a trop séché avant l’installation ou que le revêtement n’a pas
été suffisamment passé au rouleau. Si le point de rupture touche d’autres composants du système de revêtement de plancher, il peut s’agir d’un problème
avec ces composants, avec la préparation ou avec la méthode d’installation. Si un effort considérable est requis pour retirer le revêtement de plancher, par
exemple qu’il est impossible de le retirer intact, on peut considérer que l’essai est réussi, pourvu qu’on n’observe aucune trace d’humidité.
4Préparation du substrat
SUBSTRATS DE BÉTON
Pour les nouvelles constructions, l’entrepreneur principal doit fournir un substrat de béton solide et conforme à la norme ASTM C33/C33M,
Standard Specification for Concrete Aggregates. Le substrat de béton ne doit présenter aucun signe de rétrécissement, de plissures, de fissures ou
de mouvement avant l’installation du revêtement de plancher. Interface ne peut être tenue responsable d’une défaillance causée par un quelconque
mouvement des dalles ou d’une plainte en découlant. Les revêtements de plancher en feuilles de vinyle ne doivent jamais être installés sur des joints
de dilatation; utiliser un assemblage conforme aux normes de l’industrie.
Tous les substrats en béton au niveau ou au-dessous du sol doivent comporter un pare-vapeur à l’efficacité permanente confirmée, de faible perméance
(≤ 0,10) et d’une épaisseur minimale de 10 mils, conforme aux exigences actuelles de la norme ASTM E1745, Standard Specification for Plastic Water
Vapor Retarders Used in Contact with Soil or Granular Fill under Concrete Slabs. Le pare-vapeur doit également être posé directement sous le béton,
au-dessus du remblai granulaire, ou encore être assorti d’un dispositif d’atténuation de l’humidité efficace conforme à la norme ASTM F3010, Standard
Practice For Two-Component Resin Based Membrane-Forming Moisture Mitigation Systems for Use Under Resilient Floor Coverings.
N.B. : Lorsqu’utilisés avec un adhésif, les substrats en béton situés sous des lits d’hôpital ou dans des zones fortement achalandées doivent être
absorbants (voir la section Test de la goutte d’eau).
Ne pas utiliser pas de poudre à balayer à base de cire ou d’huile.
Respecter les normes de l’OSHA sur la silice cristalline respirable pour les travaux. Ne jamais préparer le béton sans un système de dépoussiérage
conforme aux exigences de l’OSHA. Communiquer avec les fabricants pour vérifier la conformité des outils avant de procéder. Ne pas balayer les aires
de l’installation; utiliser un aspirateur à filtre HEPA avec système de nettoyage par impulsions inversées ou séparateur cyclonique pour nettoyer le
substrat en béton, comme le recommande l’OSHA.
Le béton doit être assez propre et lisse pour qu’aucune aspérité ne transparaisse à la surface du revêtement de plancher.
Avant d’appliquer un produit de ragréage ou un composé de nivellement sur un substrat non absorbant, vérifier que le produit convient en effectuant
un essai d’adhérence. Pour être considérés comme absorbants, ces produits doivent être appliqués en une couche d’au moins 3 mm d’épaisseur, selon
les directives du fabricant.
N.B. : Lorsque requis, le sablage mécanique peut augmenter la densité de certains produits et diminuer la porosité de la surfa ce. Il est recommandé
d’effectuer un test de la goutte d’eau pour évaluer le pouvoir absorbant du substrat (voir la section Test de la goutte d’eau.)
Les fissures, les sillons, les cavités, les joints de contrôle et autres joints fixes et les irrégularités à la surface doivent être remplis ou lissés avec un
produit de ragréage ou une sous-couche, conformément aux directives écrites du fabricant. Le produit de ragréage ou la sous-couche doivent être
résistants à l’humidité, aux moisissures et aux alcalis, et offrir une résistance à la compression d’au moins 3 000 psi. Retirer, à l’aide d’appareils
mécaniques, la laitance, la poussière, les débris et les revêtements de la zone de remplissage. Utiliser un coupe-béton sans poussière équipé
d’une lame de diamant ou un outil similaire. Ne pas installer sur des fissures ou des joints instables. Si le taux d’humidité du béton est trop élevé,
communiquer avec le service technique et le fabricant du dispositif d’atténuation de l’humidité. Utiliser les méthodes prescrites par ce fabricant.
Ne pas installer de feuilles de vinyle sur des joints de dilatation et des joints mobiles. Utiliser un assemblage adéquat, conforme aux normes de
l’industrie. En présence de fissures ou de joints instables, communiquer avec le service technique.
SUBSTRATS EN BOIS
Les substrats en bois doivent avoir une épaisseur d’au moins 2,5 cm. Ils doivent être recouverts de contreplaqué monocouche à la surface entièrement
poncée, certifié de qualité A ou B par l’APA – The Engineered Wood Association, ou de contreplaqué certifié de qualité sous-couche par l’APA – The
Engineered Wood Association. Les panneaux de contreplaqué doivent se chevaucher et avoir au moins 6,5 mm d’épaisseur.
Tous les substrats en bois doivent être conformes à la norme ASTM F1482, Standard Practice for Installation and Preparation of Panel Type
Underlayments to Receive Resilient Flooring, et installés selon ses exigences.
Les substrats en bois ne doivent pas être en contact direct avec les substrats en béton, même s’ils sont installés sur longrines. Les planchers en bois
suspendus doivent avoir une ventilation adéquate et une membrane ou un pare-vapeur à l’efficacité permanente, posé directement au sol sous le
vide d’air. Le revêtement de plancher ne doit pas être installé sur des panneaux à copeaux orientés, de particules, en Masonite ou en Lauan, sur du
contreplaqué ignifugé ou sur tout autre substrat instable.
Le contreplaqué doit être propre et exempt de contaminants antiadhésifs. Pour ce faire, poncer le contreplaqué ou le remplacer par de nouveaux
panneaux certifiés par l’APA – The Engineered Wood Association. Remplir tout interstice avec un produit de jointoiement élastique, puis lisser. Poncer
toutes les aspérités jusqu’à ce que la surface soit lisse.
SUBSTRATS EN ACIER GALVANISÉ OU INOXYDABLE ET SUBSTRATS EN ALUMINIUM OU EN ACIER ORDINAIRE
Communiquer avec le service technique pour connaître les directives propres à ces substrats.
Éliminer toute rouille au moyen d’une sableuse ou d’un autre appareil mécanique. Pour empêcher l’acier de rouiller de nouveau, appliquer un produit
antirouille.
5Préparation du substrat (a continué)
INSTALLATION PAR-DESSUS UN REVÊTEMENT DE PLANCHER EXISTANT
Les revêtements de plancher en feuilles de vinyle peuvent être installés par-dessus un revêtement de plancher au fini lisse et à endos non coussiné,
solidement fixé (p. ex. carreaux de vinyle de composition, linoléum, revêtement en caoutchouc ou en vinyle). Le revêtement de plancher existant ne doit
comporter aucun interstice qui pourrait transparaître à la surface de la feuille de vinyle. Il est également possible d’installer un revêtement de plancher
en feuilles de vinyle par-dessus un plancher en terrazzo, en céramique ou en carreaux de carrière adéquatement préparé.
Il incombe au propriétaire, à l’entrepreneur principal et à l’entrepreneur en revêtements de plancher de déterminer si le revêtement résilient existant
est bien fixé au substrat et s’il présente une texture qui pourrait transparaître à la surface des feuilles de vinyle.
Pour remplir les interstices ou gommer les aspérités, utiliser un produit de ragréage convenant au revêtement de plancher existant. Au besoin, poncer
la surface jusqu’à ce qu’elle soit lisse. Il est important d’obtenir du fabricant du produit de ragréage les directives de préparation, de mélange et
d’installation qui s’appliquent. Toutes les garanties sur le produit ou la performance relèvent du fabricant du produit sélectionné.
N.B. : Ne pas installer le revêtement de plancher en feuilles de vinyle sur un plancher à système de chauffage radiant ou sur un faux-plancher d’accès.
Installation
La disposition des matériaux doit être déterminée par l’architecte, le designer et l’utilisateur final.
Motifs imitant le bois : Les feuilles doivent être posées de manière aléatoire de sorte que les motifs de planches soient décalés d’au moins 8 cm (3 po).
Utiliser la méthode de coupe en double pour les joints.
Poser les feuilles à sec, face dans la même direction, en faisant se chevaucher les bordures. Ne pas retourner les feuilles. Découper le long des murs.
Superposer les feuilles en alignant les motifs (découper de petites ouvertures pour s’en
assurer au besoin). Utiliser une règle droite et un couteau à lame rétractable pour découper
les deux feuilles superposées. L’utilisation d’un couteau nora peut faciliter la tâche.
Terminer la coupe des joints avec une lame à crochet pour créer de très légères encoches
(image 3). Retirer les retailles avec soin. Continuer de même, une feuille à la fois, jusqu’à ce
que la tâche soit terminée.
Faire de petites entailles au besoin pour s’assurer que les feuilles restent bien à plat et
éviter les déchirures.
Image 3
N.B. : Il n’est pas recommandé d’utiliser des outils à sous-embase pour couper les joints
Adhésif VS95 de XL Brands
L’adhésif VS95 de XL Brands est un adhésif acrylique à base d’eau qui convient aux substrats absorbants.
Il ne convient pas aux charges statiques sur une surface non absorbante.
Dans le cas d’une installation sur une surface non absorbante, appliquer l’adhésif puis, lorsque ce dernier est sec au toucher, installer immédiatement
le revêtement de plancher. Si l’adhésif demeure exposé pendant plus de 30 minutes une fois qu’il est sec au toucher, il doit être enlevé et remplacé.
N.B. : Avant de commencer l’installation, appliquer une petite quantité d’adhésif sur le substrat avec une truelle pour déterminer le temps d’ouverture et
le temps d’utilisation.
Replier un pan facilement manipulable du revêtement de plancher (généralement la moitié d’une feuille). Nettoyer le substrat et l’endos du revêtement.
Appliquer l’adhésif à l’aide d’une truelle à encoches en U de 1,6 x 1,6 x 1,6 mm.
Le produit couvre une surface d’environ 20 à 24 m² par seau d’un galon pour un CSP
1/16 1/32 (profil de surface du béton) de 1 (image d’une truelle).
1/32 L’adhésif doit être appliqué de manière uniforme, sans flaques ni espaces vides. Ne pas
ajouter d’adhésif frais sur un adhésif en train de sécher, puisque cela ferait transparaître
les lignes d’application. Remplacer la truelle lorsqu’elle est usée pour garantir une
application uniforme. Ne pas creuser de nouvelles encoches dans la truelle.
d’une truelle
L’adhésif doit être appliqué de manière uniforme, sans flaques ni espaces vides. Ne pas
ajouter d’adhésif frais sur un adhésif en train de sécher, puisque cela ferait transparaître les lignes d’application. Remplacer la truelle lorsqu’elle est
usée pour garantir une application uniforme. Ne pas creuser de nouvelles encoches dans la truelle.
6You can also read