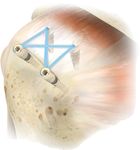
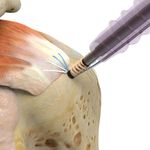
Ventix Link Screw-In Knotless Anchor - for Lateral Row Fixation in Rotator Cuff Repair - Zimmer Biomet
←
→
Page content transcription
If your browser does not render page correctly, please read the page content below
Ventix Link       ™

Screw-In
Knotless Anchor
for Lateral Row Fixation in Rotator Cuff Repair

                            Surgical Technique
2 | Ventix Link Screw-in Knotless Anchor Surgical Technique
Ventix Link Knotless Anchor
The Cayenne Medical, Inc. (Zimmer Biomet) Ventix Link Knotless Anchors are intended to be used for the
reattachment of soft tissue to bone. Ventix Link Anchors are made of PEEK (PolyEtherEtherKetone) and available in
4.75 mm (110025990) and 5.5 mm (110025992) sizes.
Instructions for Use
Ventix Link Anchor instruments should be used to ensure the proper insertion of the Ventix Link Anchor.
Note: Reference the Ventix Link Instrument guide below for details about bone quality and instrument selection.
Ventix Link Knotless Anchor Instruments
4.75/5.5 mm Tapered Awl/Punch (110025999)
Softer Bone
*Identified by crisscross laser markings
4.75/5.5 mm Awl/Punch (110025998)
4.75 mm Tap (110026000)/
4.75 mm Disposable Drill (110026002)
5.5 mm Tap (110026001)/
Harder Bone
5.5 mm Disposable Drill (110026003)3 | Ventix Link Screw-in Knotless Anchor Surgical Technique Create Pilot Hole Load Sutures Step 1 Step 2 Use a shaver/burr/rasp to remove soft tissue directly Place up to six (6) limbs of BroadBand™ Tape or #2 overlying the insertion site. Mallet the appropriate suture into the dual suture snare (load up to 3 suture Ventix Link Anchor Awl until the black laser-etch line(s) limbs per snare loop). Pull the suture snare through the is completely buried below the bone surface. eyelet to load the suture(s) into the anchor. Note: Bone quality should be assessed by the surgeon when determining proper Ventix Link instrumentation. Refer to the Instrument guide on page 2 for details about bone quality and instrument selection. Note: For hard bone, use the appropriate Ventix Link Anchor Tap (4.75 mm or 5.5 mm) and Disposable Drill (4.75 mm or 5.5 mm) to create the pilot hole. Note: If preferred, the sutures may be loaded into the Ventix Link Anchor and clamped with a hemostat prior to pilot hole creation.
4 | Ventix Link Screw-in Knotless Anchor Surgical Technique

    Insert Ventix Link Anchor                                    Set Suture Tension
    Step 3                                                       Step 4
    While holding the suture limbs, advance the anchor to        While applying forward pressure on the inserter
    the repair site and establish proper alignment. Place        handle, individually tension each suture strand and
    the tip of the anchor into the pilot hole and mallet the     release.
    inserter handle until the distal edge of the black laser-
    etch line on the Ventix Link Anchor is flush with the bone     Note: If counter pressure is not applied to the
    surface.                                                       inserter during tensioning, the anchor may back
                                                                   out.
        Note: Orient the anchor so the suture limbs entering
        the eyelet of the anchor are in line with/facing           Note: If suture is over-tensioned, a probe may be
        the tissue (i.e. not wrapped behind or around the          used to release tension under each suture prior to
        anchor).                                                   final deployment.

        Note: Release suture limbs prior to advancement.
        Pre-tensioning of the sutures is not recommended
        prior to anchor insertion
5 | Ventix Link Screw-in Knotless Anchor Surgical Technique
Mallet Anchor Final Deployment
Step 5 Step 6
Mallet the Ventix Link Anchor inserter handle until the Apply downward pressure on both the knob and
black horizonal laser etch line is completely buried inserter handle while rotating the knob clockwise.
below the bone surface. Advance the anchor until the second horizontal laser-
etch line on the inserter shaft is flush with the bone
Note: If the threads of the anchor are not engaged surface.
with the bone, the anchor will not advance properly
during final deployment. Note: Do not hold tension on the sutures during
final deployment.
Note: If downward pressure is not applied to the
knob, the anchor may not advance properly.
Note: Advancing the anchor below the bone
surface could result in over-tensioning.6 | Ventix Link Screw-in Knotless Anchor Surgical Technique
Remove Inserter Finalize Repair
Step 7 Step 8
Pull back slowly on the inserter handle to disengage the Cut the sutures to finalize the repair.
inserter shaft from the anchor.7 | Ventix Link Screw-in Knotless Anchor Surgical Technique
Indications & Contraindications
INDICATIONS CONTRAINDICATIONS
The Cayenne Medical, Inc. Ventix Link Knotless 1. Surgical procedures other than those listed in the
Anchors are intended to be used for the reattachment INDICATIONS section.
of soft tissue to bone for the following indications:
2. Presence of infection.
Shoulder
• Rotator cuff repairs 3. Patient conditions including insufficient quantity
or quality of bone or soft tissue.
• Biceps tenodesis
4. Insufficient blood supply or previous infections
• Acromioclavicular separation repairs
which may hinder the healing process.
• Deltoid repairs
5. Foreign body sensitivity. If material sensitivity is
Knee suspected, testing should be completed prior to
• Extra-capsular repairs device implantation.
• Medial collateral ligament 6. The use of this device may not be suitable for
patients with immature bone. The physician
• Lateral collateral ligament
should carefully assess the device within cartilage
• Posterior oblique ligament epiphyseal growth plates or non ossesous tissue.
• Patellar realignment and tendon repairs 7. Conditions which may limit the patient’s ability
• Illiotibial band tenodesis or willingness to follow postoperative care
instructions.
• Supplementary fixation when used in conjunction
with a primary fixation device in ACL repair and
reconstruction surgical procedures requiring
graft fixation.
Foot and Ankle
• Medial or lateral instability repairs/reconstructions
• Achilles tendon repairs/reconstructionsOrdering Information
Ventix Link Knotless Anchors
Part Number Description
110025990 4.75 mm Ventix Link Knotless Anchor
110025992 5.5 mm Ventix Link Knotless Anchor
Ventix Link Knotless Anchor Reusable Instruments (Non-Sterile)
Part Number Description
110025999 Tapered Awl/Punch, 4.75/5.5 mm Ventix Link Knotless Anchor
110025998 Awl/Punch, 4.75/5.5 mm Ventix Link Knotless Anchor
110026000 Tap, 4.75 mm Ventix Link Knotless Anchor
110026001 Tap, 5.5 mm Ventix Link Knotless Anchor
Ventix Link Knotless Anchor Disposable Instruments (Sterile)
Part Number Description
110026002 Drill, 4.75 mm Ventix Link Knotless Anchor
110026003 Drill, 5.5 mm Ventix Link Knotless Anchor
All content herein is protected by copyright, trademarks and other intellectual property rights, as applicable, owned by or licensed to Zimmer Biomet or
its affiliates unless otherwise indicated, and must not be redistributed, duplicated or disclosed, in whole or in part, without the express written consent of
Zimmer Biomet. This material is intended for health care professionals. Distribution to any other recipient is prohibited. For indications, contraindications,
warnings, precautions, potential adverse effects and patient counseling information, see the package insert or contact your local representative; visit www.
zimmerbiomet.com for additional product information.
Zimmer Biomet does not practice medicine. This technique was developed in conjunction with health care professionals. This document is intended for
surgeons and is not intended for laypersons. Each surgeon should exercise his or her own independent judgment in the diagnosis and treatment of an
individual patient, and this information does not purport to replace the comprehensive training surgeons have received. As with all surgical procedures, the
technique used in each case will depend on the surgeon’s medical judgment as the best treatment for each patient. Results will vary based on health, weight,
activity and other variables. Not all patients are candidates for this product and/or procedure. Caution: Federal (USA) law restricts this device to sale by or on
the order of a surgeon. Rx only.
© 2020 Zimmer Biomet.
Legal Manufacturer
Cayenne Medical Inc.
16597 N. 92nd St
Suite 101
Scottsdale, AZ 85260
USA
2021.3-US-en-REV0220 zimmerbiomet.comYou can also read


