Electromagnetic Safety Switch - User Manual Catalog Numbers 440G-EZS21STL05J, 440G-EZS21STL05H
←
→
Page content transcription
If your browser does not render page correctly, please read the page content below

Electromagnetic Safety
Switch
Catalog Numbers 440G-EZS21STL05J, 440G-EZS21STL05H

User Manual                                  Original Instructions

Electromagnetic Safety Switch User Manual

Important User Information
Read this document and the documents listed in the additional resources section about installation, configuration, and
operation of this equipment before you install, configure, operate, or maintain this product. Users are required to familiarize
themselves with installation and wiring instructions in addition to requirements of all applicable codes, laws, and standards.

Activities including installation, adjustments, putting into service, use, assembly, disassembly, and maintenance are required to
be carried out by suitably trained personnel in accordance with applicable code of practice.

If this equipment is used in a manner not specified by the manufacturer, the protection provided by the equipment may be
impaired.

In no event will Rockwell Automation, Inc. be responsible or liable for indirect or consequential damages resulting from the use
or application of this equipment.

The examples and diagrams in this manual are included solely for illustrative purposes. Because of the many variables and
requirements associated with any particular installation, Rockwell Automation, Inc. cannot assume responsibility or liability for
actual use based on the examples and diagrams.

No patent liability is assumed by Rockwell Automation, Inc. with respect to use of information, circuits, equipment, or software
described in this manual.

Reproduction of the contents of this manual, in whole or in part, without written permission of Rockwell Automation, Inc., is
prohibited.

Throughout this manual, when necessary, we use notes to make you aware of safety considerations.

              WARNING: Identifies information about practices or circumstances that can cause an explosion in a hazardous environment,
              which may lead to personal injury or death, property damage, or economic loss.

              ATTENTION: Identifies information about practices or circumstances that can lead to personal injury or death, property
              damage, or economic loss. Attentions help you identify a hazard, avoid a hazard, and recognize the consequence.

    IMPORTANT        Identifies information that is critical for successful application and understanding of the product.

These labels may also be on or inside the equipment to provide specific precautions.

              SHOCK HAZARD: Labels may be on or inside the equipment, for example, a drive or motor, to alert people that dangerous
              voltage may be present.

              BURN HAZARD: Labels may be on or inside the equipment, for example, a drive or motor, to alert people that surfaces may
              reach dangerous temperatures.

              ARC FLASH HAZARD: Labels may be on or inside the equipment, for example, a motor control center, to alert people to
              potential Arc Flash. Arc Flash will cause severe injury or death. Wear proper Personal Protective Equipment (PPE). Follow ALL
              Regulatory requirements for safe work practices and for Personal Protective Equipment (PPE).

The following icon may appear in the text of this document.

          Identifies information that is useful and can help to make a process easier to do or easier to understand.

2                                           Rockwell Automation Publication 440G-UM003C-EN-P - March 2022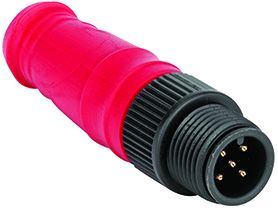
Table of Contents
                            About This Publication . . . . . . . . . . . . . . . . . . . . . . . . . . . . . . . . . . . . . . . . . . .             5
                            Who Should Use This Publication. . . . . . . . . . . . . . . . . . . . . . . . . . . . . . . . . .                       5
                            Terminology. . . . . . . . . . . . . . . . . . . . . . . . . . . . . . . . . . . . . . . . . . . . . . . . . . . . .     5
                            Summary of Changes. . . . . . . . . . . . . . . . . . . . . . . . . . . . . . . . . . . . . . . . . . . . .              5
                            Additional Resources . . . . . . . . . . . . . . . . . . . . . . . . . . . . . . . . . . . . . . . . . . . . .           5

                            Chapter 1
Safety Information          Introduction. . . . . . . . . . . . . . . . . . . . . . . . . . . . . . . . . . . . . . . . . . . . . . . . . . . . . 7
                            Intended Use . . . . . . . . . . . . . . . . . . . . . . . . . . . . . . . . . . . . . . . . . . . . . . . . . . . . 7
                            Requirements for Qualified Personnel . . . . . . . . . . . . . . . . . . . . . . . . . . . . . 8
                                Project Planning. . . . . . . . . . . . . . . . . . . . . . . . . . . . . . . . . . . . . . . . . . . . . . 8
                                Mechanical Mounting, Electrical Installation, and Commissioning 8
                                Operation and Maintenance . . . . . . . . . . . . . . . . . . . . . . . . . . . . . . . . . . . 8

                            Chapter 2
Product Overview            Structure and Function . . . . . . . . . . . . . . . . . . . . . . . . . . . . . . . . . . . . . . . . . . . 9
                            Product Features. . . . . . . . . . . . . . . . . . . . . . . . . . . . . . . . . . . . . . . . . . . . . . . . . 9
                               Product Models. . . . . . . . . . . . . . . . . . . . . . . . . . . . . . . . . . . . . . . . . . . . . . 10
                               Locking Principle . . . . . . . . . . . . . . . . . . . . . . . . . . . . . . . . . . . . . . . . . . . . 10
                               Protective Functions . . . . . . . . . . . . . . . . . . . . . . . . . . . . . . . . . . . . . . . . . 10
                               Status Indicators . . . . . . . . . . . . . . . . . . . . . . . . . . . . . . . . . . . . . . . . . . . . 11

                            Chapter 3
Project Planning            Manufacturer of the Machine . . . . . . . . . . . . . . . . . . . . . . . . . . . . . . . . . . . .                      13
                            Operating Entity of the Machine . . . . . . . . . . . . . . . . . . . . . . . . . . . . . . . . .                        13
                            Assembly . . . . . . . . . . . . . . . . . . . . . . . . . . . . . . . . . . . . . . . . . . . . . . . . . . . . . . .   13
                                Mounting Location . . . . . . . . . . . . . . . . . . . . . . . . . . . . . . . . . . . . . . . . . .                14
                                Distance . . . . . . . . . . . . . . . . . . . . . . . . . . . . . . . . . . . . . . . . . . . . . . . . . . . .     14
                                Alignment . . . . . . . . . . . . . . . . . . . . . . . . . . . . . . . . . . . . . . . . . . . . . . . . . .        14
                                Mounting Methods . . . . . . . . . . . . . . . . . . . . . . . . . . . . . . . . . . . . . . . . . .                 14
                            Electrical Control Integration . . . . . . . . . . . . . . . . . . . . . . . . . . . . . . . . . . . .                   14
                                OSSDs. . . . . . . . . . . . . . . . . . . . . . . . . . . . . . . . . . . . . . . . . . . . . . . . . . . . . .     14
                                Course of the OSSD Test Over Time . . . . . . . . . . . . . . . . . . . . . . . . . . .                              16
                                Locking Solenoid Control . . . . . . . . . . . . . . . . . . . . . . . . . . . . . . . . . . . .                     16
                                Application Diagnostic Output. . . . . . . . . . . . . . . . . . . . . . . . . . . . . . . .                         16
                            Thorough-check Concept . . . . . . . . . . . . . . . . . . . . . . . . . . . . . . . . . . . . . . . .                   17
                                Regular Thorough Check Minimum Requirements . . . . . . . . . . . . .                                                17

                            Chapter 4
Installation                Mount Multiple Safety Switches . . . . . . . . . . . . . . . . . . . . . . . . . . . . . . . . . . 19
                            Mounting . . . . . . . . . . . . . . . . . . . . . . . . . . . . . . . . . . . . . . . . . . . . . . . . . . . . . . 19
                              Mount the Sensor. . . . . . . . . . . . . . . . . . . . . . . . . . . . . . . . . . . . . . . . . . . . 20
                              Mount the Actuator . . . . . . . . . . . . . . . . . . . . . . . . . . . . . . . . . . . . . . . . . . 21

                     Rockwell Automation Publication 440G-UM003C-EN-P - March 2022                                                                    3
Table of Contents
Chapter 5
Wiring Notes on cULus . . . . . . . . . . . . . . . . . . . . . . . . . . . . . . . . . . . . . . . . . . . . . . . . . 23
Device Connection (M12, 5-pin) . . . . . . . . . . . . . . . . . . . . . . . . . . . . . . . . . . 23
Device Connection (M12, 8-pin) . . . . . . . . . . . . . . . . . . . . . . . . . . . . . . . . . . 23
Connect Safety Switches with T-connectors . . . . . . . . . . . . . . . . . . . . . . . 24
Chapter 6
Commissioning Switch On . . . . . . . . . . . . . . . . . . . . . . . . . . . . . . . . . . . . . . . . . . . . . . . . . . . . . . 25
Thorough-check Requirements. . . . . . . . . . . . . . . . . . . . . . . . . . . . . . . . . . . 25
Chapter 7
Maintenance and Maintenance . . . . . . . . . . . . . . . . . . . . . . . . . . . . . . . . . . . . . . . . . . . . . . . . . . . 27
Troubleshooting Clean the Switch. . . . . . . . . . . . . . . . . . . . . . . . . . . . . . . . . . . . . . . . . . . . . 27
Regular Thorough Check . . . . . . . . . . . . . . . . . . . . . . . . . . . . . . . . . . . . . 27
Troubleshooting . . . . . . . . . . . . . . . . . . . . . . . . . . . . . . . . . . . . . . . . . . . . . . . . 27
Appendix A
Specifications Technical Data. . . . . . . . . . . . . . . . . . . . . . . . . . . . . . . . . . . . . . . . . . . . . . . . . . 29
Approximate Dimensions. . . . . . . . . . . . . . . . . . . . . . . . . . . . . . . . . . . . . . . . 31
Appendix B
Order Information Package Contents . . . . . . . . . . . . . . . . . . . . . . . . . . . . . . . . . . . . . . . . . . . . . . . 33
Order Information . . . . . . . . . . . . . . . . . . . . . . . . . . . . . . . . . . . . . . . . . . . . . . 33
Appendix C
Replacement Parts/ Replacement Parts . . . . . . . . . . . . . . . . . . . . . . . . . . . . . . . . . . . . . . . . . . . . . . 35
Accessories Accessories . . . . . . . . . . . . . . . . . . . . . . . . . . . . . . . . . . . . . . . . . . . . . . . . . . . . . 35
Appendix D
Declaration of Conformity (DoC) EU DoC (excerpt) . . . . . . . . . . . . . . . . . . . . . . . . . . . . . . . . . . . . . . . . . . . . . . . 37
Complete EU DoC for Download . . . . . . . . . . . . . . . . . . . . . . . . . . . . . . . . . 37
Index . . . . . . . . . . . . . . . . . . . . . . . . . . . . . . . . . . . . . . . . . . . . . . . . . . . . . . . . 39
4 Rockwell Automation Publication 440G-UM003C-EN-P - March 2022Preface
About This Publication This user manual contains the information that is needed during the lifecycle
of the 440G-EZ electromagnetic safety switch.
This user manual must be available to all people who work with the safety
switch. The structure of this user manual is based on the lifecycle phases of the
safety switch: project planning, mounting, electrical installation,
commissioning, operation, and maintenance.
Who Should Use This Use these operating instructions only if you are one of the following personnel:
Publication • Project developer (planner, developer, designer)
• Installer
• Electrician
• Safety expert (such as a CE authorized representative, compliance
officer, and a person who tests and approves the application)
• Operator
• Maintenance personnel
Terminology This manual uses the following terms and abbreviations throughout. For
definitions of terms not listed here, refer to the publication AG-7.1.
Term Definition
A status of the machine or facility, where people can be injured. Protective devices help
prevent this risk if the machine is operated within its intended use.
The figures in this document always show the dangerous state of the machine as the
Dangerous movement of a machine part. In practice, there are different dangerous states, such as:
state • Machine movements
• Electrical parts
• Visible and invisible beam
• A combination of multiple hazards
Summary of Changes This publication contains the following new or updated information. This list
includes substantive updates only and is not intended to reflect all changes.
Topic Page
Updated template, no content changes Throughout
Additional Resources These documents contain additional information concerning related products
from Rockwell Automation.
Resource Description
440G-EZ Interlocking Safety Switch Installation Instructions, publication Provides installation information for 440G-EZ switches.
440G-IN019
Industrial Automation Wiring and Grounding Guidelines, publication 1770-4.1 Provides general guidelines for installing a Rockwell Automation industrial system.
Product Certifications website, rok.auto/certifications. Provides declarations of conformity, certificates, and other certification details.
You can view or download publications at rok.auto/literature.
Rockwell Automation Publication 440G-UM003C-EN-P - March 2022 5Preface Notes: 6 Rockwell Automation Publication 440G-UM003C-EN-P - March 2022
Chapter       1

                      Safety Information

Introduction          This chapter contains general safety information about the safety switch.

                      Further information about specific product use situations can be found in the
                      relevant chapters.

                                     ATTENTION: Hazard due to lack of effectiveness of the protective device.
                                     If non-compliant, it is possible that the dangerous state of the machine
                                     cannot be stopped or stopped in a timely manner.
                                     • Read this publication carefully and confirm that you understand the content
                                        fully before working with the device.
                                     • Follow all safety notes in this publication.

Intended Use          The 440G electromagnetic safety switch is a transponder safety switch with a
                      locking function, which actuators control without contact, and is suitable for
                      the following applications:
                        • Monitoring of movable physical guards
                        • Locking device for process protection

                      Only use the safety switch within the limits of the prescribed and specified
                      technical data and operating conditions.

                      Incorrect use, improper modification of, or tampering with the safety switch
                      invalidates any warranty from Rockwell Automation; in addition, any
                      responsibility and liability of Rockwell Automation for damage and secondary
                      damage that this action causes is excluded.

                      The safety switch is not suitable for the ambient conditions such as, but not
                      limited, to the following:
                        • Applications in which the dangerous state cannot be ended immediately
                            (stopping time)
                        • Radioactivity (exception: natural radioactivity)
                        • Vacuum or high pressure
                        • High UV load
                        • In the vicinity of low-frequency RFID devices
                        • In the vicinity of magnetic fields

                                     ATTENTION: Improper use of the safety switch
                                     If a voltage drop occurs, the locking device unlocks, regardless of whether the
                                     dangerous state of the machine has ended.
                                     This safety switch has a simple electromagnetic locking device. There is no
                                     locking device monitoring.
                                     • Do not use the safety switch as a safety locking device according to EN 14119.
                                     • Do not use the safety switch in applications in which the dangerous state
                                        cannot be ended immediately (stopping/run-down time).

               Rockwell Automation Publication 440G-UM003C-EN-P - March 2022                                            7
Chapter 1 Safety Information
IMPORTANT Passing metal chips can impair the function of the safety switch.
Requirements for Qualified Only qualified safety personnel can configure, mount, connect, commission,
and service the safety switch.
Personnel
Project Planning
For project planning, a person is considered competent when they have
expertise and experience in the selection and use of protective devices on
machines and is familiar with the relevant technical rules and national work
safety regulations.
Mechanical Mounting, Electrical Installation, and Commissioning
A person is considered qualified for the task when they have the expertise and
experience in the relevant field and is sufficiently familiar with the application
of the protective device on the machine to be able to assess whether it is in an
operationally safe state.
Operation and Maintenance
For operation and maintenance, a person is considered competent when they
have the expertise and experience in the relevant field and is sufficiently
familiar with the application of the protective device on the machine and the
machine operator has instructed them in its operation.
8 Rockwell Automation Publication 440G-UM003C-EN-P - March 2022Chapter 2
Product Overview
Structure and Function The safety switch is an interlocking device with a locking device, which
consists of a non-contact sensor with locking solenoid, and a coded actuator.
The actuator has a low coding level.
If the protective device closes, the actuator leads to the sensor. When the
actuation field is reached, the actuator code reads out and is evaluated by
RFID. If the code is valid, the safe output signal switching device (OSSD)
switches.
If the locking solenoid has power supply, the locking device is active.
Product Features Figure 1 - Sensor Overview
1 2 3
4
6 5
Item Description
1 Locking solenoid
2 Sensor surface
3 Cover plate
4 Plug connector IN
5 LOCK status indicator
6 OSSD status indicator
Rockwell Automation Publication 440G-UM003C-EN-P - March 2022 9Chapter 2 Product Overview
Figure 2 - Actuator Overview
1 2 3
Item Description
1 Anchor plate
2 Protective cap
3 Actuator surface
Product Models
The safety switch is available in different models. The following is an overview
of the unique features of the models:
• One cable with M12 plug connector (5-pin)
• One cable with M12 plug connector (8-pin)
Locking Principle
ATTENTION: Hazard due to lack of effectiveness of the protective device.
If a voltage drop occurs, the locking device unlocks regardless of whether the
dangerous state of the machine is ended.
• Do not use the safety switch in applications where the dangerous state cannot
be ended immediately (stopping/run-down time).
Power to Lock Principle
• Lock locking device: voltage at locking device input
• Unlock locking function: no voltage at locking device input
If voltage is interrupted, the locking device unlocks and the protective device
can open immediately.
The locking device is not monitored, which means that the safety switch does
not check whether the anchor plate is applied to the solenoid.
Protective Functions
The safety switch has the following internal protective functions:
• Short-circuit protection at all outputs
• Cross-circuit monitoring at OSSDs
• Overload protection on OSSDs
• Supply voltage reverse polarity protection
10 Rockwell Automation Publication 440G-UM003C-EN-P - March 2022Chapter 2 Product Overview
Status Indicators
The safety switch displays important status information with the status
indicators.
Figure 3 - Status Indicators
1 2
Item Name Color Description
Green when the OSSD pair is in the ON state.
1 OSSD Green/Red
Red when the OSSD pair is in the OFF state. (1)
2 LOCK Yellow Turns ON when the magnet is supplied with voltage.
(1) When a load that is too high applies to the application diagnostic output, the red OSSD status indicator remains
continuously ON. The actual switching behavior of the safety switch is not affected.
Rockwell Automation Publication 440G-UM003C-EN-P - March 2022 11Chapter 2 Product Overview Notes: 12 Rockwell Automation Publication 440G-UM003C-EN-P - March 2022
Chapter      3

                                 Project Planning

Manufacturer of the
Machine                                         ATTENTION: Failure to comply with obligations of manufacturer.
                                                Hazard due to lack of effectiveness of the protective device.
                                                • Conduct a risk assessment before using the safety switch.
                                                • Do not tamper with, open, or modify the components of the safety switch.
                                                • Do not repair defective devices – they must be replaced instead.
                                                • Confirm that switch-on commands, which bring about a dangerous state of
                                                  the machine, are not enabled until the protective device is closed.
                                                • Make sure that a stop command is triggered when the protective device is
                                                  opened during the dangerous machine state.
                                                The safety switches must not be defeated (such as jumpered contacts),
                                                rotated away, removed, or rendered ineffective in any other way. If necessary,
                                                put measures in place to reduce possibilities for defeat.

Operating Entity of the
Machine                                         ATTENTION: Failure to comply with obligations of the operating entity.
                                                Hazard due to lack of effectiveness of the protective device.
                                                • Modifications to the machine and modifications to the mechanical mounting
                                                  of the safety switch necessitate a new risk assessment. The results of this
                                                  risk assessment can require the operating entity of the machine to fulfill the
                                                  obligations of the manufacturer.
                                                • Apart from during the procedures described in this document, the components
                                                  of the safety switch must not be opened or modified.
                                                • Do not perform repair work on the components. Improper repair of the safety
                                                  switch can lead to a loss of the protective function.
                                                • Verify that there is no bypassing by replacement actuators. Restrict access to
                                                  actuators.

Assembly
                                                ATTENTION: Bypassing the protective device.
                                                Hazard due to lack of effectiveness of the protective device.
                                                Avoid incentives to manipulate the safety switch by taking at least one of the
                                                following measures:
                                                • Cover the sensor and the actuator with additional equipment or protect them
                                                   against access.
                                                • If possible, use permanent mounting methods for actuators (for example, glue,
                                                   safety screws, or rivets).

                          Rockwell Automation Publication 440G-UM003C-EN-P - March 2022                                          13
Chapter 3 Project Planning
Mounting Location
• Select the mounting location so that the sensor and actuator are
accessible for maintenance work and are protected against damage.
• Select a mounting location for the sensor that is as far away from the
door hinge as possible.
• If necessary, fit an additional stop for the moving protective device.
Distance
When several safety switches are mounted to the machine, they must be
mounted at a minimum distance to one another, see
Mount Multiple Safety Switches on page 19.
Alignment
The safety switch can be mounted in any alignment. When mounted
horizontally, the anchor plate with rotating bearings increases the
manipulation protection. When mounted horizontally, if the movable physical
guard triggers the actuator, the magnet holds the actuator. As the anchor plate
has rotating bearings, the gravitational force rotates the actuator surface away
from the sensor surface and the OSSDs go into the off state.
Mounting Methods
The sensor can be mounted in the following ways:
• Surface mount: The sensor is mounted on the fixed part of the protective
device (for example, the door frame).
• Flush mount (1): The sensor is mounted in the fixed part of the protective
device (for example, the door frame). There must be a suitable recess in
the mounting surface. The thickness of the mounting surface must be
1.5…3 mm (0.06…0.12 in.).
Electrical Control Switch-on commands that put the machine in a dangerous state can only be
activated when the protective device is closed. When the machine goes into a
Integration dangerous state, a stop command must be triggered if the protective device is
opened. Depending on the safety concept, a safety relay or a safety controller
analyzes the signal.
The control that is connected and all devices responsible for safety must
comply with the required Performance Level and the required category (for
example, according to ISO 13849-1).
OSSDs
Safety switches with local inputs and outputs can be directly integrated into
the machine controller.
ATTENTION: Hazard due to lack of effectiveness of the protective device.
If non-compliant, it is possible that the dangerous state of the machine
cannot be stopped or not stopped in a timely manner.
• Verify that the following control and electrical requirements are met so the
protective function can be fulfilled.
(1) For the recess dimensions for flush mounting, see Figure 12 on page 34
14 Rockwell Automation Publication 440G-UM003C-EN-P - March 2022Chapter 3 Project Planning
• The output signals from an OSSD pair must not be connected to each
other.
• In the machine controller, both signals from an OSSD pair must be
processed separately.
Figure 4 - Dual-channel and isolated connection of OSSD 1 and OSSD 2
• The machine must switch to the safe state at any time if at least one
OSSD in an OSSD pair switches to the off state.
• Help prevent the formation of a potential difference between the load
and the protective device. If you connect loads to the OSSDs (safety
outputs) that then also switch if controlled with negative voltage (for
example, electromechanical contactor without reverse polarity
protection diode), you must connect the 0V connections of these loads
and the connections of the corresponding protective device individually
and directly to the same 0V terminal strip. If there is a fault, this way
verifies that there can be no potential difference between the 0V
connections of the loads and the connections of the corresponding
protective device.
Figure 5 - No Potential Difference Between Load and Protective Device
ATTENTION: Hazard due to lack of effectiveness of the protective device.
If non-compliant, it is possible that the dangerous state of the machine
cannot be stopped or not stopped in a timely manner.
Downstream contactors must be positively guided and monitored depending
on applicable national regulations or required reliability of the safety function.
• Make sure that downstream contactors are monitored (external device
monitoring, EDM).
Requirements for the Electrical Control of the Machine
• Use the control without test pulses. The safety switch is self-testing.
• The safety switch tests the OSSDs at regular intervals. To conduct this
test, it switches each OSSD briefly (for max 1 ms) to the off state and
checks whether this channel is voltage-free during this time.
• Make sure that the control of the machine does not react to these test
pulses and the machine does not switch off.
• The inputs of a connected evaluation unit must be positive-switching
(PNP), as the two outputs of the safety switch send a level of the supply
voltage in the switched on state.
Rockwell Automation Publication 440G-UM003C-EN-P - March 2022 15Chapter 3 Project Planning
The OSSDs are short-circuit protected to 24V DC and 0V. When the actuator is
in the response range of the sensor, the OSSDs signal the on state with the
high signal level (non-isolated). If the actuator is removed from the response
range of the sensor or there is a device fault, the OSSDs signal the off state with
the low signal level.
The safety switch complies with the regulations for electromagnetic
compatibility (EMC) for the industrial sector (Radio Safety Class A). Radio
interference cannot be ruled out when used in residential areas.
ATTENTION: Hazard due to lack of effectiveness of the protective device.
If non-compliant, it is possible that the dangerous state of the machine
cannot be stopped or not stopped in a timely manner.
• Verify that the following control and electrical requirements are met so the
safety switch can fulfill its protective function.
• The external voltage supply of the safety switch must be able to withstand
brief power failures of 20 ms as specified in IEC 60204-1.
• The power supply unit must provide safe isolation according to IEC 61140
(SELV/PELV). Suitable power supplies are available as accessories,
contact your local Allen-Bradley product distributor or
Rockwell Automation sales office.
Course of the OSSD Test Over Time
Figure 6 - Course of the OSSD test over time
(1)
V
300 μs
OSSD 1
t
V
300 μs
OSSD 2
t
(1) Usually every 40 ms. The interval is dynamic and can be smaller than 40 ms.
Locking Solenoid Control
The locking solenoid is activated through the upstream control. There is no
internal activation or deactivation of the locking solenoid through the safety
switch. The locking device and locking force are not monitored. When the
machine starts, the following sequence must be followed:
1. Check whether safety switch OSSDs are in the on state.
2. Supply the locking solenoid with power.
3. Start the machine.
Application Diagnostic Output
The application diagnostic output signal changes as soon as the actuator is
moved into or out of the response range of the safety switch. That is, when the
movable protective device is opened or closed. This output is not a safety
output.
16 Rockwell Automation Publication 440G-UM003C-EN-P - March 2022Chapter 3 Project Planning
Table 1 - Switching Behavior of the Application Diagnostic Output
Actuator Application Diagnostic Output
Actuator not in the response area, or safety switch in an error state Off
Actuator in the response area On
For more information, see Specifications on page 31.
Thorough-check Concept Appropriately qualified safety personnel must test the safety switch during
commissioning, after modifications, and at regular intervals; see
Thorough-check Requirements on page 27.
Regular thorough checks serve to investigate the effectiveness of the safety
switch and discover anomalies that result from modifications or external
influences (such as damage or manipulation).
The manufacturer and operating entity must define the type and frequency of
the thorough checks on the machine based on the application conditions and
the risk assessment. The process of defining the thorough checks must be
documented in a traceable manner.
Regular Thorough Check Minimum Requirements
The following thorough checks must be conducted at least once a year:
• Protective function of the safety switch
• Switch housing for damage
• Switch cables for damage
• Safety switch for signs of misuse or manipulation
• Locking solenoid for correct function
Rockwell Automation Publication 440G-UM003C-EN-P - March 2022 17Chapter 3 Project Planning Notes: 18 Rockwell Automation Publication 440G-UM003C-EN-P - March 2022
Chapter       4

                               Installation

Mount Multiple Safety
Switches                           IMPORTANT         When several safety switches are mounted, the minimum distance
                                                     between the individual systems must be followed to avoid mutual
                                                     interference.

                               Figure 7 - Spacing Requirement

                                                          260
                                                        (10.24)

                                                             260 (10.24)

Mounting                       The sensor can be mounted in the following ways:
                                 • Surface mount — The sensor is mounted on the fixed part of the
                                    protective device (for example, the door frame).
                                 • Flush mount — The sensor is mounted in the fixed part of the protective
                                    device (for example, the door frame). There must be a suitable recess in
                                    the mounting surface. The thickness of the mounting surface must be
                                    between 1.5…3 mm (0.06…0.12 in.)

                               For recess dimensions for flush mounting, see Figure 12 on page 34.

                                   IMPORTANT         Install the safety switch horizontally to help increase protection against
                                                     manipulation.

                        Rockwell Automation Publication 440G-UM003C-EN-P - March 2022                                             19
Chapter 4 Installation
Mount the Sensor
1. Unscrew the mounting screw (hexagon socket, 2 mm [0.08 in.]) and
remove the cover plate.
2. Mount the sensor on the fixed part of the protective device with 4 x M4
screws and secure it with four nuts.
• For surface mount: Mount the sensor on the fixed part of the
protective device. The screws can be set in the front or the back.
Tightening torque: 1 N•m (8.85 lb•in)
20 Rockwell Automation Publication 440G-UM003C-EN-P - March 2022Chapter 4 Installation
• For flush mount: Mount the sensor in the fixed part of the protective
device.
Tightening torque: 1 N•m (8.85 lb•in)
3. Set the cover plate on the sensor.
4. Tighten the mounting screws to 1 N•m (8.85 lb•in).
Mount the Actuator
1. Align the actuator to the mounted sensor.
2. Mount the actuator on the moving part of the protective device (for
example, the door) with 4 x M4 screws. Tightening torque: 1 N•m (8.85
lb•in). Use disposable screws, if possible.
• Maximum angle between the sensor and the actuator is 3° when the
protective device is closed.
≤ 3°
3. Cover the drill holes of the actuator with protective caps.
Rockwell Automation Publication 440G-UM003C-EN-P - March 2022 21Chapter 4 Installation Notes: 22 Rockwell Automation Publication 440G-UM003C-EN-P - March 2022
Chapter   5

                           Wiring

Notes on cULus             For use according to the requirements of UL 508, the following conditions
                           must also be met:
                             • Voltage supply Uv sensor secured with 2 A fuse
                             • Voltage supply Uv magnet secured with 2 A fuse

Device Connection          Figure 8 - Device Connection Pin Assignment (Convex Connector, M12, 5-pin, A-coded)
(M12, 5-pin)                2                   1

                                                 5

                            3                   4

                                Pin       Wire Color (1)        Designation        Description
                                 1           Brown                 +24V DC         Safety switch voltage supply
                                 2           White                  OSSD 1         OSSD 1 output
                                 3            Blue                    0V           0V DC voltage supply
                                 4           Black                  OSSD 2         OSSD 2 output
                                 5            Gray                 Magnet          Magnet activation 24V DC
                           (1) Applies to the extension cables recommended as accessories.

                                 IMPORTANT             Pay attention to the tightness of the plug connector.

Device Connection          Figure 9 - Device Connection Pin Assignment (Convex Connector, M12, 8-pin, A-coded)
(M12, 8-pin)                3         2         8

                            4                   1

                            5                   7
                                      6

                                Pin   Wire Color (1)       Designation Description
                                1        White                Aux          Application diagnostic output (not safe)
                                2        Brown              +24V DC        Safety switch voltage supply
                                3        Green              Magnet         Magnet activation 24V DC
                                4        Yellow               In 2         OSSD 2 input (2)
                                5         Gray               OSSD 1        OSSD 1 output
                                6         Pink               OSSD 2        OSSD 2 output
                                7         Blue                 0V          0V DC voltage supply
                                8         Red                 In 1         OSSD 1 input (2)
                           (1) Applies to the extension cables recommended as accessories.
                           (2) When used as an individual safety switch or as the first safety switch in a cascade apply 24V DC.

                    Rockwell Automation Publication 440G-UM003C-EN-P - March 2022                                                            23
Chapter 5 Wiring
IMPORTANT Pay attention to tightness of the plug connector.
Connect Safety Switches The following connection system components facilitate connection.
with T-connectors 24V
0V 1 1 1
5 4 4 4
Safety A
Safety B 2
Lock
3 3 3
Item Connection Cat. No.
Safety-wired Splitter/T-Port 898D-438Y-D8
Convex M12 Concave M12 3 2
8
1 4 1
7
5
6
Concave M12
Safety-wired Shorting Plug 898D-418U-DM
2 PWR
5 Pin 1
2 Pin 2 OSSD 1+
3 1 Pin 3 NA
Pin 4 OSSD 2+
Pin 5 NA
4
8-pin Device Patchcords Cat. No. (1)
1 m (3.3 ft) 889D-F8ABDM-1
3 2 m (6.6 ft) 889D-F8ABDM-2
5 m (16.4 ft) 889D-F8ABDM-5
10 m (32.8 ft) 889D-F8ABDM-10
5-pin Patchcords Cat. No. (1)
1 m (3.3 ft) 889D-F5ACDM-1
4 2 m (6.6 ft) 889D-F5ACDM-2
5 m (16.4 ft) 889D-F5ACDM-5
10 m (32.8 ft) 889D-F5ACDM-10
5-pin Cordsets Cat. No. (1)
2 m (6.6 ft) 889D-F5AC-2
5 5 m (16.4 ft) 889D-F5AC-5
10 m (32.8 ft) 889D-F5AC-10
(1) Add the letter S to the catalog numbers for stainless steel connectors (example: 889DS-F5AC-1).
24 Rockwell Automation Publication 440G-UM003C-EN-P - March 2022Chapter 6
Commissioning
ATTENTION: Hazard due to lack of effectiveness of the protective device.
If non-compliant, it is possible that the dangerous state of the machine
cannot be stopped or not stopped in a timely manner.
• Before commissioning the machine, have qualified safety personnel check
and release it.
• Verify that the time for the safety requirement (closing the protective device
again) is longer than the response time.
Switch On The device initializes after it is switched on. OSSDs are switched off in the
meantime. The OSSD light-emitting diode lights up after initialization.
Thorough-check The protective device and its application must be thoroughly checked in the
following situations:
Requirements
• Before commissioning.
• After changes to the configuration or the safety function.
• After changes to the mounting, the alignment, or the electrical
connection.
• After exceptional events, such as after a manipulation has been detected,
after modification of the machine, or after replacing components.
The thorough check verifies the following:
• All relevant regulations are complied with and the protective device is
active for all operating modes of the machine.
• The documentation corresponds to the state of the machine, including
the protective device.
Qualified safety personnel or specially qualified and authorized personnel
must conduct the thorough checks and must be document results in a
traceable manner.
IMPORTANT • Check whether the protective device of the machine is effective in all
operating modes in which the machine can be set.
• Verify that operating personnel have been instructed in the function of
the protective device before starting work on the machine. The machine
operator has overall responsibility for the instruction, which qualified
personnel must conduct.
Rockwell Automation Publication 440G-UM003C-EN-P - March 2022 25Chapter 6 Commissioning Notes: 26 Rockwell Automation Publication 440G-UM003C-EN-P - March 2022
Chapter       7

                         Maintenance and Troubleshooting

Maintenance              Clean the Switch
                             IMPORTANT         • Do not use aggressive cleaning agents (such as isopropanol or spirit).
                                               • Do not use any substances that hinder the wetting properties of
                                                 lacquers.
                                               • We recommend anti-static cleaning agents.

                         Regular Thorough Check
                         The safety switch must be checked regularly. The manufacturer and the
                         operating entity of the machine defines the type and frequency of thorough
                         checks, see Thorough-check Concept on page 18.
                         The regular thorough checks serve to investigate the effectiveness of the safety
                         switch and detect any ineffectiveness due to modifications or external
                         influences (for example, damage or manipulation).

                             IMPORTANT         Conduct the thorough checks according to the instructions from the
                                               manufacturer and the machine user.

Troubleshooting
                                        ATTENTION: Hazard due to lack of effectiveness of the protective device.
                                        If non-compliant, it is possible that the dangerous state of the machine
                                        cannot be stopped or not stopped in a timely manner.
                                        • Immediately shut down the machine if the behavior of the machine cannot be
                                           clearly identified.
                                        • Immediately shut down the machine if a machine fault cannot be determined
                                           or safely rectified.
                                        • Secure the machine so that it cannot switch on unintentionally.

                                        ATTENTION: Hazard due to unexpected starting of the machine.
                                        When any work is taking place, use the protective device to secure the
                                        machine or to verify that the machine is not switched on unintentionally.

                                        ATTENTION: Hazard due to lack of effectiveness of the protective device.
                                        If non-compliant, it is possible that the dangerous state of the machine
                                        cannot be stopped or not stopped in a timely manner.
                                        • Do not repair device components.
                                        • Do not modify or manipulate device components.
                                        • Apart from during the procedures described in this document, the device
                                           components must not be opened.

                  Rockwell Automation Publication 440G-UM003C-EN-P - March 2022                                           27
Chapter 7 Maintenance and Troubleshooting
IMPORTANT If you cannot remedy the fault with the help of the information that is
provided in this chapter, contact your local Allen-Bradley product
distributor or Rockwell Automation sales office.
Perform one of the following steps when an error occurs:
• Check voltage supply.
• Check cables.
• Check alignment of safety switch and actuator.
• Check ambient conditions (for example, interfering RFID frequencies or
magnetic fields, distances to other safety switches).
IMPORTANT If a safety switch has a fault in a cascade with an end connector, the
OSSDs of all safety switches between the safe evaluation unit and the
safety switch concerned switch into the off state.
28 Rockwell Automation Publication 440G-UM003C-EN-P - March 2022Appendix A
Specifications
Technical Data
Table 2 - Features
Attribute Value
Safe switch on distance Sao 4 mm (0.16 in.)
Typical switch on distance So 15 mm (0.59 in.)
Safe switch off distance Sar 45 mm (1.77 in.)
Max actuation frequency 0.5 Hz
Locking force 500 N (112.4 lbf)
Magnetic retaining force when not supplied with power 25 N (5.6 lbf)
Alignment tolerance for locking device
Vertical 5 mm (0.2 in.)
Horizontal 5 mm (0.2 in.)
Aperture angle 3°
Table 3 - Safety
Attribute Value
IEC 60947-5-3, IEC 60947-5-1, IEC 61508, EN ISO 13849-1,
Standards IEC 62061, ISO 14119, UL 508
PLe category 4 per ISO 13949-1, SIL 3 per IEC 61508 and
Safety classification (guard door sensing) IEC 62061
CE Marked for all applicable EU directives,
Certifications
cULus (UL 508), TÜV, C-Tick
Performance level PLe (ISO 13849-1) (1)
Category 4 (ISO 13849)
Safety integrity level SIL 3 (EN 61508)
SIL claim limit SIL CL 3 (EN 62061)
-8
PFH (average frequency of a dangerous failure per hour) 1.5 x 10 at 40 °C (104 °F) and 1000 m (3280.8 ft) above
sea level
TM (mission time) 20 years (ISO 13849-1)
Type Type 4 (ISO 14119)
Coding level Low coding level (ISO 14119)
Safe state when a fault occurs At least one OSSD is in the OFF state
(1) In a cascade, the performance level for the cascade as a whole depends on the number and type of devices in the cascade.
PLe is only possible in cascades with a maximum of six devices.
Table 4 - System Connection of Variant with 1 x M12 Plug Connector, 5-pin
Attribute Value
Voltage supply Convex, M12, 5-pin, A-coded (common plug connector for
Local inputs and outputs voltage supply and outputs)
Length of connecting cable 150 mm (5.91 in.)
Rockwell Automation Publication 440G-UM003C-EN-P - March 2022 29Appendix A Specifications
Table 5 - System Connection of Variant with 1 x M12 Plug Connector, 8-pin
Attribute Value
Voltage supply Convex, M12, 8-pin, A-coded (common plug connector for
Local inputs and outputs voltage supply and inputs and outputs)
Length of connecting cable 150 mm (5.91 in.)
Table 6 - Electrical
Attribute Value
OSSD pairs 1
Rated impulse withstand voltage Uimp 1500V
Pollution degree 3 (external, according to EN 60947-1)
Power-up delay (after supply voltage applied) (1) 2.5 s
Supply voltage when an individual safety switch is connected
Supply voltage Vv sensor 24V DC (19.2…28.8V) Class 2 supply
Supply voltage Vv magnet 24V DC (19.2…28.8V) Class 2 supply
Supply voltage when a cascade is connected
Supply voltage Vv sensor 24V DC (22.8…28.8V) Class 2 supply
Supply voltage Vv magnet 24V DC (21.6…28.8V) Class 2 supply
Muting time when supply voltage is interrupted 4 ms
Rated insulation voltage Ui 32V DC
Cable capacitance 400 nF (for Out A and Out B)
Device fuse 0.6…1 A
Current consumption at 24V
Locking device deactivated 50 mA
Locking device active 350 mA
Protection class III (EN 61140/IEC 61140)
Response time (2) ≤50 ms (3)
Release time (4) ≤100 ms (3)
Risk time (5) ≤100 ms (3)
(1) Once the supply voltage has been switched on, the OSSDs are in the OFF state during the time delay before availability. The
time that is specified applies to one sensor; in a cascade, 0.1 s must be added per sensor.
(2) Response time for moving the OSSDs into the OFF state when the actuator is removed from the response area or when the
OSSD input signals go into the OFF state.
(3) In a cascade, the value is multiplied by the number of safety switches in the cascade.
(4) Response time for moving the OSSDs into the ON state when the sensor detects the actuator and the OSSD input signals are
in the ON state.
(5) The risk time is the time that is required to detect internal and external faults. External errors affect the OSSDs (short-circuit
to an OSSD and cross-circuit between the two OSSDs). At least one of the two OSSDs is safely switched off during the risk
time.
Table 7 - Mechanical Data
Attribute Value
Dimensions (W x H x D)
Safety switch 120 x 60 x 38.5 mm (4.72 x 2.36 x 1.52 in.)
Actuator 120 x 60 x 20.5 mm (4.72 x 2.36 x 0.81 in.)
Material
Sensor housing Anodized aluminum
Actuator housing Fiber-glass-reinforced PVC
Anchor plate Nickel-plated steel
Weight
Safety switch 510 g (18 oz)
Actuator 210 g (7.41 oz)
30 Rockwell Automation Publication 440G-UM003C-EN-P - March 2022Appendix A Specifications
Table 8 - Inputs
Attribute Value
Rated voltage 24V DC
ON state ≤5 mA
OFF state 0 mA
ON state 19.2…28.8V DC
OFF state 0…2V DC
Table 9 - Outputs
Attribute Value
2 x PNP, max 100 mA, short-circuit protected and
2 OSSDs (Out 1 and Out 2) overload-proof
1 Application diagnostic output (Aux) 25 mA max (1), short-circuit protected (resistive load)
Switching voltage (all outputs)
ON state 19.2…28.8V DC
OFF state 0…2V DC
Switching current (OSSDs)
ON state ≤100 mA
OFF state ≤500 µA
Test pulse duration (OSSDs) 300 µs
(1) A higher load affects the behavior of the status indicators, see Status Indicators on page 11.
Table 10 - Environment
Attribute Value
Enclosure rating IP 67 (IEC 60529)
Ambient operating temperature -20…+55 °C (-4…+131 °F)
Storage temperature -25…+70 °C (-13…+158 °F)
Relative humidity 50% at 70 °C (158 °F) (IEC 60947-5-2)
Vibration resistance 1 mm/10…55 Hz (IEC 60068-2-6)
Shock resistance 30 g, 11 ms (IEC 60068-2-27)
In accordance with IEC 61326-3-1, IEC 60947-5-2, IEC
EMC 60947-5-3, and EN 300330 V2.1.1
Depending on alignment, see
Minimum distance between two safety switches Mount Multiple Safety Switches on page 19.
Approximate Dimensions Figure 10 - 440G-EZ Sensor with 1 x M12 Convex [mm (in.)]
122 (4.8)
42
(1.65) 5.5
24 (0.22) 34
14.5 (0.94) (1.34)
(0.57)
6.5
(0.26) 4.5
(0.18)
44
(1.73) 10
(0.39)
44 60
12.5 (1.73) (2.36)
(0.49)
5.7
(0.22)
(1)
L 120 (4.73)
(1) L = 150±2 mm (5.91±0.79 in.)
Rockwell Automation Publication 440G-UM003C-EN-P - March 2022 31Appendix A Specifications
Figure 11 - 440G-EZ Sensor Actuator [mm (in.)]
17.8 3.7 8 (0.31)
(0.70) (0.15)
4.5 (0.18) 6
(0.24) 20.5
16.8 (0.81)
(0.66)
120 (4.72)
8
44 (1.73) (0.31)
44 60
(1.73) (2.36)
10 (0.39)
Figure 12 - Flush Mount [mm (in.)]
44 (1.73)
22
15.2 14.4 (0.57) (0.87) 22
(0.60) (0.87)
14.4
28 (0.57)
(1.10)
Ø42 44
(1.65) (1.73)
16.3 (0.64) 32 (1.26)
83.5 (3.29) Ø5 (0.20) x 4
32 Rockwell Automation Publication 440G-UM003C-EN-P - March 2022Appendix B
Order Information
Package Contents • Safety switch
• Actuator
• Four protective caps
• Safety note
• Mounting instructions
Order Information
Table 11 - 440G-EZ Product Selection
Sensor Connection Type Cat. No.
Electromagnetic switch 440G-EZS21STL05J
Cable with 5-pin M12 connector
Electromagnetic Switch 440G-EZS21STL05H
Cable with 8-pin M12 connector
Rockwell Automation Publication 440G-UM003C-EN-P - March 2022 33Appendix B Order Information Notes: 34 Rockwell Automation Publication 440G-UM003C-EN-P - March 2022
Appendix                 C

                           Replacement Parts/Accessories

Replacement Parts
                            Description                                                            Cat. No.
                            Actuator                                                               440G-EMAS

Accessories                Table 12 - DC Micro (M12) Cables
                            Description                                                                          Cat. No.
                            8-pin cordset — concave, straight                                                    889D-F8AB-x (1)
                            8-pin patchcord — concave, straight                                                  889D-F8ABDM-x (2)
                            5-pin cordset — concave, straight                                                    889D-F5AC-x (1)
                            5-pin patchcord — concave, straight                                                  889D-F5ACDM-x (2)
                           (1) Replace the x with a 2 [2 m (6.6 ft)], 5 [5 m (16.4 ft)], or 10 [10 m (32.8 ft)] for standard cable lengths.
                           (2) Replace the x with a 1 [1 m (3.3 ft)], 2 [2 m (6.6 ft)], 3 [3 m (9.8 ft)], 5 [5 m (16.4 ft)], or 10 [10 m (32.8 ft)] for standard cable
                               lengths

                    Rockwell Automation Publication 440G-UM003C-EN-P - March 2022                                                                                        35
Appendix C Replacement Parts/Accessories Notes: 36 Rockwell Automation Publication 440G-UM003C-EN-P - March 2022
Appendix       D

                             Declaration of Conformity (DoC)

EU DoC (excerpt)             The undersigned, who represents the manufacturer in the following section,
                             hereby declares that the product complies with the regulations of the following
                             EU directives (including all relevant changes), and that it is based on the
                             relevant standards and/or technical specifications.

Complete EU DoC for          You can find the EU declaration of conformity for the protective device at
                             rok.auto/certifications.
Download

                      Rockwell Automation Publication 440G-UM003C-EN-P - March 2022                       37
Appendix D Declaration of Conformity (DoC) Notes: 38 Rockwell Automation Publication 440G-UM003C-EN-P - March 2022
Index

                  A                                             function 9
                                                                     protective 10
       accessories 35
       actuator
            mount 21                                                      I
            overview 10
       alignment 14                                             indicator
                                                                     status 11
       application
                                                                information
            diagnostic output 16
                                                                     safety 7
       approximate dimension 31
                                                                installation 19
       assembly 13
                                                                     electrical
                                                                           commission 8
                                                                integration
                  C                                                  electrical control 14
       clean                                                    intended use 7
            switch 27                                           introduction
       commission 25                                                 safety information 7
       concept
            thorough-check 17
       conformity                                                         L
            declaration of 37                                   location
       connect                                                       mounting 14
            safety switch                                       locking principle 10
                 T-connector 24                                 locking solenoid
       content                                                       control 16
            package 33
       control
            locking solenoid 16                                           M
       cULus
                                                                M12, 5-pin
            note 23
                                                                     device connection 23
                                                                M12, 8-pin
                  D                                                  device connection 23
                                                                machine
       dangerous state 5                                             manufacturer 13
       declaration of conformity 37                                  operating entity 13
       device connection                                        maintenance 8, 27
            M12, 5-pin 23                                       manufacturer
            M12, 8-pin 23                                            machine 13
       diagnostic output                                        mechanical mounting 8
            application 16                                      method
       dimension                                                     mounting 14
            approximate 31                                      minimum requirement
       distance 14
                                                                     thorough-check 17
       DoC 37                                                   model 10
                                                                mount
                  E                                                  actuator 21
                                                                     flush 19
       electrical                                                    multiple safety switches 19
            installation 8                                           sensor 20
       electrical control                                            surface 19
            integration 14                                      mounting 19
            requirement 15                                           location 14
                                                                     mechanical 8
                                                                     method 14
                  F                                             multiple safety switches
       features                                                      mount 19
            product 9
       flush mount 19

Rockwell Automation Publication 440G-UM003C-EN-P - March 2022                                         39
Index
O switch
clean 27
operating entity
switch on 25
machine 13
operation 8
ordering information 33 T
OSSD 14
terminology 5
test
thorough-check
course over time 16
overview minimum requirement 17
regular 27
actuator 10
requirement 25
product 9
thorough-check concept 17
sensor 9
troubleshooting 27
P
package content 33
W
personnel wiring 23
qualified 8
planning
project 8, 13
Power to Lock
principle 10
principle
Power to Lock 10
product
features 9
model 10
overview 9
project planning 8, 13
protective function 10
Q
qualified personnel
requirement 8
R
regular thorough check 27
replacement part 35
requirement
electrical control 15
minimum
thorough-check 17
qualified personnel 8
thorough-check 25
S
safety
information 7
safety switch
connect
T-connector 24
sensor
mount 20
overview 9
specifications 29
status indicator 11
structure 9
surface mount 19
40 Rockwell Automation Publication 440G-UM003C-EN-P - March 2022Electromagnetic Safety Switch User Manual Rockwell Automation Publication 440G-UM003C-EN-P - March 2022 41
Rockwell Automation Support
Use these resources to access support information.
Technical Support Center                                    Find help with how-to videos, FAQs, chat, user forums, and product notification updates.                      rok.auto/support
Knowledgebase                                               Access Knowledgebase articles.                                                                                rok.auto/knowledgebase
Local Technical Support Phone Numbers                       Locate the telephone number for your country.                                                                 rok.auto/phonesupport
Literature Library                                          Find installation instructions, manuals, brochures, and technical data publications.                          rok.auto/literature
Product Compatibility and Download Center                   Download firmware, associated files (such as AOP, EDS, and DTM), and access product                           rok.auto/pcdc
(PCDC)                                                      release notes.

Documentation Feedback
Your comments help us serve your documentation needs better. If you have any suggestions on how to improve our
content, complete the form at rok.auto/docfeedback.

Waste Electrical and Electronic Equipment (WEEE)

                         At the end of life, this equipment should be collected separately from any unsorted municipal waste.

Rockwell Automation maintains current product environmental compliance information on its website at rok.auto/pec.

Allen-Bradley, expanding human possibility, and Rockwell Automation are trademarks of Rockwell Automation, Inc.
Trademarks not belonging to Rockwell Automation are property of their respective companies.
Rockwell Otomasyon Ticaret A.Ş. Kar Plaza İş Merkezi E Blok Kat:6 34752, İçerenköy, İstanbul, Tel: +90 (216) 5698400 EEE Yönetmeliğine Uygundur

Publication 440G-UM003C-EN-P - March 2022                                                                                                                                                     PN-XXXXXX-XX
Supersedes Publication 440G-UM003B-EN-P - June 2020                                                                             Copyright © 2022 Rockwell Automation, Inc. All rights reserved. Printed in the U.S.A.
You can also read