Seed & sow - Farmer's Co-op
←
→
Page content transcription
If your browser does not render page correctly, please read the page content below
seed & sow
                 a g r i c u lt u r a l                  WINTER 2022
                    lifestyle
                     magazine

                                                           Winter on the Mountain, Jessica Ritchie

In this issue
purina: meet the team
garden talk with Doc: prepping for spring                                      FARMERCOOP.COM
the future of farming: an introduction to the alma ffa
salt Spring Bend, Mulberry River, 2.15.21
Charlton McDaniel

 in this issue
 Garden Talk with Doc

 The Future of Farming: Meet Lakan Brumley

 Crop Insurance: What is it and Why You Need it

 Kitten Your Hands Dirty: A DIY Indoor Cat Garden

 Meet the Team: An Introduction to Your Purina Specialists
in this issue
Homestead Hobbyist: Bringing it Indoors

From Our Table to Yours: Recipes for Winter

Peculiar Plants: The Science Behind Propagation

Winter Weather: Prepping for Your Outdoor Pets

Purina Managers' Meeting: A Video Review

From the editor
                                      Hello, Readers. I hope you all had a
                                      wonderful holiday season. Wow. 2022. The
                                      past year has flown by and, while it wasn’t
                                      all good, I look forward to what the next
                                      year has in store. For me, the new year is
                                      not only about looking forward, but also a
                                      little bit about looking back, reflecting on
                                      the previous year. 2021 was a year of new
                                      experiences: harvesting corn, eating the
                                      best peaches and apples I’ve ever tasted,
                                      learning a lot about bats from our friends
                                      at Devils Den, and hearing the experiences
                                      of producers in our area as they navigated
                                      a year of shipping delays, climbing prices,
                                      and uncertainty.

It was a year of personal failures – remember the disaster garden? – but even
more personal triumphs. I kept mums for an entire season. They look terrible
now, but the point is they survived autumn in tact and well, and I’ve since
moved on to houseplants, all of which, at the time of this publication, are very
much alive. My gardening experiences are a bit reflective of my 2021, off to a
rocky start, but here we are, into 2022, and I, like my houseplants, am very
much alive. I hope 2022 brings you everything you wish for and, as always, I
hope you enjoy the magazine.

 sign up for our newsletter.
       Visit farmercoop.com to sign up today.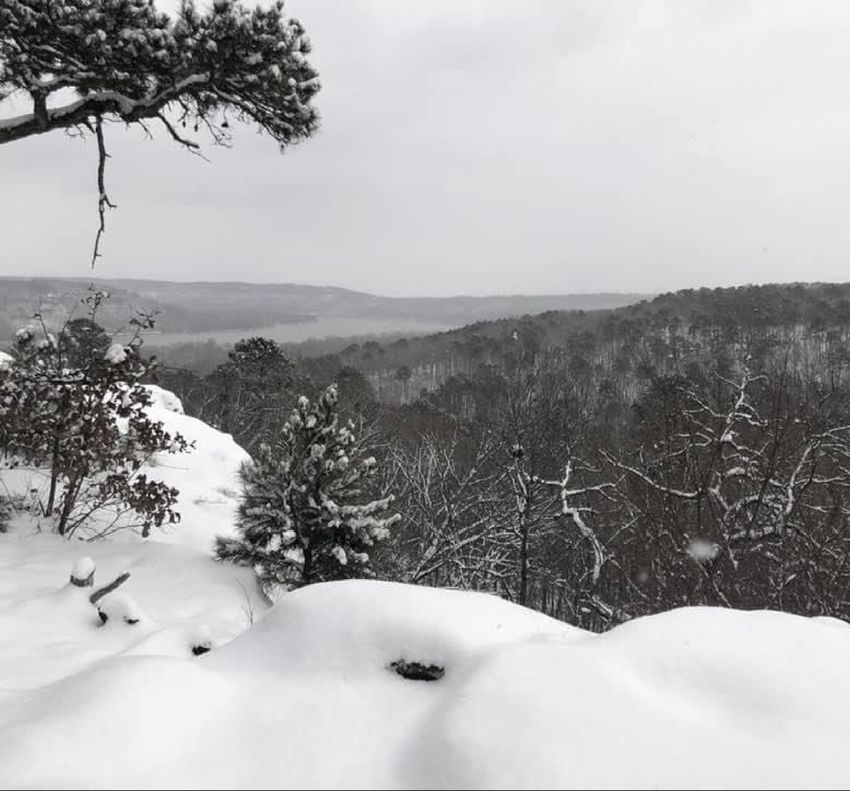
visit the coop
   for all your
propane & propane
   accessories
GARDEN
TA L K W I T H D O C
THE BASICS AND BEYOND
DOC SORGE

Doc is not only the manager of our Mena Coop, but he’s also one heck of a
gardener. Inspired by watching his grandpa garden, Doc has been growing his own
food, particularly green beans, cucumbers, and peppers – his favorite - for over
thirty years. In that time, he’s learned a thing or two; he wants to share that
knowledge with you!
For the winter months, Doc suggests covering your beds with elbon rye. Tilling the
rye in helps provide green manure, ensuring your beds are prepped and ready to go
come spring.
But, most importantly, he recommends getting a soil sample. It’s a sure-fire way to
find out exactly what your soil is lacking. Soil samples take the guess work out of it,
and they are free! Collect your sample and take it to your county extension office,
or your local Coop. We can take care of it from there.

Are you a beginner who needs help
   with the basics? Have you been
 gardening for years, and you’re just
looking to take it up a notch? Doc is
 here to help! Email your gardening
             questions to
 rharpercoop@gmail.com and we’ll
get you an answer. Or, if you’re in the
  Mena area, swing by and see Doc;
     he’s always happy to help.

                                                                Veggies, Ryanne Harper
Here we go,
talking about soil samples again.
They really are that important.

The key to getting reliable results is taking a good, quality sample. Sounds simple,
right? But how do you take a good sample?

    Check out this video from the University of Arkansas
     Division of Agriculture for a step-by-step tutorial.

            Soil Testing: How to Collect Soil Samples at Home
                                                                Watch later   Share

      Watch on
TROWEL & ERROR
Misadventures in Gardening

Ryanne Harper

I’m a fall and winter person. I don’t mind the shorter days, I live on soup and warm
beverages, and I’m obsessed with knitwear. Winter is perfect. BUT, by February, I do
start to get a little down. There’s only so much artificial vitamin D you can take. Plants
make me happy – I discovered just how happy last Summer when I turned my deck
into a miniature nature center, complete with squirrels who are comfortable enough
to beg for food. After my deck and mum success – we’re not going to discuss the
garden of disasters – I’ve decided to try my hand at houseplants. My history with
houseplants has been…not great.

                                                     I killed bamboo and a money tree;
                                                     every succulent I’ve ever owned has
                                                     shriveled and died; my orchid died
                                                     on my birthday. It’s not been great.
                                                     But I’ve gotten better. I have a peace
                                                     lily that’s been hanging on for a few
                                                     years now and a cactus that’s doing
                                                     decently well. Even after I caught it
                                                     on fire! Yep. I accidentally caught my
                                                     cactus on fire with incense. But it’s
                                                     fine; a little singed but ultimately
                                                     fine. Unfortunately, I have little to no
                                                     natural light in my house, leaving me
                                                     few options when it comes to plants.
                                                     To set myself up for success, I went
                                                     with a plant that require little to no
                                                     light. The cast iron plant.
                          Stargazer, Ryanne Harper
I based this decision on two things: minimal Pinterest research and the name. Cast
iron implies strength and the ability to stand up to anything, even living with me.
I ordered my plants from Etsy, but I’m sure you can find them locally, too. The first
thing I did was prep my pots and soil with the proper fertilizer. I’m just kidding. I’ve
learned nothing. The first thing I did was rearrange my bedroom seven times to
accommodate two six-inch pots. Then I got my pots and soil ready. I used Happy Frog
Potting Soil, available at the Coop.
When my cast iron plants arrived, I unpacked them, let them have a moment to adjust
to life outside the packing peanuts and cardboard, and got them potted. We’re about
eight weeks in, and they’re beautiful. They’re also low maintenance; I water once a
week and just sort of leave them be. I haven’t seen any growth, but I’m okay with that.
Heck, I haven’t grown much in the last few months either.

Despite the lack of growth, I’m going to count this as a win. My cast irons look great,
they’re green and their little white specks look extra bright and speckly. Since
beginning this houseplant journey, I’ve added a poinsettia and a wandering jew
rescued from a house with cats to the bunch. That brings me to two cast irons, three
terrariums, a peace lily, a couple of cacti, a few that I have no idea what they are, an
air plant that has seen better days, and an asparagus fern I found abandoned in the
street. I once found an entire baked ham on this same street outside the same house.
I don’t know what those particular neighbors get up to, but I am intrigued. Anyway,
bringing a little bit of the outdoors in has helped keep the winter gloomies at bay.
And the air, to quote Shakespeare, is as pure as the driven snow.

     If cast iron plants aren’t your
    jam, or you’re wanting to few
      varieties of low light plants,
          try your hand with a
        maidenhair fern, a nerve
          plant, or spider plant.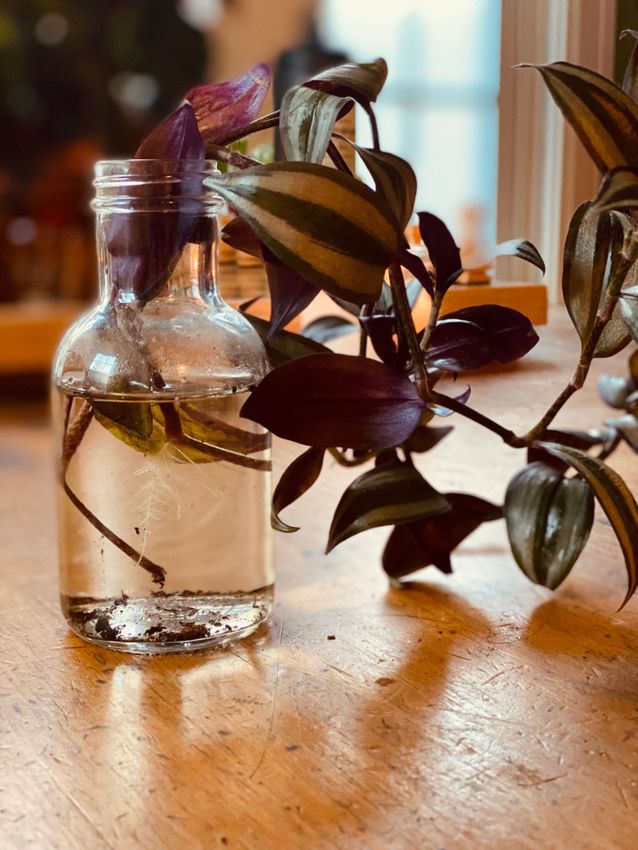
peculiar plants
Propagating without a Seed

Ryanne Harper
Winter is all about short days and long, dark nights. Keeping the kids entertained can
be a challenge, so why not introduce them to a little plant science? Plus, you get
more plants!
Propagation without a seed is pretty cool because you can take part of an existing
plant and use it to make new plants.
But let’s back it up a bit. What is propagation?

propagation:
The breeding of specimens of a plant or animal by natural
processes from the parent stock

There are two methods of propagation, with and without a seed. Farmers and
scientists use both methods to manage their crop production and also ensure
quality seeds. Beans, broccoli, and spinach, just to name a few, use seed propagation
while artichokes, garlic, and potatoes are propagated without a seed.

Now, propagating crops is complicated, but the same concept works with some
houseplants!

Houseplants that propagate really well from cuttings include:
•  Pothos
•  Chinese evergreen
•  Philodendron
•  Diffenbachia
•  Dracaena
It isn’t on the list, but I was recently gifted a Wandering Jew. Since I’ve had it, I’ve
gotten enough cuttings for six or seven pretty substantial plants. How did I do it? By
doing almost nothing. That’s how easy propagation is!

Method 1: Straight to Dirt

I’d heard that you can take your
cuttings and put them directly in
soil, give them a little water, and
call it good.

Method 2: The Water Method

To propagate in water, you simply
place your cuttings in a jar of water
and leave them alone. After a week
or ten days, you should have new
roots.

I tried both methods to see which worked better. I saw no real difference. My water
method cuttings have since been planted and all my new plants are thriving.
I’m interested to see how well propagation works with philodendron. But, first, I’m
going to need some more pots! Get some cuttings and try it out for yourself!
NEED NEW
TREATS & TOYS
FOR YOUR BEST
GIRLS & BOYS?
homestead hobbyist
Samantha Dooley

                                                              Baker's Dozn, Ryanne Harper

Winter is Coming!

You don’t have to be a member of the Night’s Watch to know colder temperatures
mean changes to your homestead activities. (Just a little Game of Thrones humor
since I’ve recently been reading the books again). There is always something that
needs to be done when working your own land; the winter months generally bring
those activities inside. Last year, the winter months were filled with planning,
building storage, and figuring out what needed to be done for us to expand our
homestead. This year, I need to spend some time indoors getting caught up on some
projects that have been put off while working on other things.

My husband and I have our own lists that we plan to do. His focus is on making sure
the livestock are comfortable and will have plenty of hay and feed, now that the
pasture isn’t growing as fast. He also plans on spending his winter evenings doing
preventative maintenance and repairs on the tractor, mule, trailers, and other
equipment, checking hoses, changing fluids, winterizing (if needed), and making sure
we will be ready to hit the ground running come spring.

My plans are a bit more domestic: canning, extract making, dehydrating, soap
making, and maybe a little quilting. While the blackberry plants were producing like
crazy this year, I ended up putting a few gallons in the freezer. One of my first
projects is to make a family request, blackberry jam! My new favorite jam that
generally can be done in the fall/winter is Christmas jam. Other fruits and
vegetables will also need to be processed to clear up freezer space for the deer that
have and will be harvested this season. But let’s get back to this Christmas jam, shall
we?
one does not simply mention
christmas jam without offering
the recipe.
Christmas Jam
1 package (40 ounces) frozen
unsweetened strawberries,
thawed or 2-1/2 quarts fresh
strawberries
1 pound fresh or frozen
cranberries, thawed
5 pounds sugar
2 pouches (3 ounces each) liquid
fruit pectin
I Don't Think You're Ready, Ryanne Harper
Directions
1. Grind strawberries and cranberries in a food processor or grinder; place in a Dutch
oven. Add sugar. Bring to a full rolling boil; boil for 1 minute. Remove from the heat;
stir in pectin and return to a full rolling boil. Boil for 1 minute, stirring constantly.
Remove from the heat.
2. Cool for 5 minutes; skim off foam. Carefully ladle hot mixture into hot half-pint
jars, leaving 1/4-in. headspace. Remove air bubbles; wipe rims and adjust lids. Process
for 10 minutes in a boiling-water canner.Extracts, Tinctures, & Other Sundries
I have had vanilla and other extracts or tinctures brewing for the last few months.
These need to be bottled up and labeled for long term storage. Once you have had
true homemade vanilla extract you can never go back to the store bought stuff. A
general guideline for making your own is 1 oz of vanilla beans (5-6, split them in half)
to 8 oz of a decent 80 proof (or less) alcohol. Vodka is the common choice but rum
and bourbon make great extracts as well. If you prefer a non-alcoholic version, there
are many online to choose from. Once you place your beans in the liquid, close up
your bottle and store in a dark cabinet for 6-12 months. Be sure to shake the bottle
every week or so. Once you start with vanilla, you will soon find yourself trying other
extracts! I have a mocha, chocolate, almond, orange, and coffee all just waiting to be
used.
My newest thing is to teach myself how to make soap. I don’t plan on making
decorative soaps or anything too fancy. I simply want to make soap for my family to
use. I like to know that I can do something if the need arises. My first attempt was
pretty good. It wasn’t very pretty or uniform, but I’ve ordered a couple of molds that
should help my next batch. By the next article, I hope to be able to report more
successes. There are a million different ways to do this but I started basic with a
simple 3 ingredient recipe that uses oil(s), water, and lye. (I’m not a fan of a lot of
fragrance but it could be added.) The internet is full of step by step videos and
directions, so go explore! If you have goat milk available, you are in for a whole new
world of great soap recipes.
I’ve never been a fan of cold
weather; I prefer to be outside
in the sunshine. For me, it's
important to find things -
sometimes too many things - to
occupy the time so I can't dwell
on the fact that it's so dark and
cold. With the homestead and
all that comes with it, this may
be my first winter that I am
looking forward to being
indoors more often. I’m excited
about these and other projects
I know I’ll find this year!from our table to yours
Soups for the family
Table Spread, Ryanne Harperroasted cauliflower & Leek Soup
Ryanne Harper
Cauliflower is finally getting its moment in the sun. No longer resigned to being
broccoli’s sad accomplice, the last remaining vegetable on the holiday veggie tray.
No, cauliflower has come a long way since the California medley. It is everywhere.
Pizza crust. Fried rice. A great substitute for mashed potatoes. You can’t escape it, so
you might as well embrace it. Rather than incognito cauliflower, this soup allows
cauliflower to shine without pretending to be something else. With leeks along for
the ride – you can’t go wrong with leeks – this soup is sure to become a winter
favorite.
Chowder, Ryanne HarperIngredients 1 Large head of cauliflower cut into florets; you should end up with 6-8 cups 2 Leeks sliced thinly; you just want the white part of the leek 5 Cups stock of your choice 1 Lemon, quartered 1 – 5 Cloves of garlic to taste Salt Black pepper 1 Handful chopped parsley Instructions 1. Preheat your oven to 425 degrees and arrange cauliflower on to a baking sheet. Drizzle with olive oil, hit it with a little salt and pepper, and toss. Roast until golden brown. About 25 minutes. Set aside your roasted cauliflower until later. 2. Get out your trusty soup pot and heat the remaining oil. Add leeks and sautee until soft. Leeks cook really quickly, so this should only take a few minutes. Add garlic and cook until fragrant. 3. Add your roasted cauliflower to the pot, reserving a few of the nicer florets for garnish (or snacking. Honestly, I always eat the garnish while waiting on the soup), add enough stock to cover the vegetables. Add a pinch of salt and pepper. Bring the soup to a boil and simmer about 20 minutes. 4. Allow the soup to cool slightly and very carefully blend with an immersion blender. 5. Ladle soup into bowls, add a squeeze of lemon, parsley, and any remaining roasted florets, and serve. I like to top my soup with a little wilted spinach, but that’s just me. I put spinach on everything; it’s the only way to stay strong to the finich. Recipe courtesy of Spoonful of Plants.
Carrot & lentil soup
Ryanne Harper

Lentils are quick-cooking, protein packed little legumes that come in a variety of
colors. This recipe calls for red lentils but any color will work. I went with green
because it's what I had on hand. Carrots are a staple at my house - we go through
about seven pounds a week. Carrot and lentil are a classic combination, and this soup
proves why.

                                                        Carrot & Lentil, Ryanne Harper
Ingredients 1½ Medium onion, chopped 4 or 5 Carrots, peeled and chopped 2 Cups red lentils, rinsed until the water runs clear 3 Cloves of garlic, minced 1 – 15 Ounce can diced tomatoes 4 Cups vegetable broth or stock of your choice 2 Tbl olive oil 1 tsp each cumin, turmeric, coriander ½ tsp paprika ¼ tsp cinnamon Salt and pepper to taste For the Garnish Lemon wedges Fresh herbs – cilantro and Italian parsley work well Crushed red pepper, optional Instructions 1. Heat your oil in a large pot over medium heat. Sauté the onion and garlic until soft. Add your spices and sauté for another five minutes or so. Add the carrots and cook until tender. 2. Add the broth, tomatoes, and lentils. Cook until the lentils are tender. Lentils cook really quickly, so this should be about 20 minutes. 3. Once the lentils are done, you’re ready to eat. You can either leave your soup chunky and eat as is, or you can use an immersion blender to make it creamy. If you want, you can do something in between. Blend until you get the consistency you want. 4. Garnish and enjoy! I topped mine with chopped red peppers, a little spinach, and some roasted chickpeas, and served with naan bread. Naan is a delicious flatbread that makes everything better. Recipe courtesy of A Cedar Spoon.
roasted red pepper & tomato soup
Ryanne Harper

While there is absolutely nothing wrong with popping open a can of Campbell’s
tomato soup, but the addition of the roasted red peppers elevates this classic, kicking
it up a notch.

Ingredients

• 5 Red bell peppers – you are welcome to use any color bell pepper you have on hand
• 28 oz can whole stewed tomatoes
• ½ Sweet yellow onion
• 6 Cloves minced garlic
• Red pepper flake to taste – usually just a pinch
• Pinch of salt
• 1 Tbsp smoked paprika
• 2 Bay leaves
• 3 Cups water or stock of your choice
• 5 – 6 Basil leaves, thinly sliced for garnish
• ¼ Toasted pine nuts for garnish
• 2 Tbsp fresh parsley for garnish

For the Pesto

• 2 Cups Italian parsley – you want the leafy green part of the herb
• 3 Tbsp toasted pine nuts
• 2 Tbsp lemon juice
• 1 Tbsp grated parmesan or nutritional yeast*
• 3 Tbsp olive oil
• 4 Cloves of garlic
• Pinch of salt
*Nutritional yeast is a shelf-stable, flaky yeast that tastes remarkably like cheese. It’s perfect for
adding a little cheesy flavor to recipes without adding actual cheese.
Instructions

roast the peppers
1. Preheat your broiler and place the peppers on a broiler safe sheet pan. Roast them
under the flames until they are fully charred, you want the skin of the peppers to be
black. Rotate them using kitchen tongs to ensure the whole pepper gets roasted.
Carefully remove, place into a bowl, and cover with a towel until the peppers are
cool enough to handle.
2. Gently remove the charred skin, discard the core, and set peppers aside until you
need them.

make the soup

1. Preheat a soup pot of over medium flame. This can be done while the peppers roast. Just
don’t forget about your peppers!
2. Add onion, a little salt, and a drizzle of olive oil. Sauté until the onions are cooked – about 10
minutes. Add red pepper flake, garlic, and paprika and give everything a good stir. Add the
tomatoes. Do not drain them first. You want all that good tomato juice.
3. Bring to a slow simmer. Add the roasted peppers, stock or water, and bay leaves. Bring to a
simmer again and cook over a medium-low flame for 20 minutes or so.
4. Remove soup from heat and discard the bay leaves. Blend with an immersion blender until
the soup has reached a consistency you like, adding more water or stock if your soup is too
thick.
5. Add more seasoning to taste and serve with a drizzle of the parsley pesto and some toasted
pine nuts, and, if you're smart, a grilled cheese on the side.

make the pesto
This one is simple.

1. Add all pesto ingredients to your blender. Blend until smooth, adding more olive oil as needed.
2. Drizzle over soup and eat.

Recipe courtesy of Veggie Society.
Odd Bits Pie, Ryanne Harper
Whatever you have handy pie
A celebration of leftovers and odd bits

This recipe – if you can really call it that – is a great for those times when you have a
little bit of this, a little bit of that, and maybe a stray carrot or two that need to be
eaten. The best part is, by far, the crust. I use a hot water crust method that is both
easy and makes a delicious, flaky crust.

For the Filling

•    White beans
•    Mushrooms
•    Carrots
•    Onion
•    Bok choy
•    Yellow bell pepper
•    Garlic
•    Liquid aminos
This is just what I used for this particular pie. You can use whatever you want for
your filling. The key is to make it ahead of time so it isn’t piping hot when you pour it
into your crust, and you don’t want the filling to be too wet.
I threw all my veggies in a food processor, sauteed them in a pan, added my leftover
cannellini beans and my seasoning, and cooked until the carrots were soft.

Crust Tip from an Amateur
Here’s where you have to use a little judgement. I am terrible at rolling out a thin,
even crust. I can’t get the hang of it, so I typically end up with a thicker crust.
Because of that, I double the crust recipe.
For the Crust
•    2 cups spelt flour*
•    ½ teaspoon salt
•    1/3 cup water
•    ¼ cup coconut oil
•    ¼ cup olive oil
•
*I use spelt flour or a mix of spelt and oat flour, but any flour should work just fine.

 Put your flour and salt in a bowl and set aside. Add the water and the two oils to a
small pot and bring to a boil. Be careful. I have let mine boil a little too long and the
oil started popping. Once your oil and water mix is boiling, carefully add it to your
flour and salt mixture, stirring with a wooden spoon. Stir until it’s combined. Once
the dough is cool enough to touch – it should still be warm, just not hot – divide it
into 2/3 and 1/3 sections. Roll the larger portion out and carefully place it in a
springform pan. It will probably tear but that’s okay, just use a bit of dough to patch
any holes. Fill your tin to the brim with filling and get ready to roll out your top crust.

                   Again, I am not great at rolling out a nice, thin,
                   even crust, so I did the best I could and made
                   circles. It looks artsy and fun, and comes with
                   the added benefit of providing a vent for the
                                    steam to escape.

If you do a solid top crust, you’ll need to create a steam vent by slicing a little X in the
center of the pie.

Bake for 60-75 minutes at 350.

 Remove from the oven and carefully unhinge your springform pan and remove the
ring. I like to serve my pie on the base of the pan to keep from moving it around a
bunch. You are welcome to transfer it to a prettier dish.
FINANCING THE
RURAL LIFESTYLE.
FARMS | HOMES | LAND | EQUIPMENT
LIVESTOCK | STORM SHELTERS | & MORE
800-444-3276
myaglender.comTHE NEXT GENERATION OF ANIMAL MANAGEMENT Repairs and maintenance can feel like they will never end. Gallagher’s line of electric fencing and weighing products can make all the difference. And Gallagher is always ready to provide on-farm assistance. Because at Gallagher, our commitment to making your job easier is never-ending. The W-0 Weigh Scale and Gallagher Animal Performance App S100 Solar Fence Energizer Turbo Wire S200 Solar Fence Energizer To purchase, or find more information, visit your local farmers co-op branch location.
STAYCATION                                     Ryanne Harper
explore the
outdoors
Over the Thanksgiving holiday, I decided to skip the black Friday madness and hit
the trails for an entirely different kind of madness. My husband and I took a drive
to Compton to tackle Hemmed In Hollow. Hemmed In Hollow is a steep 2.7-mile
descent into a, well, hollow. It’s beautiful. Here’s the thing I often forget about,
after you get down there, you have a 2.7-mile ascent to get out. Hemmed In Hollow
is like nature’s stairmaster, and it’s awesome. Here are a few things I learned on my
maiden voyage:

                                                         Hemmed In, Ryanne Harper

                        Trail, Ryanne Harper
Trekking poles are your friend. Usually, I’ve very in to making things more difficult for myself. Not this time. Trekking poles are a game changer, particularly on the way up. Having that extra point of contact really helps when climbing the bigger steps. Wear layers. I’m a fan of layering anyway, but in this case it’s a necessity. As you hike down, you’ll warm up, but there is a significant temperature drop – 15-20 degrees, probably – when you drop into the hollow. Enjoy yourself. Give yourself time to hang out in the hollow. First of all, it’s really cool. Secondly, you have a long, steep trek ahead of you. Take some time to really check it out before you head back up. Your thighs will appreciate the rest. Hemmed In Hollow is rated as “hard” on All Trails, which I would say is accurate. Before heading out, you’ll want to be sure you’ve given yourself plenty of time to get down and back before it gets dark. There is no camping allowed, so don’t weigh yourself down with a heavy pack. All you’ll need are your trekking poles, your sense of adventure, and good company. Conversation distracts from the fact that you’re climbing what feels like one million stairs. We discussed which character from Lord of the Rings we would be. I am one hundred percent a hobbit, and not even a main hobbit. I’m one of the “let’s stop for second breakfast” hobbits, and I’m okay with that. My husband fancied himself a Strider. Bless him. No one is Strider. If you’re up for an adventure, head to Compton. It’s a beautiful area full of trails of varying difficulty. If you aren’t, stay home and watch the Lord of the Rings trilogy; it will take roughly the same amount of time.
travel tips
SAFE COLD WEATHER DRIVING
Robb A. Elliott
Training and Compliance Manager
I would like to begin by wishing everyone a very Happy New Year. I hope everyone
had a great Thanksgiving and Christmas. As we move from the holiday season into
the beginning of travel season, we must take time to remember some very important
safety and travel rules for traveling in cold weather.
Let’s begin by remembering the most important rule of all. If the weather is too bad
or is going to get bad before you can reach you destination safely, STAY HOME! If you
can, postpone your trip by a day or two to avoid the cold/winter weather.
Once you have decided to travel, you need to look over your vehicle. Is it
mechanically sound and able to make the trip? If your vehicle is not in good shape,
you should consider either a rental or a loaner.
After deciding what you will be driving, there are a few things you should do to
prepare yourself and your vehicle. According to AAA, NHTSA and OSHA you should
follow these guidelines for your car.

Be sure to check the following:
• Tires - check for wear and proper inflation. Also, check your spare tire.
• Battery – check for age and any corrosion or leaking that could cause the battery to
fail.
• All fluids – be sure the antifreeze is at an operating temperature level of where you
will be traveling.
• Wiper blades – look for signs of wear.

Be sure to replace, repair and/or fill as needed. It never hurts to take an extra gallon
of washer fluid or quart of oil with you on the trip. Just in case.

                now that your vehicle is in order,
                let's talk about you.
a few general safety items you will want to include for your trip: • A flashlight with extra batteries. • A small battery powered radio and, yes, they are still available - don’t forget the batteries. • Extra battery back-up/charger for your cell phone and other electronics • Small shovel • Tire chains • Chain or recovery strap for towing • Road flares or flashing lights to signal for help • Old fashioned road maps of the areas you will be traveling through • A compass • Package of water proof/wind proof matches • A whistle - the pea less kind are louder • Good quality first aid kit • Tools • Jack • Bag of sand or kitty litter • Ice scraper and/or de-icer • Roll of paper towels or shop towels • Five-gallon bucket with a lid. You can use the bucket to store the small emergency items in. Also, be sure someone on both ends of your trip have your travel plans so they will know if they need to start looking for you. Stay in touch with your contact people and make them aware of any changes to your travel plan. The most important thing to remember is to have some fun and enjoy your friends and family. Taking the time to prepare on the front end of a trip for something that may never happen will pay you great return if something does go wrong and you find yourself faced with a survival/emergency situation. Wishing you safe and happy travels.
Meet the team
An Introduction to Your Local Purina
Specialists
Ryanne Harper

The Coop’s partnership with Purina is one that goes back many years. Purina’s
mission to provide the very best in animal health goes hand-in-hand with our
mission of providing quality services and supplies to members and non-members
alike.
But what happens when you need a little extra help with your horses or cattle?
That’s where Christi Keeler, Ty Cunningham, and Dr. NT Cosby come in.
If you’ve visited any of our locations or special events, it’s likely you’ve had the
opportunity to meet the three of them. Involved at all levels, your local Purina team
is here to help.

                                      Christi has worked for Purina for nearly three
                                      years, she’s a Sales Specialist, working with all
                                      species from horses, cattle, goats, and sheep.
                                      Having grown up on a cattle operation and
                                      agriculture equipment business in Northern
                                      Oklahoma, Christi has over 20 years of hands-
                                      on cattle industry experience in cow/calf,
                                      grower, stocker, and feedlot production.
                                      Through her work with Purina, Christi strives
                                      to provide solutions for the Coop customers
                                      while bringing value and products to enhance
                                      the overall performance of animals.

Christi’s goal is to serve the Coop’s customers by farm gate visits: evaluating body
condition scores of cattle and horses, assist with feeding programs, and providing
information to overcome obstacles the customer faces.

Christi does what she can to help and, when she can’t, she calls on her colleagues.
Ty Cunningham, our regional Senior Equine
Technical Specialist, grew up on a 2000-acre
ranch in Oklahoma. He spent his youth not only
helping with the 100+ head of cattle, but also
raising, showing, and breaking horses. He
attended NEO and OSU on livestock judging
scholarships. Ty graduated from OSU with a
degree in Animal Science. He spent a few years
teaching ag before joining Purina in August of
2010.
As we prepare for colder weather, Ty stresses the
importance of ensuring your horses have fresh,
clean water and access to a salt block. Horses
need water to avoid dehydration and colic, which
is abdominal pain and discomfort. If you keep
your horses outside, the best thing you can do
for them is have a tank heater so their water
doesn’t freeze and provide them a wind break.
He also had some advice for those folks who have brood mares. Keep their weight
up. After a mare foals, her calorie needs triple, meaning she’s going to require more
feed, especially if you want to take advantage of foaling heat. The gestation period of
horses is 11 months, and mares are ready to breed again in as little as 5 days after
foaling! 5 days! But, to pull it off, she needs to be in good body condition, so keep
feeding.
fact vs. fiction: horse edition
Feeding corn increases body temperature, keeping your horses warmer in cold
weather.
false
Corn makes the horse sweat, leaving you with a horse that is not just cold, but cold
and sweaty. Excess hay, as much as 1-1.5% of the horse’s body weight, is needed to
keep weight and core body temperature up.Illinois native Dr. NT Cosby earned a Masters in Meat
Science from the University of Florida before pursuing
his PhD from Colorado State. After graduation, he
joined the Purina team where he has been ever since. A
cattle specialist, he’s spent the last 25 years traveling to
farms, offering assistance to sales specialists, coops,
and customers all over Arkansas, Eastern Oklahoma,
Missouri, and Kansas. Dr. Cosby offers advice on how to
increase efficiency in your cattle operation and how
Purina products may help you achieve your goals.
His short-term advice for getting your herd through
winter is to keep the body condition up by making sure
they have plenty to eat and access to fresh, clean water.
March is the toughest month for cows in our region. It’s wet, it’s windy. Cows are
working hard to stay warm during the cooler nights but are impatient to get out and
graze during the warm days. It’s a simple supply and demand issue. Cows want the
grass; it just hasn’t grown yet. Continuing to feed is crucial to their health.
Dr. Cosby’s best advice wasn't season specific. “Sometimes we make short term
decisions on our cow herd based on the economics we’re seeing at the time, but the
long-term outlook for cattle economics over the next four to six years are very, very
positive. If we short change cows now, we may not have as many calves to sell when
prices are good.”
fun fact: cattle edition
Early green grass is not a reliable sign that spring is here.
Here in Arkansas and Oklahoma, we can see green grass as early as late February.
Like us, cows are anxious to shake off the gloom of winter and dive head first into
spring. For them, that means grazing on grass instead of hay. Here's the thing, a
cow can eat up to 100 pounds of spring grass in a day. 100 pounds. There simply
isn't enough of it to go around, so it's crucial that you continue supplemental
feeding well into spring.Ag contributes
around $16
Billion to AR's
economy.
QUICK 97% of AR's
49,346 farms
AR
are family-
owned.
AG AR is home to
14.5 million
acres of
FACTS
farmland.
Arkansas is
1st in rice
production.
Arkansas is
3rd in cotton
Statistics available from production.
Farm Bureau.THE FUTURE OF FARMING
An Introduction to FFA
Ryanne Harper
Lakan Brumley
As someone who did not grow up in
the world of agriculture, I am
clueless as to how people get
started. Do you wake up one day and
decide to buy a cow? Probably not.
Are you born into it? Often, yes. But
not always. We didn’t have an
introduction to agriculture or FFA
program at my school. Although, in
my career orientation class, it was
determined that I was suitable for
only two jobs: farmer or farmer
assistant. Based on all the evidence
thus far, this assessment was dead
wrong. I am living proof that, no,
aptitude tests are not always
accurate and, as a kid, you should
pursue your interest to get a feel for
what areas you’re gifted in and what
will, ultimately, help you not only
make a living but also make you
happy. That’s where Lakan Brumley
FFA STATS
comes in; she’s a local agriculture 735,038 members across all
teacher/FFA advisor who graciously
agreed to answer my questions 50 states, Puerto Rico, and
about FFA and, more specifically, the
FFA program at the Alma Middle the U.S Virgin islands.
School where she teaches.
Members ran in age from 12-21R: How long have you been teaching? L: I am currently in the middle of my third year as a teacher. I began teaching in 2019 after graduating from Oklahoma State University with degrees in agricultural education and animal science. I was hired at Alma to start/re-start up the Alma Agricultural Education and FFA Chapter after it had been non-existent for several years. R: What is FFA? L: FFA is a leadership organization intertwined with Agricultural Education (CTE) courses at the high school level. Formally called the Future Farmers of America, it is now recognized as the National FFA Organization. R: When was the program introduced in your school? L: The Alma FFA Chapter previously existed at Alma High School 15-20 years ago; in 2019 the district decided to reintroduce the program to the district and the program and agricultural classes were offered beginning in the 2019-2020 school year. R: What opportunities does FFA offer to kids? L: FFA offers students the opportunity to grow as individuals and leaders and prepares them to achieve success in future careers beyond high school graduation. This includes a multitude of opportunities for community service, competitive public speaking events on agricultural topics, competitive contests that focus on an occupational area in the agriculture industry and a great deal of opportunities for leadership positions and conferences. R: What types of events do the students participate in, and what are you most looking forward to in the year to come? L: We have several Alma FFA members who exhibit livestock on the county and state level. FFA members at Alma participate in a variety of community events throughout the year and put a large emphasis on finding ways to serve and give back to our local community. We have several students who will be competing in competitive public speaking events in the spring of 2022 and a large group of members that will be attending leadership conferences and conventions in the upcoming spring as well. The Alma FFA Chapter Officer Team is elected at the end of each school year.
This person then leads/plans the events for the next year during the summer
months. Included in the events they plan are monthly Alma FFA Chapter meetings
that strengthen relationships among our program’s members. I am excited for the
growth we are experiencing in our program, the facilities that our district is working
to build our students in order to expand the opportunities they have during their
time in FFA, and I am looking forward to taking our students to the Arkansas State
FFA Convention this spring in Hot Springs, AR. Like many things, the AR State FFA
Convention has only occurred in a virtual setting since we restarted the program in
2019. This spring will be the first time Alma FFA members get to experience it in
person.

R: As a teacher, what do you hope your kids get out of their time in FFA?

L: As a teacher/FFA advisor, I want my students to develop confidence in themselves,
learn the value of community involvement/service, develop the skills that will lead
them to achieve success in their future endeavors, and make connections and
friendships that will last them beyond their time in high school.

Former FFA student and current Coop CEO, Matt Crabtree, remembers his time with
FFA, and those who helped him along the way, fondly.

    “I can remember those who helped me along the way, and
  I’m extremely thankful for their contribution and investment
   into my life. These young people are the ones we need to be
  training and encouraging. Support can come in many forms;
  it may be something as simple as lending equipment, giving
    advice, or supporting them by being in the bleachers when
        they show. I promise you these gestures aren’t going
                             unnoticed.”

By helping to kickstart the Alma FFA program, Lakan Brumley is doing just that,
investing in her students and inspiring them to reach their potential. I can’t wait to
follow along and see what these kids do come show season.
,
Specializing in only crop insurance. It s all we do!
Please Call for Quotes
Covington OK Office Van Buren Arkansas Office
Becky Eggers Heath Robert
580-554-0597 479-651-7890
BECIinc@PLDI.net AgInsurance.Heath@gmail.com
Find us on @ BECICropInsurancecrop insurance
What Exactly Is it? And Why You May Need It.
Ryanne Harper
Becky Eggers
Becky Eggers, owner and operator of B.E.C.I. Becky Eggers Crop Insurance, has been
in the insurance business for years. But what exactly is crop insurance? Crop and
livestock insurance protects the American farmer against declining market prices in
their crops and livestock. In its simplest terms, crop and livestock insurance protect
farmers by ensuring that, if they don’t make a crop or the market prices crash on
livestock, they survive to try again next year. But that isn’t all. Crop insurance doesn’t
just protect against the market. Like car and home insurance, crop insurance helps
out during times of natural disasters as well. Farmers choose the level of coverage
they carry, working with Becky and her family to get a policy that’s right for them.
Speaking of Becky’s family, B.E.C.I. is a family business, with Becky, her son Heath
Roberts, and her daughter-in-law Felicia Roberts all pitching in. Becky’s grandson
Zach has recently taken an interest in a different family business, becoming the
fourth generation to work the family farm in Oklahoma.
Becky and her family not only understand the need for protection from an insurance
perspective, but from a farming perspective as well, giving B.E.C.I. a unique angle, a
relatability to their customer.
Becky and her family work hard to provide crop insurance for farmers in Arkansas,
Oklahoma, as well as parts of Texas, and southern Kansas. Specializing in all aspects
of insurance such as crop, irrigation, livestock revenue protection, livestock
transportation, and property, Becky, Heath, and Felicia are prepared to help you
protect your farm and your family.
for more information, check out their facebook page.Welcome to The Farm
Watch later Share
Watch onPrepping an outdoor animal shelter
for winter
Ryanne Harper
With winter weather on the horizon, it’s important to think about the health and
safety of your outdoor pets. Now, if possible, you should bring your dogs in when
temperatures drop. But, if you can’t, you can still provide them with much-needed
weather protection by properly prepping their outdoor living space.
Essentials for keeping your animal happy and healthy:
Bedding
Do not use blankets as bedding. I know that seems counter-intuitive, but
the blankets get wet and can freeze, causing the animal to actually be
colder.
So, what should you use?
Cedar shavings are always a good bet. Like keeping moths away from your sweaters,
cedar also keeps fleas and other bugs at bay, making your outdoor dog shelter comfy
and cozy.
Straw is another alternate for bedding.
But, wait, what’s the difference between
hay and straw?
Hay is a crop that is grown, harvested, and used to feed cattle, horses, and other
livestock. Straw, on the other hand, is a byproduct of a grain crop, wheat, for
example. The key to keeping your outdoor pets warm is to keep them dry. Straw’s dry
exterior actually repels water while hay becomes a soggy mess. Hay is also more
likely to cause allergies than straw, making it unsuitable for outdoor bedding.A roof and a wind break.
Keeping the wind off your outdoor pet will go a long why toward keeping
them comfortable in the colder months.
A nice, sturdy dog house is the obvious choice. Check your local Coop for different
sizes and styles.
Fresh water.
This seems obvious, but it bears repeating. Water is essential. Even more
so than food.
The key to watering in the winter is to ensure your outdoor animals have access to
clean, fresh water that isn’t frozen over. Check their water a couple of times a day to
make sure it's accessible to them and clean.
Whether you’re
providing shelter for the
neighborhood street
cats or have a stubborn
dog who just won’t come
in, taking these steps
will ensure they stay safe
and protected through
the winter months.
Betty, Lauren ThomasIf your pet is accustomed to
the finer things, visit your local
Coop for a selection of beds,
toys, and treats.
Roscoe, Ryanne HarperKitten your hands dirty DIY Cat Garden Ryanne Harper Covid-19 inspired a lot of people to delve deep into the world of houseplant ownership. You love your plants! But, unfortunately, so does your cat. Instead of fighting a constant battle with your feline friend, why not create them a garden all their own? It’s easy. All you need is the right container, some plants, and a little knowledge regarding plant toxicity. But let’s do the fun stuff first. containers I don’t know much, but I do know that cats love to sit right in the middle of two things: plants and boxes, making window boxes the obvious choice for your cat garden container. If window boxes don’t suit your décor, or maybe your cat is a little… rotund, any larger planter will work. plants & herbs For the perfect cat garden, I’d start with sedum. Sedum is a beautiful, low maintenance Pepper and Snake Plant, Beth Price ground cover. So low maintenance you don’t even have to plant it.
Seriously. Simply toss it where you’d like it to grow and it roots itself. I use it in my
outdoor beds, but it works really well indoors as well. Once it grows, it creates a nice
fluffy bed, perfect for doing a little sunbathing. Once you lay the foundation, you can
add the fun stuff.
Asparagus ferns are fun, hearty, and can survive just about anywhere. Cats are
hunters. Giving them something tall to hide behind – like an asparagus fern – allows
them to tap into their instincts while also staying out of your fiddle leaf fig.

Herbs are a nice addition to your cat garden as they are all safe, and you can enjoy
them, too! Catnip and cat grass are the obvious choices. Keep it simple with these
classics, or go a more controversial route with cilantro. When it comes to humans,
cilantro is probably the most divisive of all the herbs, but cats seem to universally
enjoy it. So, don’t hesitate to add some to your cat garden.

                                                      It is well known that cats
                                                      love to chew on plants. Make
                                                      the most of this habit by
                                                      including cinnamon and
                                                      thyme in your cat garden.
                                                      Once grown out, cinnamon is
                                                      quite pretty and you get a
                                                      nice aroma when your cat
                                                      chomps on the blooms.
                                                      Thyme is easily digestible,
                                                      making it perfect for your
                                                      cat.
                       Pepper and McCoy, Beth Price

don't you know that you're toxic?
Many of the most common houseplants are toxic to cats, dogs, or both. Before you
bring any plant in to your home, please check that it is safe for animals. Again, cats
love to eat plants. Make sure what you’re bringing in is safe for them.
Cats are often solitary creatures. Giving them a space all their own where they can
graze and bask in the sun will be a welcome treat – and hopefully keep them out of
your philodendron.
Winter Car Prep Checklist - GEICO
Watch later Share
Watch onYou can also read