Clinical Skills Exam (CSE) - EXAM DATES: August 2022 - May 2023
←
→
Page content transcription
If your browser does not render page correctly, please read the page content below
Clinical Skills Exam (CSE®)
            SITE INFORMATION & EQUIPMENT LIST

EXAM DATES:
August 2022 – May 2023

                                                12/06/2022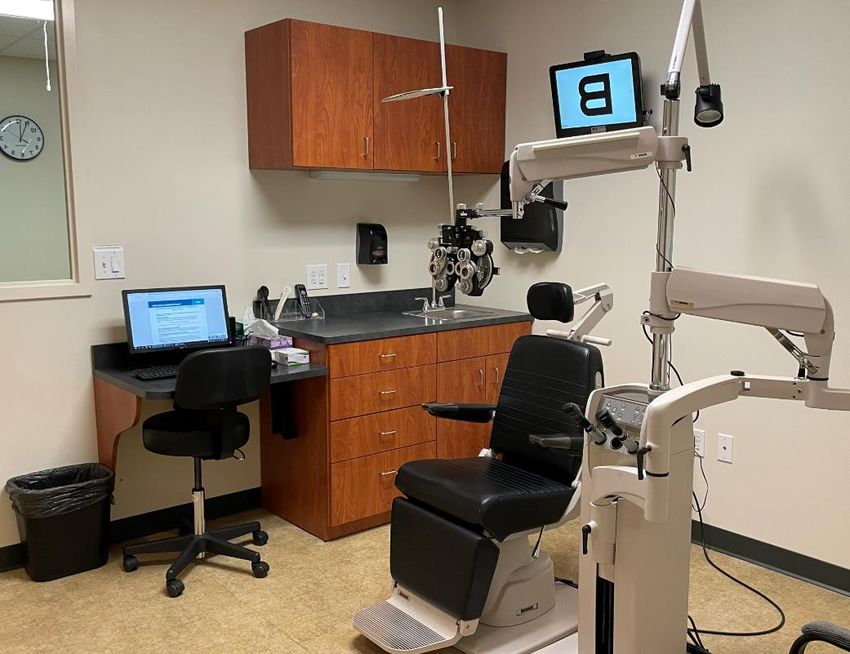
The information listed in this CSE Site Information and Equipment List is for informational purposes only. There
may be additional equipment or supplies on-site during the exam that may not be reflected in this manual.
Additionally, equipment and supplies may change without warning.

This information is not intended to prepare candidates for the exam, but to provide a general overview of
equipment and supplies used during the exam. Candidates are reminded to thoroughly review the evaluation forms
and candidate guide to adequately prepare for the Part III, Clinical Skills Examination.

         NCCTO SITE INFORMATION & EQUIPMENT LIST OVERVIEW
NCCTO EQUIPMENT QUICK REFERENCE:

 Station 1
     •   Reliance 6200-L Chair
     •   M&S Smart System II 20/20 Acuity Chart
     •   Marco 101 Lensmeter
     •   Blood Pressure Simulator Life Form 01095
     •   Welch Allyn 3.5v 41100 Transilluminator

 Station 2
     •   Reliance 6200-L Chair
     •   7900-IC Floor Stand
     •   Haag-Streit 900 BI Slit Lamp Video System
     •   Volk G-3 Three-Mirror Glass Gonio Fundus Lens with Flange

 Station 3
     •   Reliance 6200-L Chair
     •   7900-IC Floor Stand
     •   Reichert 11636 Minus Cylinder Back Illuminated Ultramatic Rx Master Phoropter Refractor
     •   M&S Smart System II 20/20 Acuity Chart
     •   Welch Allyn 18245 Elite Streak Retinoscope

 Station 4
     •   Reliance 6200-L Chair
     •   7900-IC Floor Stand
     •   Haag-Streit 900 BI Slit Lamp Video System
     •   “Modified” Keeler BIO Vantage Plus Slimline Wireless Plus Indirect System with +2.00 Oculars
     •   Volk 20D Lens
     •   Volk Digital Clear Field Lens
     •   Volk VDGTL1 Digital High Mag Imaging Lens
     •   Volk Digital Wide Field Lens
     •   Volk 78D & 90D Lenses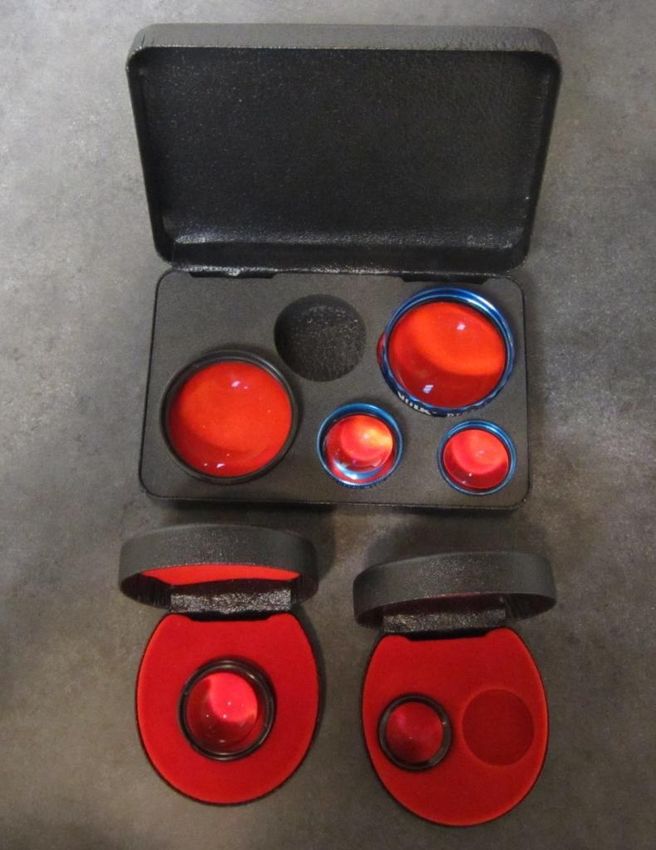
ALL STATIONS
                       The following information is identical in all exam rooms

MAIN OVERHEAD LIGHT SWITCH, DIMMER LIGHT SWITCH, AND SLIDER
Located behind the computer workstation
Location of this switch is the same in EVERY exam room

Main overhead light switch is located on the LEFT
Dimmer light switch is located on the RIGHT
Slider to adjust dimmer brightness is on the RIGHT side of the dimmer switch

                                                            Dimmer
                                                          Light Switch
    Normal room illumination is              Main
    when the main overhead                Overhead
    lights are on                        Light Switch
                                                                               Slider to adjust
                                                                               dimmer brightness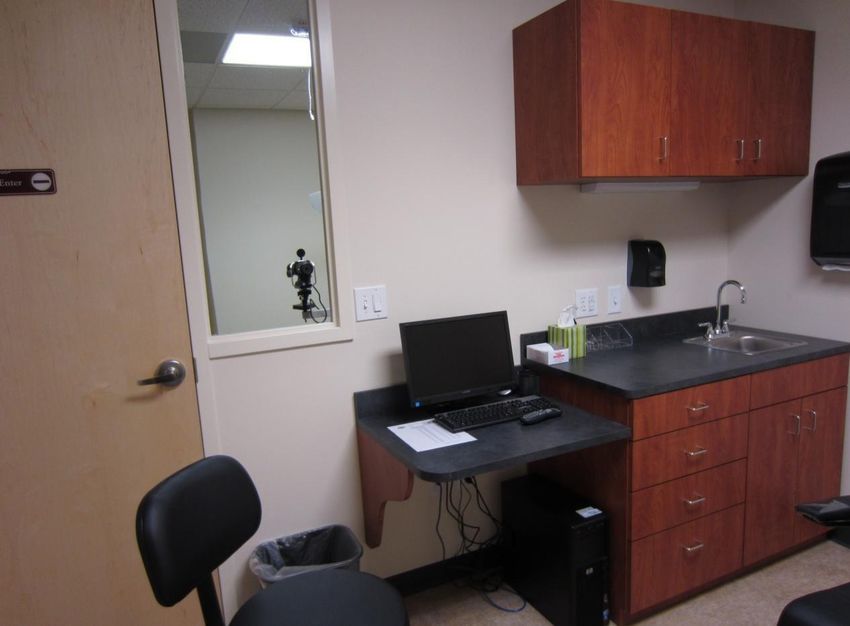
ALL STATIONS
                      The following information is identical in all exam rooms

UNDER-CABINET LIGHT SWITCH
Located above the sink counter, by soap dispenser
Location of this switch is the same in EVERY exam room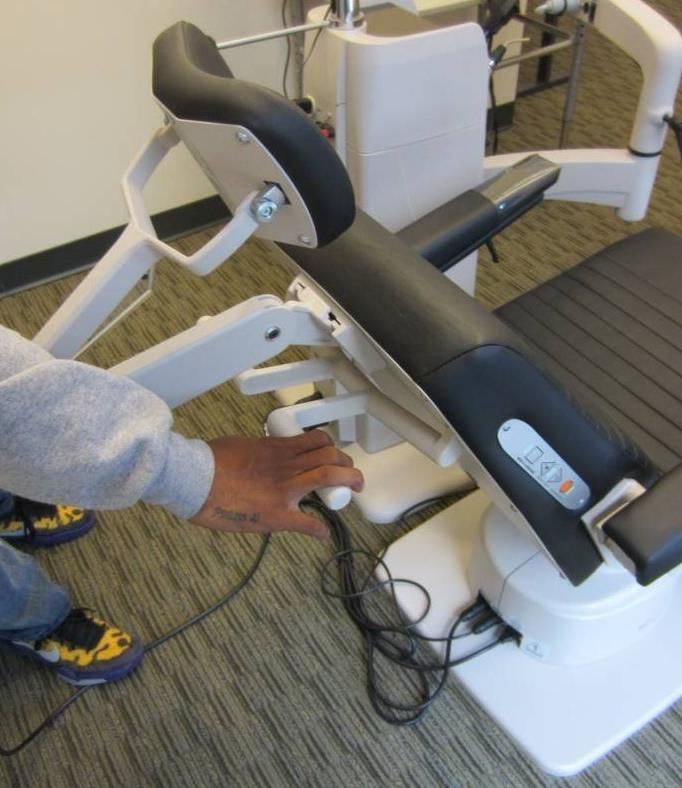
ALL STATIONS
      The following information is identical in all exam rooms

Exam Chair Overview
  Reliance 6200-L Chair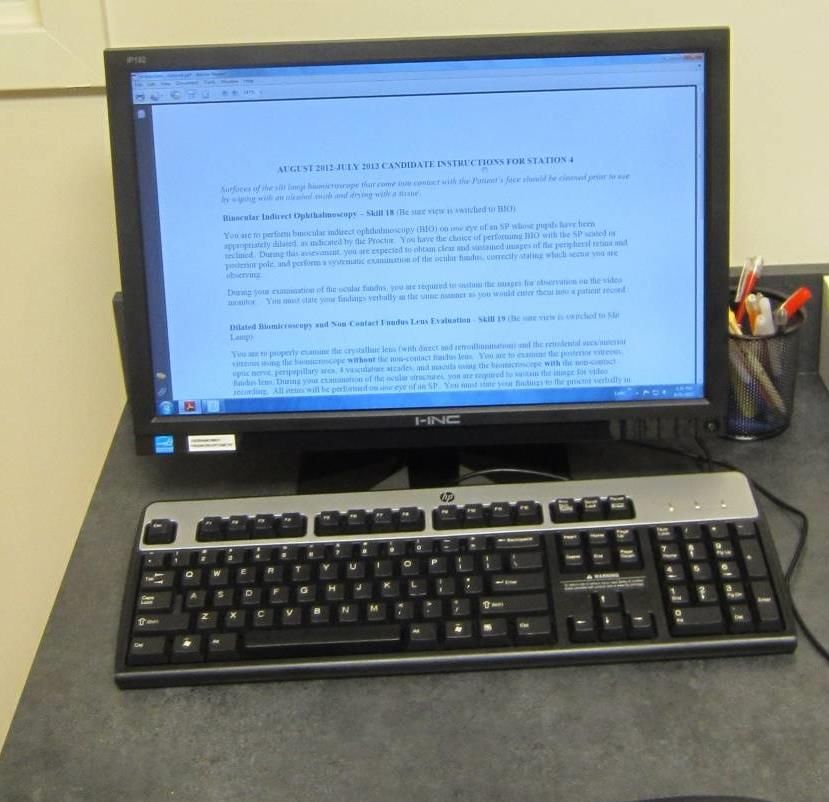
ALL STATIONS
The following information is identical in all exam rooms

                Exam Chair Overview
                    Reliance 6200-L Chair
                    To recline the exam chair:
     Pull DOWN on the lever located on the back of the chair
           Lower the chair and position appropriately
     Release the lever while lowered to lock the chair in place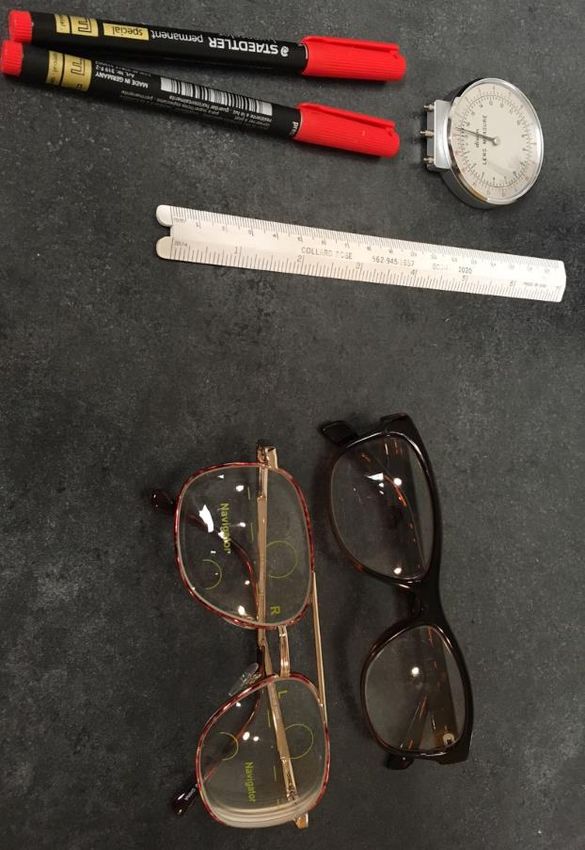
ALL STATIONS
                     The following information is identical in all exam rooms

                                                                   Computer Workstations
                                                                  Displays station instructions
                                                                 Not an item-by-item list, but a
                                                                brief overview of skills expected
                                                                        to be performed.

                                                                  Turn the monitor on/off by
                                                                pressing button underneath the
                                                                      bottom right corner

                                                                         Repeat Policies
                                                                Posted on the back of the exam
                                                                   room doors, next to the
                                                                    computer workstation
Pens & pencils are                Band-Aids® are
 provided in each             available in all rooms in
    station for                the event of an injury
  candidate use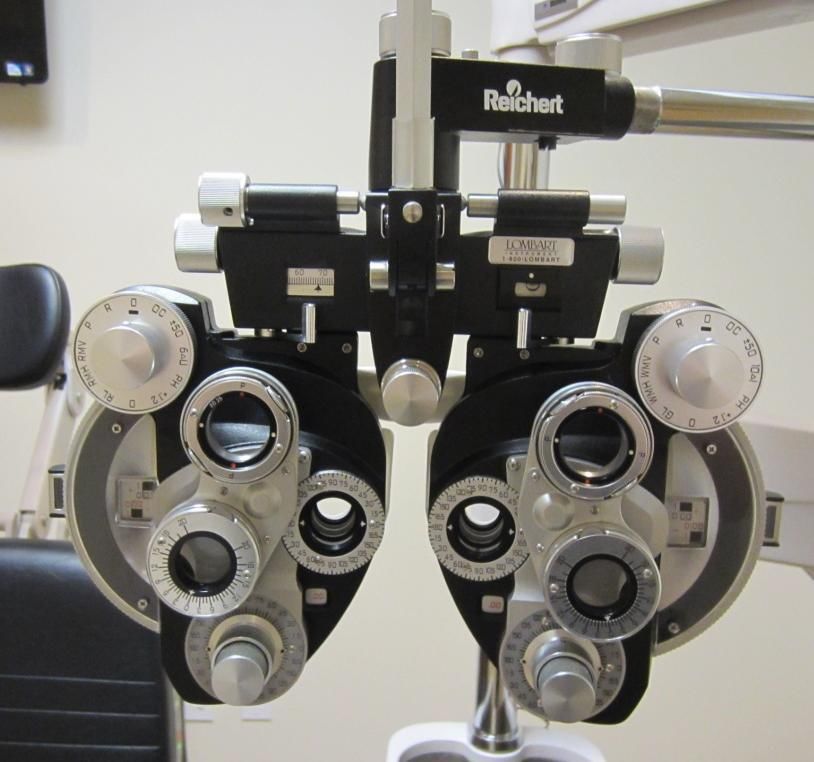
ALL STATIONS
                The following information is identical in all exam rooms

A countdown clock will be available on the exam room computer monitor for candidates to use. Use of the
countdown clock is optional.

Countdown clocks on the computers do NOT officially determine a candidate’s time.

                                                  Start     Decrease size   Increase size   Reset timer

Testing officially begins when you hear the announcement “The exam cycle has begun.” Testing ends
when you hear “The exam cycle has ended.” Candidates wishing to use the countdown clock in the rooms
must press the arrow button indicating START to begin the countdown clock. There may be a delay
between when the announcement plays and when a candidate presses START, thus the time remaining
may be less than what is displayed on the computer (15 minutes for Station 4). Using the countdown
clock in the room is optional and assists in determining the amount of time remaining in the station. Again,
these clocks are not the official time keepers of the exam.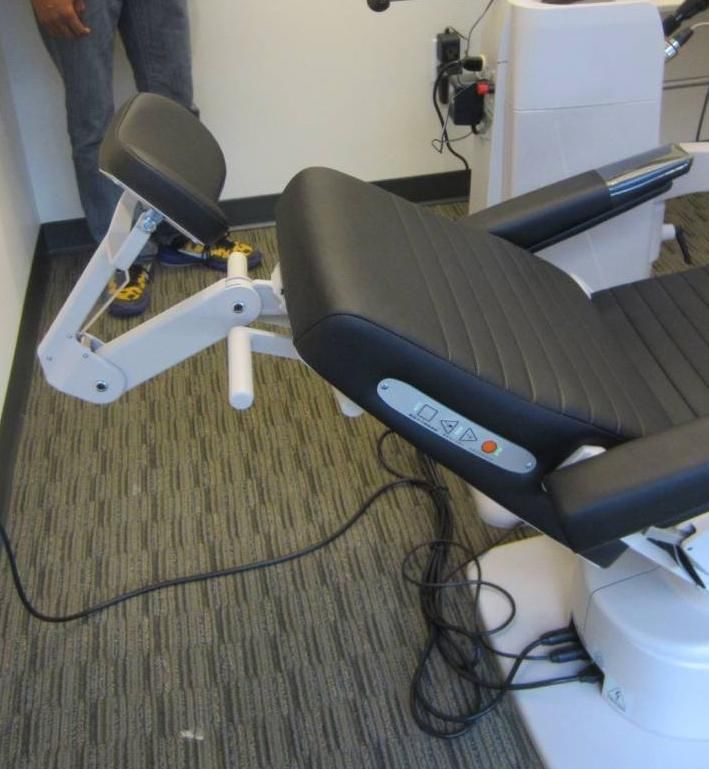
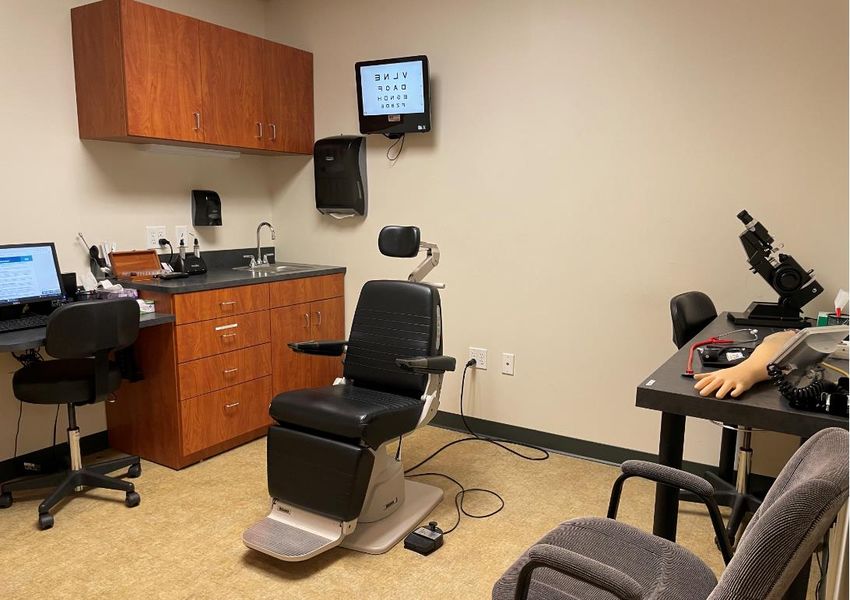
STATION 1 EQUIPMENT & SUPPLIES

                                                                Station 1 Room View

           Transilluminators                               M&S Acuity Chart Remote Control
Welch Allyn 3.5v 41100 Transilluminator                   (see Station 3 for detailed remote information)
                                            Prism Bars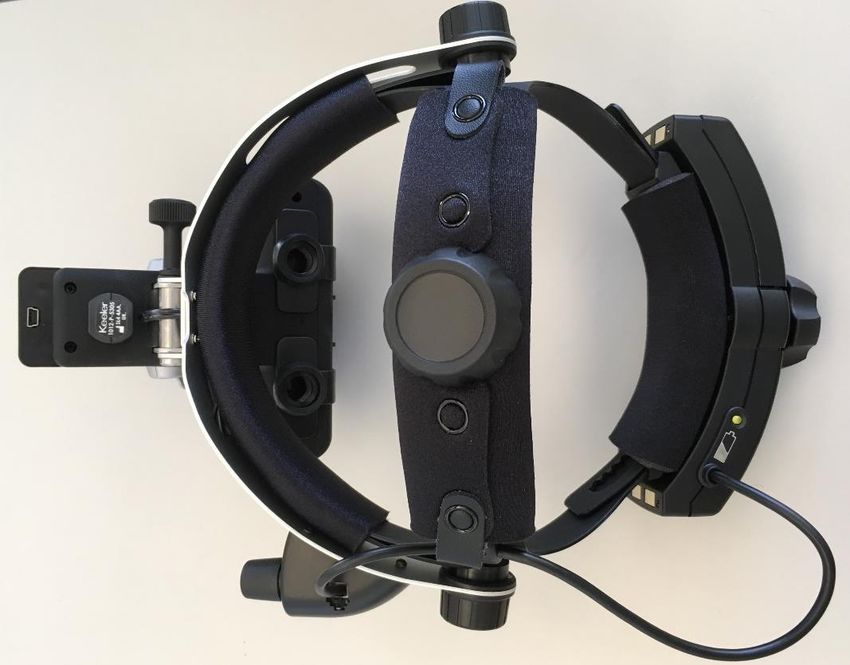
STATION 1 EQUIPMENT & SUPPLIES
                Fixation Targets
                Rulers

Cover Paddles                                  Fixation T rge Third
                                             Line from h Top is the   Reverse Side is
                      Pen Lights                                       the PD Ruler
                             Tape Measure            20/40 lin

                                            20/40

                                            BLNCS

            Silver/Gold Wands

                Alcohol Wipes

                  Tissues
STATION 1 EQUIPMENT & SUPPLIES
Simulated Blood
Pressure Arm &
Equipment Overview
Blood Pressure Simulator Life
Form 01095
The simulated arm is attached to a control box. The display of the control box
is partially covered. Do not lift the cover. Lifting the cover will result in failure
of the Blood Pressure Skill.
Candidates will need to turn on the box before pumping the BP cuff.
The power button is located at the top right corner of the control box.
As soon as the power button is pressed, the machine will be ready to
use.
Please note that the BP machine turns off without use, so candidates
should turn it on right before performing the skill.
Candidates can verify the machine is turned on by viewing the letters in
the corner of the display.STATION 1 EQUIPMENT & SUPPLIES
Lensmeter & Lensometry Supplies
Marco 101 Lensmeter
Candidates are responsible
for focusing and zeroing the
lensmeter
The pair of progressive lenses will
have necessary markings needed to
obtain adequate findings. Glasses will
vary for each examSTATION 2 EQUIPMENT & SUPPLIES
Station 2 Room View
All Station 2 skills are performed using the
Haag-Streit 900 BI Slit Lamp Video System
CAMERA IS ON THE LEFT OCULAR
For optimal views, candidates
must use focus rod to focus the
oculars
Non-functioning buttons
Magnification:
10X or 16X
Power: (left) (right)
blinking green = standby;
solid green = on
RheostatSTATION 2 SLIT LAMP SETTINGS OVERVIEW
Bright White-No Filters
Top pin fixed all the way to the left
Blue Filter
Circular dial turned all the way to the left so “B” is
displayed
Yellow (Wratten) Filter
If the lever is at the solid white circle, the filter is IN
If the lever is NOT at the solid white circle, the filter
is OUTSTATION 2 EQUIPMENT AND SUPPLIES OVERVIEW
Stand light, on/off
Toric Soft Contact Lens
Correct orientation off eye
Correct orientation on eye
OKSTATION 2 SUPPLIES OVERVIEW
Note: The brand of the item may change and be different than what is displayed
Tray
Example of Station 2 supplies set up on the counter ready for use • Tray will contain ready to use, already-
disinfected, gonio lens, tonometer, forceps
• Please keep tray closed until the start of the
exam
• After using the instruments please place on
the clean paper towel
Elbow Rest Gonio Lens
Example
Volk G-3 Three-Mirror Glass
Gonio Fundus Lens with Flange
Collagen Inserts/Plugs
Alcohol Wipes Kim Wipes
TissuesSTATION 2 SUPPLIES OVERVIEW
Note: The brand of the item may change and be different than what is displayed
Cotton Tipped Applicators
Toric Soft Contact
RGP Contact Lens Example
Lens ExampleSTATION 3 EQUIPMENT & SUPPLIES
Station 3
Room View
Reichert 11636 Minus Cylinder Back Illuminated Welch Allyn 18245
Ultramatic Rx Master Phoropter Refractor Cover Paddles/ PD Rulers Elite Streak Retinoscope
Alcohol Wipes
Tissues Kim WipesSTATION 3 PHOROPTER NEAR CARD OVERVIEW
STATION 3 REMOTE CONTROL OVERVIEW

            Guidance for Commonly Used Settings

FNC – “Shift” key provides access to less commonly used
features (FNC + 400 at the same time provides red/green
20/400 target)

LTR – Provides a descending chart of lines of letters. Press
again to randomize the chart

R/G – Red/Green

SGL – Displays a single letter

LINE – Displays a single line of letters

LINES – Displays three lines of letters of the same size

VLine – Displays a vertical line of letters

B – Blank/Black screen (press any button to turn the screen
back on)

CYC – Single line on screen will randomize at regular timing
intervals

Arrow – Displays an arrow beneath the first letter in a single
line - vertical or horizonal

+ – Scroll up in letter size
- – Scroll down in letter size

10, 15, 20 etc. – Select a given acuity level. E.g. 30 = 20/30
Pressing a second time will randomize

Additional Remote Tips

Randomizing – There are several ways to randomize the display:

     1. Press the test mode button again. For example, if you desire to randomize the letters, simply press
         LTR a second time.
     2. Press the size button again. For example, if the top line of the chart is 20/40 and you wish to randomize
         the chart, simply press 40.
     3. If working with a single letter or single line, press the SGL or Line button a second time.

To access a particular size letter or a particular line of the chart, press the numbered button corresponding to it. For
example, to bring up 20/100, press 100.
STATION 4 EQUIPMENT & SUPPLIES
Station 4 Room
View
Stand light, on/offSTATION 4 BIO HEADSET OVERVIEW
“Modified” Keeler BIO Vantage Plus Slimline Wireless Plus Indirect System
• The BIO headset will be hanging on the stand in Station 4
• Without an appropriate working distance (18-25 inches) the target may
appear decentered
FIXED ADJUSTABLE
• aperture • fit behind head
• filter • fit on top of head
• brightness • PD
• circle beam height • Pantoscopic tilt: angle
• +2.00 oculars of ocular to eyes
Knob loosens/tightens
to adjust ocular
distance to eyes
Illumination
will be set by
the SP
Slide to adjust
PD between
48-76 mm
Vertical fit
Turn to tighten or
loosen fitSTATION 4 EQUIPMENT & SUPPLIES
Station 4 Slit Lamp For optimal views, candidates Bright White:
Haag-Streit 900 BI Slit must use focus rod to focus Top pin fixed all the
Lamp Video System the oculars
way to the left
CAMERA IS ON THE LEFT OCULAR
Magnification:
10X or 16X
(left) (right)
Power:
blinking green = standby
solid green = on
Non-functioning buttons
RheostatStation 4 Lens Overview Miscellaneous Supplies
The following lenses are available for Alcohol Wipes
candidate use during
Skill 18 and Skill 19
• Volk 20D Lens
• Volk Digital Clear Field Lens
• Volk VDGTL1 Digital High Mag Imaging Lens
• Volk Digital Wide Field Lens
• Volk 78D & 90D Lenses
Kim Wipes
Tissues
Elbow RestYou can also read


