Load Balancing Microsoft AD FS - Loadbalancer.org
←
→
Page content transcription
If your browser does not render page correctly, please read the page content below

Load Balancing Microsoft AD FS
Version 1.5.0
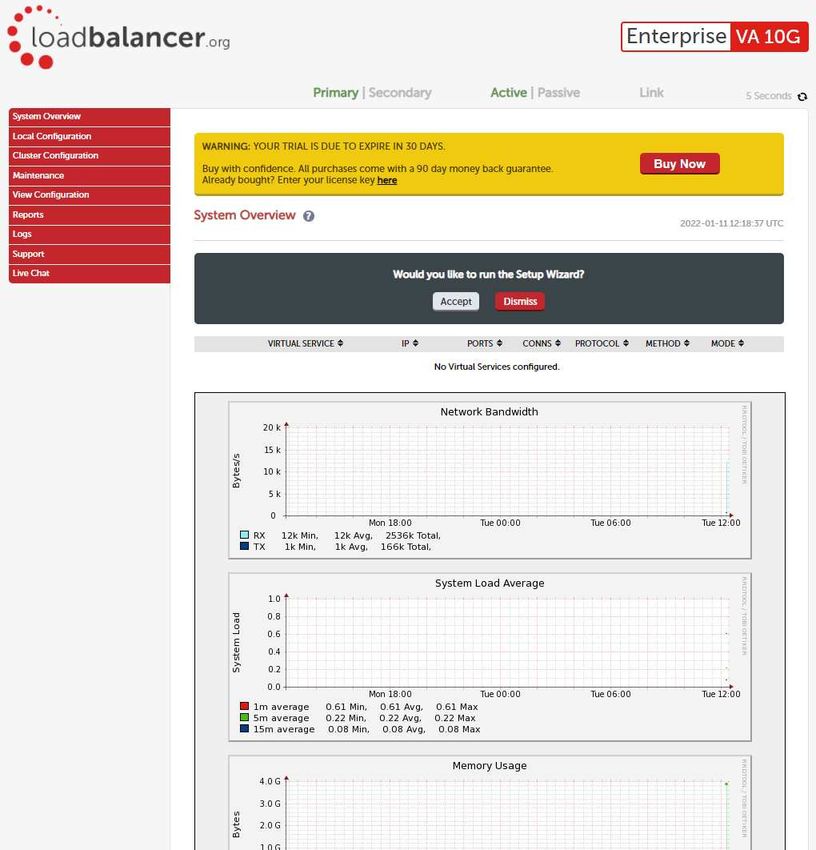
Table of Contents
1. About this Guide . . . . . . . . . . . . . . . . . . . . . . . . . . . . . . . . . . . . . . . . . . . . . . . . . . . . . . . . . . . . . . . . . . . . . . . . . . . . . . . . . . . . . 4
2. Loadbalancer.org Appliances Supported . . . . . . . . . . . . . . . . . . . . . . . . . . . . . . . . . . . . . . . . . . . . . . . . . . . . . . . . . . . . . . . 4
3. Loadbalancer.org Software Versions Supported . . . . . . . . . . . . . . . . . . . . . . . . . . . . . . . . . . . . . . . . . . . . . . . . . . . . . . . . . 4
4. Microsoft Windows Versions Supported . . . . . . . . . . . . . . . . . . . . . . . . . . . . . . . . . . . . . . . . . . . . . . . . . . . . . . . . . . . . . . . . 4
5. Active Directory Federation Services (AD FS) . . . . . . . . . . . . . . . . . . . . . . . . . . . . . . . . . . . . . . . . . . . . . . . . . . . . . . . . . . . 4
    Introduction . . . . . . . . . . . . . . . . . . . . . . . . . . . . . . . . . . . . . . . . . . . . . . . . . . . . . . . . . . . . . . . . . . . . . . . . . . . . . . . . . . . . . . . . 4
    AD FS SSO Scenarios . . . . . . . . . . . . . . . . . . . . . . . . . . . . . . . . . . . . . . . . . . . . . . . . . . . . . . . . . . . . . . . . . . . . . . . . . . . . . . . 4
        Web SSO . . . . . . . . . . . . . . . . . . . . . . . . . . . . . . . . . . . . . . . . . . . . . . . . . . . . . . . . . . . . . . . . . . . . . . . . . . . . . . . . . . . . . . . 4
        Federated Web SSO . . . . . . . . . . . . . . . . . . . . . . . . . . . . . . . . . . . . . . . . . . . . . . . . . . . . . . . . . . . . . . . . . . . . . . . . . . . . . 5
    AD FS Versions. . . . . . . . . . . . . . . . . . . . . . . . . . . . . . . . . . . . . . . . . . . . . . . . . . . . . . . . . . . . . . . . . . . . . . . . . . . . . . . . . . . . . 5
    Role Services . . . . . . . . . . . . . . . . . . . . . . . . . . . . . . . . . . . . . . . . . . . . . . . . . . . . . . . . . . . . . . . . . . . . . . . . . . . . . . . . . . . . . . 5
    How AD FS Works . . . . . . . . . . . . . . . . . . . . . . . . . . . . . . . . . . . . . . . . . . . . . . . . . . . . . . . . . . . . . . . . . . . . . . . . . . . . . . . . . . 6
        Internal Clients . . . . . . . . . . . . . . . . . . . . . . . . . . . . . . . . . . . . . . . . . . . . . . . . . . . . . . . . . . . . . . . . . . . . . . . . . . . . . . . . . . 6
        External Clients . . . . . . . . . . . . . . . . . . . . . . . . . . . . . . . . . . . . . . . . . . . . . . . . . . . . . . . . . . . . . . . . . . . . . . . . . . . . . . . . . . 7
        Other Useful References . . . . . . . . . . . . . . . . . . . . . . . . . . . . . . . . . . . . . . . . . . . . . . . . . . . . . . . . . . . . . . . . . . . . . . . . . . 7
6. Load Balancing AD FS . . . . . . . . . . . . . . . . . . . . . . . . . . . . . . . . . . . . . . . . . . . . . . . . . . . . . . . . . . . . . . . . . . . . . . . . . . . . . . . 8
    Basic Concepts . . . . . . . . . . . . . . . . . . . . . . . . . . . . . . . . . . . . . . . . . . . . . . . . . . . . . . . . . . . . . . . . . . . . . . . . . . . . . . . . . . . . . 8
    Load Balanced Ports & Services . . . . . . . . . . . . . . . . . . . . . . . . . . . . . . . . . . . . . . . . . . . . . . . . . . . . . . . . . . . . . . . . . . . . . . 8
    Persistence (Server Affinity) Requirements & Options. . . . . . . . . . . . . . . . . . . . . . . . . . . . . . . . . . . . . . . . . . . . . . . . . . . . 8
    Server Health checking. . . . . . . . . . . . . . . . . . . . . . . . . . . . . . . . . . . . . . . . . . . . . . . . . . . . . . . . . . . . . . . . . . . . . . . . . . . . . . 8
    SSL Termination . . . . . . . . . . . . . . . . . . . . . . . . . . . . . . . . . . . . . . . . . . . . . . . . . . . . . . . . . . . . . . . . . . . . . . . . . . . . . . . . . . . . 9
    Load Balancer Deployment . . . . . . . . . . . . . . . . . . . . . . . . . . . . . . . . . . . . . . . . . . . . . . . . . . . . . . . . . . . . . . . . . . . . . . . . . . 9
    Load Balancer Deployment Mode. . . . . . . . . . . . . . . . . . . . . . . . . . . . . . . . . . . . . . . . . . . . . . . . . . . . . . . . . . . . . . . . . . . . . 9
7. Loadbalancer.org Appliance – the Basics. . . . . . . . . . . . . . . . . . . . . . . . . . . . . . . . . . . . . . . . . . . . . . . . . . . . . . . . . . . . . . . 9
    Virtual Appliance. . . . . . . . . . . . . . . . . . . . . . . . . . . . . . . . . . . . . . . . . . . . . . . . . . . . . . . . . . . . . . . . . . . . . . . . . . . . . . . . . . . 10
    Initial Network Configuration . . . . . . . . . . . . . . . . . . . . . . . . . . . . . . . . . . . . . . . . . . . . . . . . . . . . . . . . . . . . . . . . . . . . . . . . 10
    Accessing the WebUI. . . . . . . . . . . . . . . . . . . . . . . . . . . . . . . . . . . . . . . . . . . . . . . . . . . . . . . . . . . . . . . . . . . . . . . . . . . . . . . 10
        Main Menu Options . . . . . . . . . . . . . . . . . . . . . . . . . . . . . . . . . . . . . . . . . . . . . . . . . . . . . . . . . . . . . . . . . . . . . . . . . . . . . . 11
    HA Clustered Pair Configuration . . . . . . . . . . . . . . . . . . . . . . . . . . . . . . . . . . . . . . . . . . . . . . . . . . . . . . . . . . . . . . . . . . . . . 12
8. Server & Appliance Configuration - AD FS 2.0 . . . . . . . . . . . . . . . . . . . . . . . . . . . . . . . . . . . . . . . . . . . . . . . . . . . . . . . . . . 12
    Federation Servers . . . . . . . . . . . . . . . . . . . . . . . . . . . . . . . . . . . . . . . . . . . . . . . . . . . . . . . . . . . . . . . . . . . . . . . . . . . . . . . . . 12
        Federation Server Installation & Configuration . . . . . . . . . . . . . . . . . . . . . . . . . . . . . . . . . . . . . . . . . . . . . . . . . . . . . . 12
        Load Balancer Configuration . . . . . . . . . . . . . . . . . . . . . . . . . . . . . . . . . . . . . . . . . . . . . . . . . . . . . . . . . . . . . . . . . . . . . 12
        DNS Configuration . . . . . . . . . . . . . . . . . . . . . . . . . . . . . . . . . . . . . . . . . . . . . . . . . . . . . . . . . . . . . . . . . . . . . . . . . . . . . . 13
        Testing & Verification . . . . . . . . . . . . . . . . . . . . . . . . . . . . . . . . . . . . . . . . . . . . . . . . . . . . . . . . . . . . . . . . . . . . . . . . . . . . 14
    Federation Proxy Servers . . . . . . . . . . . . . . . . . . . . . . . . . . . . . . . . . . . . . . . . . . . . . . . . . . . . . . . . . . . . . . . . . . . . . . . . . . . 14
        Proxy Server Installation & Configuration . . . . . . . . . . . . . . . . . . . . . . . . . . . . . . . . . . . . . . . . . . . . . . . . . . . . . . . . . . . 14
        Load Balancer Configuration. . . . . . . . . . . . . . . . . . . . . . . . . . . . . . . . . . . . . . . . . . . . . . . . . . . . . . . . . . . . . . . . . . . . . . 14
        DNS Configuration . . . . . . . . . . . . . . . . . . . . . . . . . . . . . . . . . . . . . . . . . . . . . . . . . . . . . . . . . . . . . . . . . . . . . . . . . . . . . . 15
        Testing & Verification . . . . . . . . . . . . . . . . . . . . . . . . . . . . . . . . . . . . . . . . . . . . . . . . . . . . . . . . . . . . . . . . . . . . . . . . . . . . 15
9. Server & Appliance Configuration - AD FS 3.0 / 4.0 / 5.0 . . . . . . . . . . . . . . . . . . . . . . . . . . . . . . . . . . . . . . . . . . . . . . . . . 16
    Federation Servers . . . . . . . . . . . . . . . . . . . . . . . . . . . . . . . . . . . . . . . . . . . . . . . . . . . . . . . . . . . . . . . . . . . . . . . . . . . . . . . . . 16
        Federation Server Installation & Configuration . . . . . . . . . . . . . . . . . . . . . . . . . . . . . . . . . . . . . . . . . . . . . . . . . . . . . . 16
        Load Balancer Configuration . . . . . . . . . . . . . . . . . . . . . . . . . . . . . . . . . . . . . . . . . . . . . . . . . . . . . . . . . . . . . . . . . . . . . 18
        DNS Configuration . . . . . . . . . . . . . . . . . . . . . . . . . . . . . . . . . . . . . . . . . . . . . . . . . . . . . . . . . . . . . . . . . . . . . . . . . . . . . . 20
        Testing & Verification . . . . . . . . . . . . . . . . . . . . . . . . . . . . . . . . . . . . . . . . . . . . . . . . . . . . . . . . . . . . . . . . . . . . . . . . . . . . 21
    Web Application Proxy (WAP) Servers . . . . . . . . . . . . . . . . . . . . . . . . . . . . . . . . . . . . . . . . . . . . . . . . . . . . . . . . . . . . . . . . 21
        WAP Server Installation & Configuration. . . . . . . . . . . . . . . . . . . . . . . . . . . . . . . . . . . . . . . . . . . . . . . . . . . . . . . . . . . . 21
        Load Balancer Configuration . . . . . . . . . . . . . . . . . . . . . . . . . . . . . . . . . . . . . . . . . . . . . . . . . . . . . . . . . . . . . . . . . . . . . 22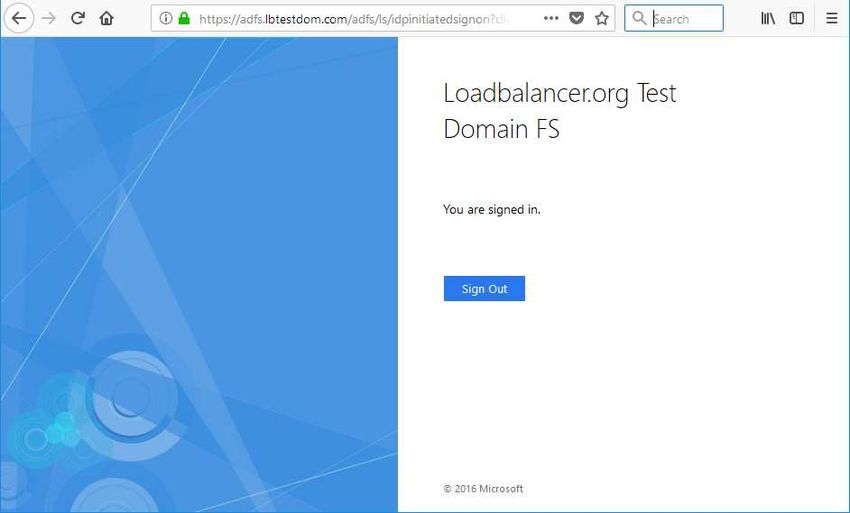
DNS Configuration . . . . . . . . . . . . . . . . . . . . . . . . . . . . . . . . . . . . . . . . . . . . . . . . . . . . . . . . . . . . . . . . . . . . . . . . . . . . . . 25
        Testing & Verification . . . . . . . . . . . . . . . . . . . . . . . . . . . . . . . . . . . . . . . . . . . . . . . . . . . . . . . . . . . . . . . . . . . . . . . . . . . 26
10. Technical Support . . . . . . . . . . . . . . . . . . . . . . . . . . . . . . . . . . . . . . . . . . . . . . . . . . . . . . . . . . . . . . . . . . . . . . . . . . . . . . . . . 26
11. Further Documentation . . . . . . . . . . . . . . . . . . . . . . . . . . . . . . . . . . . . . . . . . . . . . . . . . . . . . . . . . . . . . . . . . . . . . . . . . . . . . 26
12. Conclusion . . . . . . . . . . . . . . . . . . . . . . . . . . . . . . . . . . . . . . . . . . . . . . . . . . . . . . . . . . . . . . . . . . . . . . . . . . . . . . . . . . . . . . . 26
13. Appendix . . . . . . . . . . . . . . . . . . . . . . . . . . . . . . . . . . . . . . . . . . . . . . . . . . . . . . . . . . . . . . . . . . . . . . . . . . . . . . . . . . . . . . . . . 27
    Configuring HA - Adding a Secondary Appliance . . . . . . . . . . . . . . . . . . . . . . . . . . . . . . . . . . . . . . . . . . . . . . . . . . . . . . 27
14. Document Revision History . . . . . . . . . . . . . . . . . . . . . . . . . . . . . . . . . . . . . . . . . . . . . . . . . . . . . . . . . . . . . . . . . . . . . . . . . 30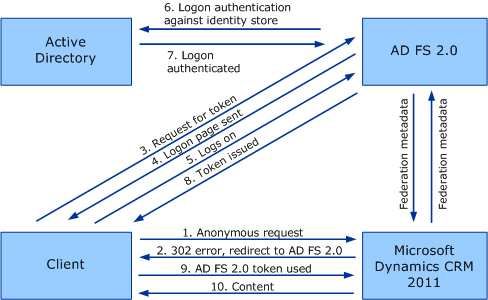
1. About this Guide
This guide details the steps required to configure a load balanced Microsoft AD FS environment utilizing
Loadbalancer.org appliances. It covers the configuration of the load balancers and also any Microsoft AD FS
configuration changes that are required to enable load balancing.
For more information about initial appliance deployment, network configuration and using the Web User Interface
(WebUI), please also refer to the Administration Manual.
2. Loadbalancer.org Appliances Supported
All our products can be used with AD FS. For full specifications of available models please refer to
https://www.loadbalancer.org/products.
Some features may not be supported in all cloud platforms due to platform specific limitations, please check with
Loadbalancer.org support for further details.
3. Loadbalancer.org Software Versions Supported
v8.3.8 and later
4. Microsoft Windows Versions Supported
Windows 2008 R2 and later (AD FS v2.0+)
5. Active Directory Federation Services (AD FS)
Introduction
AD FS provides simplified, secured identity federation and Web single sign-on (SSO) capabilities for end users who
need access to applications within an AD FS secured enterprise, in federation partner organizations, or in the
cloud.
AD FS is a Web Service that authenticates users against Active Directory and provides them access to claims-
aware applications. These applications are typically used through the client’s web browser. The applications can be
on-premises, off-premises, or even hosted by other companies.
AD FS SSO Scenarios
Web SSO
This is the most common scenario. Here users login to web applications, either off-premises or on-premises, from
their browsers using their Active Directory credentials. Examples of such applications include:
salesforce.com
servicenow.com
SharePoint Online (SPO)
Office 365
etc.
4 4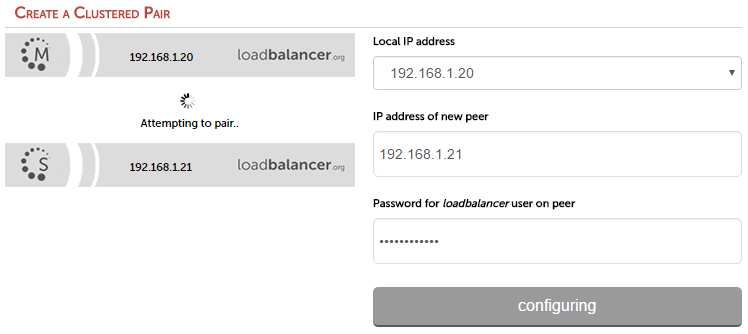
Federated Web SSO
The following scenarios are examples of Federated SSO. These scenarios aren’t as common but they illustrate how
AD FS can be used to collaborate with a partner, another company, or another AD forest:

  1. You want users from another organization to login to your web applications using their own identity
     credentials.

  2. You want to login to another organization’s web applications using your own Active Directory credentials.

  3. You want users from another internal Active Directory forest to login to your web applications in your Active
     Directory using their own AD credentials without a domain and/or forest trust.

  4. You want to use your production Active Directory credentials to login to test web applications located in your
     test Active Directory environment without a domain and/or forest trust.

  5. You want users to be able to login to your web applications using their Google, Facebook, Live ID, Yahoo, etc.
     credentials.

AD FS Versions
The following table lists the various versions of AD FS and in which Windows version they were initially released:

AD FS Version                                              Released in Windows Version
v1.0                                                       2003 R2
v1.1                                                       2008
v2.0                                                       2008 R2
v2.1                                                       2012
v3.0                                                       2012 R2
v4.0                                                       2016
V5.0                                                       2019

Role Services
The following role services can be deployed as part of the AD FS role:

Role Service                           Purpose
Federation Server                      Acts as an identity provider - Authenticates users to provide security
                                       tokens to applications that trust AD FS

                                       or

                                       Acts as a federation provider - Consumes tokens from other identity
                                       providers and then provides security tokens to applications that trust AD
                                       FS

                                                                                                                      5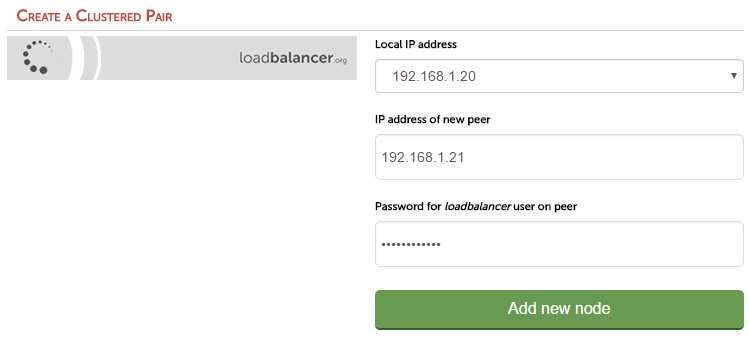
Role Service                              Purpose
Federation Server Proxy / Web             The Federation Service Proxy functions as an intermediary proxy service
Application Proxy                         between an Internet client and a Federation Server that is located behind a
                                          firewall on a corporate network.

                                          Note: In Windows 2012 R2 and later, the dedicated Proxy role service has
                                          been removed. Instead, the proxy is based on WAP (Web Application
                                          Proxy).

How AD FS Works
The following sections explain how AD FS authenticates internal LAN based users and external Internet based
users.

A Microsoft Dynamics CRM example is used with AD FS v2.0, although the general flow is the same for other
applications and different AD FS versions.

     Note       For a reference of key AD FS concepts, please refer to this URL.

Internal Clients
The authentication process for internal clients is shown below:

    1. The client sends a request to access the Microsoft Dynamics CRM website.

    2. IIS refuses the connection with an HTTP 302 error message and redirects the user to the trusted claims
       provider (also known as the STS) for Microsoft Dynamics CRM (AD FS v2.0).

    3. The client sends a request for a security token to AD FS v2.0.

    4. AD FS 2.0 returns an HTTP 401.1 error, indicating that the client must supply a Kerberos ticket.

    5. The client sends a Kerberos authentication request to Active Directory.

    6. Active Directory validates the client and sends a Kerberos ticket.

6                                                                                                                    6
7. The client sends a request for a security token to AD FS v2.0 and includes the Kerberos ticket.
If the client already has a valid Kerberos ticket on the network, this ticket is sent to AD FS
Note
v2.0 in step 3 and steps 4 through 7 are skipped.
8. AD FS v2.0 provides a security token containing claims for access to Microsoft Dynamics CRM data.
9. The client sends the security token containing claims obtained from AD FS v2.0 to the Microsoft Dynamics
CRM server.
10. The Microsoft Dynamics CRM server decrypts and validates the security token and presents the user with the
requested information.
Note For more information, please refer to this URL.
External Clients
The flow for external access is largely unchanged from the flow described above for internal access. The major
difference is that user authentication does not include a Kerberos ticket.
The authentication process for external clients is shown below:
Note For more information, please refer to this URL.
When an AD FS proxy is used, the client is redirected to the proxy which then connects to the internal AD FS server
where authentication occurs. For more details of AD FS proxy, please refer to this URL.
Other Useful References
How To Install AD FS 2016 For Office 365:
https://blogs.technet.microsoft.com/rmilne/2017/04/28/how-to-install-ad-fs-2016-for-office-365/
Setting up AD FS and Enabling Single Sign-On to Office 365:
7https://blogs.technet.microsoft.com/canitpro/2015/09/11/step-by-step-setting-up-ad-fs-and-enabling-single-sign-on-
to-office-365/
6. Load Balancing AD FS
It’s highly recommended that you have a working AD FS environment first before implementing
the load balancer. The initial environment would normally include a single Federation Server and
a single Proxy Server. If the Federation Service Name was set to adfs.lbtestdom.com at initial
Note
deployment, additional Federation Servers can be added to the same farm, then DNS entries
must be changed so that adfs.lbtestdom.com points to the VIP on the load balancer rather than
the primary Federation Server.
Basic Concepts
To provide resilience and high availability for your AD FS infrastructure, multiple Federation Servers and multiple
Federation Proxy Servers (WAPs in Windows 2012 & later) must be deployed with a load balancer. This helps
ensure that users can be authenticated and obtain access to the required systems and applications by constantly
checking the health of the AD FS servers and only forwarding client authentication requests to those that are
functional.
Load Balanced Ports & Services
The following table shows the ports that are load balanced:
Port Protocols Use
443 TCP/HTTPS AD FS communications
49443 TCP Used for certificate authentication in AD FS v3.0 and later
Persistence (Server Affinity) Requirements & Options
As mentioned here, Microsoft do not recommend using source IP persistence (affinity) For AD FS. However, under
certain complex scenarios persistence may be required for the Federation Server VIP.
Source IP persistence can easily be enabled by modifying the VIP, setting Persistence Mode to
Note
Source IP, clicking Update and reloading/restarting HAProxy.
Server Health checking
By default the load balancer uses a TCP port connect to verify the health of back-end servers. For AD FS we
recommend that more comprehensive checks are used.
For AD FS v2.0, the load balancer is configured to look for specific content on the AD FS login page:
https:///adfs/ls/idpinitiatedsignon.aspx
For AD FS v3.0 prior to update rollup KB2975719, the load balancer is configured to use a script to carry out an SNI
based health check that looks for specific content on the AD FS login page: https:///adfs/ls/idpinitiatedsignon.htm
For AD FS v3.0 with update rollup KB2975719 and later, the load balancer is configured to look for a HTTP 200 OK
8 8response when the built-in probe URL is read: http:///adfs/probe
SSL Termination
Microsoft state that SSL termination between the Proxy Servers and the Federation Servers is not supported and
that SSL Termination between Client and Proxy is only supported under certain situations. For the configurations
presented in this guide, SSL is terminated on the Federation & WAP servers and not the load balancer.
Load Balancer Deployment
The following diagram shows a typical load balanced AD FS deployment.
Load balancers can be deployed as single units or as a clustered pair. Loadbalancer.org always
recommend deploying clustered pairs for HA and resilience.
The Federation Proxy servers / WAP servers must be able to access the internal AD FS VIP on
Note
port 443 via the "Federation Service Name" specified during installation / configuration. Make
sure that firewalls, routing and DNS are configured to allow this. In this guide, the Federation
Service Name used is adfs.lbtestdom.com, so an entry for this is added to the local hosts file on
each Federation Proxy Server / WAP server which resolves to the AD FS VIP on the internal LAN.
Load Balancer Deployment Mode
Layer 7 SNAT mode (HAProxy) is recommended for AD FS and is used for the configurations presented in this
guide. This mode offers good performance and is simple to configure since it requires no configuration changes to
the AD FS servers.
Layer 4 DR mode, NAT mode and SNAT mode can also be used if preferred. For DR mode you’ll need to solve the
ARP problem on each AD FS server - for more information please refer to DR Mode Considerations. For NAT mode
the default gateway of the AD FS servers must be the load balancer.
7. Loadbalancer.org Appliance – the Basics
9Virtual Appliance
A fully featured, fully supported 30 day trial is available if you are conducting a PoC (Proof of Concept) deployment.
The VA is currently available for VMware, Virtual Box, Hyper-V, KVM, XEN and Nutanix AHV and has been
optimized for each Hypervisor. By default, the VA is allocated 1 CPU, 2GB of RAM and has a 20GB virtual disk. The
Virtual Appliance can be downloaded here.
The same download is used for the licensed product, the only difference is that a license key file
Note (supplied by our sales team when the product is purchased) must be applied using the
appliance’s WebUI.
Please refer to The Virtual Appliance - Hypervisor Deployment and the ReadMe.txt text file
Note included in the VA download for more detailed information on deploying the VA using various
Hypervisors.
For the VA, 4 NICs are included but only eth0 is connected by default at power up. If the other
Note NICs are required, these should be connected using the network configuration screen within the
Hypervisor.
Initial Network Configuration
After boot up, follow the instructions on the console to configure the IP address, subnet mask, default gateway,
DNS and other network settings.
Be sure to set a secure password for the load balancer, when prompted during the setup
Important
routine.
Accessing the WebUI
The WebUI is accessed using a web browser. Appliance authentication is based on Apache .htaccess files. User
admin tasks such as adding users and changing passwords can be performed using the WebUI menu option:
Maintenance > Passwords.
A number of compatibility issues have been found with various versions of Internet Explorer and
Note
Edge. The WebUI has been tested and verified using both Chrome & Firefox.
If required, users can also be authenticated against LDAP, LDAPS, Active Directory or Radius. For
Note
more information please refer to External Authentication.
1. Using a browser, access the WebUI using the following URL:
https://:9443/lbadmin/
2. Log in to the WebUI:
Username: loadbalancer
Password:
10 10Note To change the password, use the WebUI menu option: Maintenance > Passwords.
Once logged in, the WebUI will be displayed as shown below:
The WebUI for the VA is shown, the hardware and cloud appliances are very similar. The
Note
yellow licensing related message is platform & model dependent.
3. You’ll be asked if you want to run the Setup Wizard. If you click Accept the Layer 7 Virtual Service
configuration wizard will start. If you want to configure the appliance manually, simple click Dismiss.
Main Menu Options
System Overview - Displays a graphical summary of all VIPs, RIPs and key appliance statistics
11Local Configuration - Configure local host settings such as IP address, DNS, system time etc.
Cluster Configuration - Configure load balanced services such as VIPs & RIPs
Maintenance - Perform maintenance tasks such as service restarts and taking backups
View Configuration - Display the saved appliance configuration settings
Reports - View various appliance reports & graphs
Logs - View various appliance logs
Support - Create a support download, contact the support team & access useful links
Live Chat - Start a Live Chat session with one of our Support Engineers
HA Clustered Pair Configuration
Loadbalancer.org recommend that load balancer appliances are deployed in pairs for high availability. In this guide
a single unit is deployed first, adding a secondary unit is covered in Configuring HA - Adding a Secondary
Appliance.
8. Server & Appliance Configuration - AD FS 2.0
Federation Servers
Federation Server Installation & Configuration
AD FS v2.0 for Windows 2008 R2 must be downloaded and installed manually on each AD FS server. If
installed using Server Manager/Add Roles, v1.0 will be installed, NOT v2.0.
AD FS update rollup 3 is available here
For information on configuring the Federation Servers please refer to this URL
Load Balancer Configuration
Setting up the Virtual Service (VIP)
1. Using the WebUI, navigate to: Cluster Configuration > Layer 7 – Virtual Services and click Add a New Virtual
Service.
2. Enter the following details:
3. Enter an appropriate name (Label) for the Virtual Service, e.g. ADFS-Cluster.
4. Set the Virtual Service IP address field to the required IP address, e.g. 192.168.2.100.
5. Set the Virtual Service Ports field to 443.
6. Set Layer 7 Protocol to TCP Mode.
7. Click Update.
12 128. Now click Modify next to the newly created Virtual Service.
9. Change Persistence Mode to None.
10. In the Health Checks section, click Advanced to show more options.
11. Change Health Checks to Negotiate HTTPS (GET).
12. Set Check Port to 443.
13. Set Request to Send to adfs/ls/idpinitiatedsignon.aspx.
14. Set Response Expected to Sign-In.
15. In the Other section, click Advanced to show more options.
16. Enable (check) the Timeout checkbox, set both Client Timeout and Real Server Timeout to 5m.
17. Click Update.
Setting up the Real Servers (RIPs)
1. Using the WebUI, navigate to: Cluster Configuration > Layer 7 – Real Servers and click Add a new Real Server
next to the newly created Virtual Service.
2. Enter the following details:
3. Enter an appropriate name (Label) for the first AD FS server, e.g. ADFS1.
4. Change the Real Server IP Address field to the required IP address, e.g. 192.168.2.110.
5. Set the Real Server Port field to 443.
6. Click Update.
7. Now repeat for your remaining Federation server(s).
Applying the new Layer 7 Settings
1. Once the configuration is complete, use the Restart/Reload HAProxy button at the top of the screen to
commit the changes, or use the WebUI option: Maintenance > Restart Services.
DNS Configuration
Create a suitable DNS entry for the load balanced Federation Servers, i.e. for the VIP on the load balancer.
e.g. adfs.lbtestdom.com
13Testing & Verification
The load balanced AD FS servers should now be accessible using the DNS entry for the VIP. Connect to the login
page from a browser.
e.g. https://adfs.lbtestdom.com/adfs/ls/idpinitiatedsignon.aspx
Federation Proxy Servers
Proxy Server Installation & Configuration
AD FS v2.0 for Windows 2008 R2 must be downloaded and installed manually on each AD FS Proxy Server. If
installed using Server Manager/Add Roles, v1.0 will be installed, NOT v2.0.
AD FS update rollup 3 is available here.
When running the wizard, the Federation Service Name should be the load balanced VIP of the Federation
Servers.
For information on configuring the Proxy Servers please refer to this URL.
The Federation Proxy servers must be able to access the internal AD FS VIP on port 443 via the "Federation
Service Name" specified during installation / configuration. Make sure that firewalls, routing and DNS are
configured to allow this. In this guide, the Federation Service Name used is adfs.lbtestdom.com, so an entry
for this is added to the local hosts file on each Federation Proxy Server which resolves to the AD FS VIP on the
internal LAN.
Load Balancer Configuration
Setting up the Virtual Service (VIP)
1. Using the WebUI, navigate to: Cluster Configuration > Layer 7 – Virtual Services and click Add a New Virtual
Service.
2. Enter the following details:
3. Enter an appropriate name (Label) for the Virtual Service, e.g. ADFS-Proxy-Cluster.
4. Set the Virtual Service IP address field to the required IP address, e.g. 192.168.2.100.
5. Set the Virtual Service Ports field to 443.
6. Set the Layer 7 Protocol to TCP Mode.
7. Click Update.
8. Now click Modify next to the newly created Virtual Service.
14 149. Change Persistence Mode to None.
10. In the Health Checks section, click Advanced to show more options.
11. Change Health Checks to Negotiate HTTPS (GET).
12. Set Check Port to 443.
13. Set Request to Send to adfs/ls/idpinitiatedsignon.aspx.
14. Set Response Expected to Sign-In.
15. In the Other section, click Advanced to show more options.
16. Enable (check) the Timeout checkbox, set both Client Timeout and Real Server Timeout to 5m.
17. Click Update.
Setting up the Real Servers (RIPs)
1. Using the WebUI, navigate to: Cluster Configuration > Layer 7 – Real Servers and click Add a new Real Server
next to the newly created Virtual Service.
2. Enter the following details:
3. Enter an appropriate name (Label) for the first AD FS server, e.g. ADFS1.
4. Change the Real Server IP Address field to the required IP address, e.g. 192.168.2.110.
5. Set the Real Server Port field to 443.
6. Click Update.
7. Now repeat for your remaining Federation Proxy server(s).
Applying the new Layer 7 Settings
1. Once the configuration is complete, use the Restart/Reload HAProxy button at the top of the screen to
commit the changes, or use the WebUI option: Maintenance > Restart Services.
DNS Configuration
Create a suitable DNS entry for the load balanced Proxy Servers, i.e. for the VIP on the load balancer.
e.g. adfs.robstest.com
Testing & Verification
The load balanced AD FS servers should now be accessible using the DNS entry for the VIP. Connect to the login
15page from a browser.
e.g. https://adfs.robstest.com/adfs/ls/idpinitiatedsignon.aspx
9. Server & Appliance Configuration - AD FS 3.0 / 4.0 / 5.0
Federation Servers
Federation Server Installation & Configuration
The key points of the installation process are covered below. For more details, please also refer to the following
Microsoft URL:
How To Install AD FS 2016 For Office 365
STEP 1 – Prepare AD FS Certificates
In this guide an Internal CA was used to issue the certificate. As mentioned here the Private Key must be
exportable so that the certificate and private key can be exported from the first Federation Server, and used on
other Federation Servers and on the WAPs.
In this guide, the Common Name is set to adfs.lbtestdom.com. As mentioned on page 9, for AD
FS v4.0 and later, an additional SAN can be added (certuth.adfs.lbtestdom.com) to allow
certificate authentication over port 443. If this is not done, certificate authentication occurs over
TCP 49443. In this scenario, port 49443 must be included in the VIP.
Note
The following warning is displayed for AD FS v4.0+ if the additional SAN is not included:
STEP 2 – Install AD FS on the first (Primary) Federation Server
Use Server Manager > Add Roles and Features to install AD FS, then run the Configuration Wizard:.
Select Create the first federation server in federation server farm and click Next.
16 16Specify a suitable account and click Next.
Choose the certificate created in Step 1, enter a display name and click Next.
Choose a suitable service account and click Next.
Choose where configuration data will be stored and click Next.
17As mentioned, click Configure to begin the installation.
STEP 3 – Install AD FS on the remaining Federation Server(s)
Use Server Manager > Add Roles and Features to install AD FS, then run the Configuration Wizard:
In this case, select Add a federation server to the federation server farm and click Next , then continue through the
remaining screens until the installation & configuration is complete.
Load Balancer Configuration
Setting up the Virtual Service (VIP)
1. Using the WebUI, navigate to: Cluster Configuration > Layer 7 – Virtual Services and click Add a New Virtual
Service.
2. Enter the following details:
3. Enter an appropriate name (Label) for the Virtual Service, e.g. ADFS-Cluster.
4. Set the Virtual Service IP address field to the required IP address, e.g. 192.168.2.100.
5. Set the Virtual Service Ports field to 443.
18 18If you don’t have the SAN certauth.your_adfs_service_name added to your SSL certificate,
Note make sure port 49443 is also included in the VIP, i.e. set the Virtual Service Ports field to:
443,49443 rather than: 443.
6. Set the Layer 7 Protocol to TCP Mode.
7. Click Update.
8. Now click Modify next to the newly created Virtual Service.
9. In the Other section, click Advanced to show more options.
10. Enable (check) the Timeout checkbox, set both Client Timeout and Real Server Timeout to 5m.
11. Click Update.
Configure the Health-check for "Windows 2012 R2 with KB2975719 & Later".
Update rollup KB2975719 was released in August 2014, so the health-check configuration
Note
presented in this section should be used in most if not all cases.
1. Click Modify next to the newly created Virtual Service.
2. In the Health Checks section, click Advanced to show more options.
3. Configure the health check settings as shown below, this will configure the load balancer to look for an HTTP
200 OK response from each server:
a. Change Health Checks to Negotiate HTTP (GET).
b. Set Check Port to 80.
c. Set Request to send to adfs/probe.
d. Leave Response Expected blank.
4. Click Update.
Configure the Health-check for Windows 2012 R2 prior to KB2975719
The adfs/probe option above does not exist in older versions of Windows. In this case, the load balancer’s built-in
SNI check must be used instead as described below:
191. Edit the file: /var/lib/loadbalancer.org/check/sni-check-v2.sh
Note This SNI URI is the default AD FS sign-in URI and should not normally need changing.
2. Save the file.
3. Now click Modify next to the newly created Virtual Service.
4. Change Health Checks to External Check.
5. Change Check Script to sni-check-v2.sh.
6. Click Update.
Setting up the Real Servers (RIPs)
1. Using the WebUI, navigate to: Cluster Configuration > Layer 7 – Real Servers and click Add a new Real Server
next to the newly created Virtual Service.
2. Enter the following details:
3. Enter an appropriate name (Label) for the first AD FS server, e.g. ADFS1.
4. Change the Real Server IP Address field to the required IP address, e.g. 192.168.2.110.
5. Set the Real Server Port field to 443.
Note If you included port 49443 in the VIP, leave the Real Server Port field blank.
6. Click Update.
7. Now repeat for your remaining Federation server(s).
Applying the new Layer 7 Settings
1. Once the configuration is complete, use the Restart/Reload HAProxy button at the top of the screen to
commit the changes, or use the WebUI option: Maintenance > Restart Services.
DNS Configuration
Create a suitable DNS entry for the load balanced AD FS servers, i.e. for the VIP on the load balancer.
e.g. adfs.lbtestdom.com
20 20If your SSL certificate includes the additional SAN for certificate authentication, you’ll also need a suitable DNS
entry for this.
e.g. certauth.adfs.lbtestdom.com
Testing & Verification
The load balanced AD FS servers should now be accessible using the DNS entry for the VIP. Connect to the login
page from a browser.
e.g. https://adfs.robstest.com/adfs/ls/idpinitiatedsignon.htm
As mentioned here, the Sign In page is disabled by default in AD FS 2016 (AD FS v4.0) and later.
To manually enable it, use the following PowerShell command on the Primary Federation Server:
Note
Set-AdfsProperties -EnableIdPInitiatedSignonPage $true
Log in when prompted. Once logged in, your browser should display something similar to the following:
Web Application Proxy (WAP) Servers
WAP Server Installation & Configuration
The key points of the installation process are covered below. For more details, please also refer to the following
Microsoft URLs:
How To Install AD FS 2016 For Office 365
21The WAP servers must be able to access the internal AD FS VIP on port 443 via the "Federation
Service Name" specified during installation / configuration. Make sure that firewalls, routing and
Note DNS are configured to allow this. In this guide, the Federation Service Name used is
adfs.lbtestdom.com, so an entry for this is added to the local hosts file on each WAP server which
resolves to the AD FS VIP on the internal LAN.
STEP 1 – Prepare the SSL Certificate
Export the certificate & private key from one of the Federation Servers, then import the certificate into the local
computer account certificate store on each WAP server. This will ensure the certificate is ready to use when the
configuration wizard is run.
STEP 2 – Install & Configure Web Application Proxy (WAP) on the each WAP Server
1. Use Server Manager > Add Roles and Features to install Web Application Proxy, then run the Configuration
Wizard:
2. Enter the Federation service name and the user credentials and click Next.
3. Select the certificate to be used by the Proxy and click Next, then click Configure to start the configuration.
Load Balancer Configuration
Setting up the Virtual Service (VIP)
1. Using the WebUI, navigate to: Cluster Configuration > Layer 7 – Virtual Services and click Add a New Virtual
Service.
2. Enter the following details:
22 223. Enter an appropriate name (Label) for the Virtual Service, e.g. ADFS-Proxy-Cluster.
4. Set the Virtual Service IP address field to the required IP address, e.g. 192.168.2.100.
5. Set the Virtual Service Ports field to 443.
If you don’t have the SAN certauth.your_adfs_service_name added to your SSL certificate,
Note make sure port 49443 is also included in the VIP, i.e. set the Virtual Service Ports field to:
443,49443 rather than: 443.
6. Set the Layer 7 Protocol to TCP Mode.
7. Click Update.
8. Now click Modify next to the newly created Virtual Service.
9. In the Other section, click Advanced to show more options.
10. Enable (check) the Timeout checkbox, set both Client Timeout and Real Server Timeout to 5m.
11. Click Update.
Configure the Health-check for Windows 2012 R2 with KB2975719 & Later
Update rollup KB2975719 was released in August 2014, so the health-check configuration
Note
presented in this section should be used in most if not all cases.
1. Click Modify next to the newly created Virtual Service.
2. In the Health Checks section, click Advanced to show more options.
3. Configure the health check settings as shown below, this will configure the load balancer to look for an HTTP
200 OK response from each server:.
23a. Change Health Checks to Negotiate HTTP (GET).
b. Set Check Port to 80.
c. Set Request to send to adfs/probe.
d. Leave Response Expected blank.
As mentioned here, you’ll need to create an inbound rule to open port 80 on the
Note firewall of each WAP server for this health-check to work. For the Federation servers
this is configured automatically, but not for the WAPs.
4. Click Update
Configure the Health-check for Windows 2012 R2 prior to KB2975719
The adfs/probe option above does not exist in older versions of AD FS. In this case, the load balancer’s built-in SNI
check must be used instead as described below:
1. Modify the file: /var/lib/loadbalancer.org/check/sni-check-v2.sh.
Note This SNI URI is the default AD FS sign-in URI and should not normally need changing.
2. Save the file.
3. Now click Modify next to the newly created Virtual Service.
4. Change Health Checks to External Check.
5. Change Check Script to sni-check-v2.sh.
6. Click Update.
24 24Setting up the Real Servers (RIPs)
1. Using the WebUI, navigate to: Cluster Configuration > Layer 7 – Real Servers and click Add a new Real Server
next to the newly created Virtual Service.
2. Enter the following details:
3. Enter an appropriate name (Label) for the first AD FS server, e.g. ADFS1.
4. Change the Real Server IP Address field to the required IP address, e.g. 192.168.2.110.
5. Set the Real Server Port field to 443.
Note If you included port 49443 in the VIP, leave the Real Server Port field blank.
6. Click Update.
7. Now repeat for your remaining WAP server(s).
Applying the new Layer 7 Settings
1. Once the configuration is complete, use the Restart/Reload HAProxy button at the top of the screen to
commit the changes, or use the WebUI option: Maintenance > Restart Services.
DNS Configuration
Create a suitable DNS entry for the load balanced AD FS servers, i.e. for the VIP on the load balancer.
e.g. adfs.lbtestdom.com
If your SSL certificate includes the additional SAN for certificate authentication, you’ll also need a suitable DNS
entry for this.
e.g. certauth.adfs.lbtestdom.com
The WAP servers must be able to access the internal AD FS VIP on port 443 via the "Federation
Service Name" specified during installation / configuration. Make sure that firewalls, routing and
Note DNS are configured to allow this. In this guide, the Federation Service Name used is
adfs.lbtestdom.com, so an entry for this is added to the local hosts file on each WAP server which
resolves to the AD FS VIP on the internal LAN.
25Testing & Verification The load balanced AD FS servers should now be accessible using the DNS entry for the VIP. Connect to the login page from a browser. e.g. https://adfs.robstest.com/adfs/ls/idpinitiatedsignon.htm Login as prompted. Once logged in, your browser should display something similar to the following: 10. Technical Support If you have any questions regarding the appliance or would like assistance designing your deployment, please don’t hesitate to contact our support team: support@loadbalancer.org. 11. Further Documentation The Administration Manual contains much more information about configuring and deploying the appliance. It’s available here: https://pdfs.loadbalancer.org/loadbalanceradministrationv8.pdf. 12. Conclusion Loadbalancer.org appliances provide a very cost effective and flexible solution for highly available load balanced Active Directory Federation Services environments. 26 26
13. Appendix
Configuring HA - Adding a Secondary Appliance
Our recommended configuration is to use a clustered HA pair of load balancers to provide a highly available and
resilient load balancing solution.

We recommend that the Primary appliance should be configured first, then the Secondary should be added. Once
the Primary and Secondary are paired, all load balanced services configured on the Primary are automatically
replicated to the Secondary over the network using SSH/SCP.

              For Enterprise Azure, the HA pair should be configured first. In Azure, when creating a VIP using
              an HA pair, 2 private IPs must be specified – one for the VIP when it’s active on the Primary and
   Note
              one for the VIP when it’s active on the Secondary. Configuring the HA pair first, enables both IPs
              to be specified when the VIP is created.

The clustered HA pair uses Heartbeat to determine the state of the other appliance. Should the active device
(normally the Primary) suffer a failure, the passive device (normally the Secondary) will take over.

              A number of settings are not replicated as part of the Primary/Secondary pairing process and
   Note       therefore must be manually configured on the Secondary appliance. These are listed by WebUI
              menu option in the table below:

WebUI Main Menu        Sub Menu Option         Description
Option
Local Configuration    Hostname & DNS          Hostname and DNS settings
Local Configuration    Network Interface       All network settings including IP address(es), bonding configuration
                       Configuration           and VLANs
Local Configuration    Routing                 Routing configuration including default gateways and static routes
Local Configuration    System Date & time      All time and date related settings
Local Configuration    Physical – Advanced Various settings including Internet Proxy, Management Gateway,
                       Configuration       Firewall connection tracking table size, NIC offloading, SMTP relay,
                                           logging and Syslog Server
Local Configuration    Security                Appliance security settings
Local Configuration    SNMP Configuration      Appliance SNMP settings
Local Configuration    Graphing                Appliance graphing settings
Local Configuration    License Key             Appliance licensing
Maintenance            Software Updates        Appliance software update management
Maintenance            Firewall Script         Appliance firewall (iptables) configuration
Maintenance            Firewall Lockdown       Appliance management lockdown settings
                       Wizard

To add a Secondary node - i.e. create a highly available clustered pair:

                                                                                                                    27
1. Deploy a second appliance that will be the Secondary and configure initial network settings.
2. Using the WebUI, navigate to: Cluster Configuration > High-Availability Configuration.
3. Specify the IP address and the loadbalancer user’s password for the Secondary (peer) appliance as shown
above
4. Click Add new node.
5. The pairing process now commences as shown below:
6. Once complete, the following will be displayed:
28 287. To finalize the configuration, restart heartbeat and any other services as prompted in the blue message box at
the top of the screen.
Clicking the Restart Heartbeat button on the Primary appliance will also automatically restart
Note
heartbeat on the Secondary appliance.
For more details on configuring HA with 2 appliances, please refer to Appliance Clustering for
Note
HA.
2914. Document Revision History
Version Date Change Reason for Change Changed By
1.4.0 7 August 2019 Styling and layout General styling RJC
updates
Added AD FS v5.0 (Win2019)
Support for latest
version
1.4.1 7 January 2020 Removed links to certain Microsoft The related links are RJC
reference material no longer available
at microsoft.com
1.4.2 16 July 2020 New title page Branding update AH
Updated Canadian contact details Change to Canadian
contact details
Revised instructions and screenshots for
configuring health checks and VIP Changes to the
timeouts appliance WebUI
1.5.0 1 January 2022 Converted the document to AsciiDoc Move to new AH, RJC, ZAC
documentation
system
30 30About Loadbalancer.org
Loadbalancer.org’s mission is to ensure that its clients’ businesses are never interrupted. The load balancer
experts ask the right questions to get to the heart of what matters, bringing a depth of understanding to each
deployment. Experience enables Loadbalancer.org engineers to design less complex, unbreakable solutions - and
to provide exceptional personalized support.
United Kingdom Canada
Loadbalancer.org Ltd. Loadbalancer.org Appliances Ltd.
Compass House, North Harbour 300-422 Richards Street, Vancouver,
Business Park, Portsmouth, PO6 4PS BC, V6B 2Z4, Canada
UK:+44 (0) 330 380 1064 TEL:+1 866 998 0508
sales@loadbalancer.org sales@loadbalancer.org
support@loadbalancer.org support@loadbalancer.org
United States Germany
Loadbalancer.org, Inc. Loadbalancer.org GmbH
4550 Linden Hill Road, Suite 201 Tengstraße 2780798,
Wilmington, DE 19808, USA München, Germany
TEL: +1 833.274.2566 TEL: +49 (0)89 2000 2179
sales@loadbalancer.org sales@loadbalancer.org
support@loadbalancer.org support@loadbalancer.org
© Copyright Loadbalancer.org • www.loadbalancer.orgYou can also read