HOMEOWNER CARE &
MAINTENANCE MANUAL
←
→
Page content transcription
If your browser does not render page correctly, please read the page content below
HOMEOWNER CARE & MAINTENANCE MANUAL

TABLE OF CONTENTS

 SECTION 1: INTRODUCTION                                  P.5

 SECTION 2: THE NEXT STEP                                 P.7

      1. HOME ORIENTATION                                 P.7

      2. PREPARING TO MOVE                                P.8

      3. MOVE-IN & MOVE-OUT PROCEDURES                    P.9

 SECTION 3: YOUR NEW COMMUNITY                            P.10

      1. EMERGENCY CONTACTS                               P.10

      2. UTILITY INFORMATION                              P.11

      3. SCHOOL INFORMATION                               P.11

      4. TRANSPORTATION                                   P.12

      5. OTHER COMMUNITY INFORMATION                      P.12

 SECTION 4: NATIONAL HOME WARRANTY                        P.13

       1. NEW HOME WARRANTY                               P.13

       2. WARRANTY EXCLUSIONS                             P.14

       3. MANUFACTURER WARRANTIES                         P.16

 SECTION 5: CARING FOR YOUR HOME                          P.17

       1. HOMEOWNER USE AND MAINTENANCE GUIDELINES        P.17

       2. EQUIPMENT                                       P.17

               A. ELECTRICAL                              P.17

               B. PLUMBING                                P.18

               C. INTERIOR ENVIRONMENT CONTROLS           P.19

               D. DRYER VENTING                           P.20

All information subject to change without notice        2|Page
E. FIRE SAFETY                             P.21

        3. CRAWL SPACE/ UNFINISHED BASEMENT               P.21

 SECTION 6: MAINTENANCE RECOMMENDATIONS                   P.22

        1. CABINETS                                       P.22

        2. CARPET                                         P.22

        3. CAULKING                                       P.25

        4. CERAMIC TILE & STONE                           P.26

        5. CONDENSATION                                   P.27

        6. COUNTERTOPS                                    P.27

        7. DOORS AND LOCKS                                P.28

        8. DRYWALL                                        P.30

        9. EXPANSION AND CONTRACTION                      P.30

        10. FIREPLACE (SELECT HOMES)                      P.31

        11. GAS SHUT-OFFS                                 P.31

        12. HARDWARE                                      P.31

        13. HEATING SYSTEM: HEAT PUMP (IF APPLICABLE)     P.31

        14. LAMINATE FLOORING                             P.33

        15. MILDEW                                        P.34

        16. MIRRORS                                       P.34

        17. PAINT AND STAIN                               P.34

        18. PLUMBING                                      P.35

        19. SHOWER DOORS OR TUB ENCLOSURES                P.38

        20. SMOKE DETECTORS                               P.38

        21. VENTILATION                                   P.38

        22. WINDOWS AND GLASS DOORS                       P.39

        23. WOOD TRIM                                     P.40

All information subject to change without notice        3|Page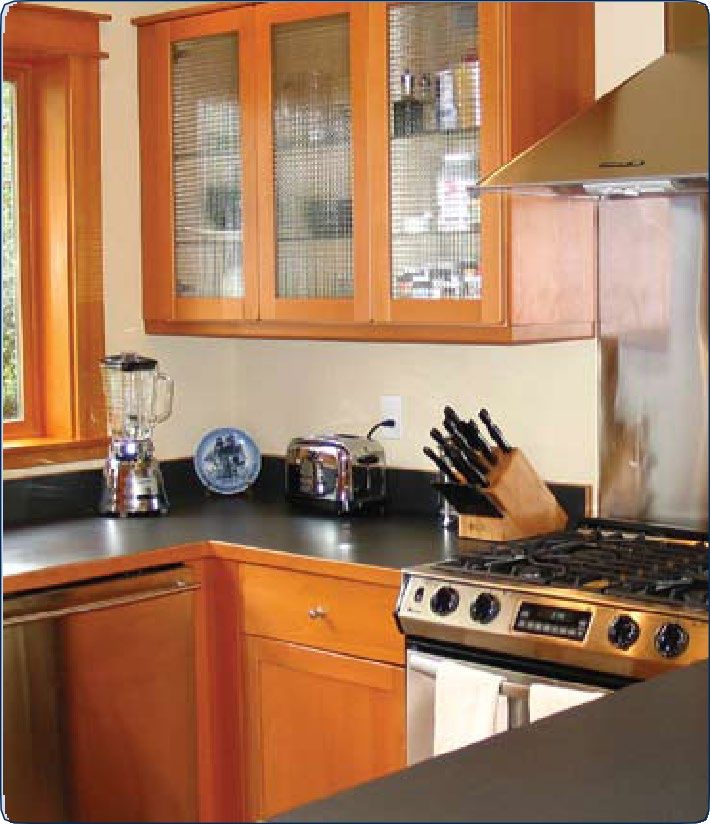
SECTION 7: WARRANTY & SERVICE REQUESTS              P.42

 SECTION 8: SUB-TRADE LIST                           P.43

 SECTION 9: N.H.W. MAINTENANCE MANUAL                P.46

All information subject to change without notice   4|Page

SECTION 1: INTRODUCTION

                Welcome to GableCraft Homes at Royal Bay

We understand that buying and moving into a new home should be an exciting and fulfilling experience,
but it can also be a stressful time. With that in mind, we have created this Homeowner Care &
Maintenance Manual to make this experience as effortless as possible, and to provide you with valuable
tools to use while living in your new home.

This manual explains our product standards, our pre-closing and post-closing processes, maintenance
recommendations, community information, and all other information we feel necessary to support you
through your home buying and home ownership experience.

Your Home Ownership Experience:

Although most of the features and components in your new home are covered under the National Home
Warranty New Home Warranty, it is important to properly maintain your new home and its many
features. Your warranty will not cover any areas of your home that were not properly maintained; so we
highly recommend that you take the time to review these sections in detail. Maintaining your new
residence properly and regularly will ensure that every facet of your home performs as intended, avoiding
unnecessary and costly repairs.

Congratulations on your purchase at GableCraft Homes at Royal Bay!

All information subject to change without notice                                                5|Page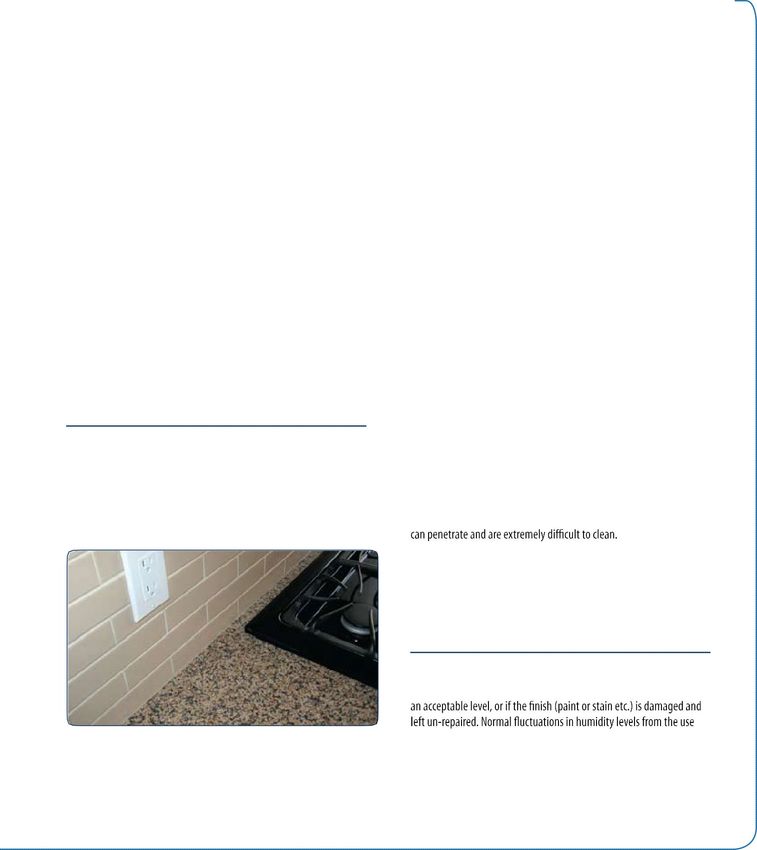
Notice

This manual has been prepared as an informational and instrumental tool for GableCraft Homes at Royal
Bay homeowners during their home ownership. Duplication of any part of this manual is prohibited, other
than for use by GableCraft Homes at Royal Bay homeowners for maintaining their homes. GableCraft RB
Homes Limited Partnership reserves the right to make changes and revisions to the contents of this
manual without notice, as necessary, for future distribution.

©2019

All information subject to change without notice                                              6|Page

SECTION 2: THE NEXT STEP
1. HOME ORIENTATION
The Home Orientation is designed to make you familiar with your new home and the
surrounding amenities. During this process we will tour you through your home, pointing out features as
well as providing you with helpful hints on how to maintain your new home.

Cosmetic Surfaces

Cosmetic surface damage caused during construction may be readily noticeable during the walkthrough.
Such damage can also occur during the move-in process or through daily activities. Therefore, cosmetic
damage not documented prior to close is not covered under our warranty program.

During your orientation, we will confirm that all surfaces are in acceptable condition. Any details that
need attention will be listed on your New Home Walkthrough Inspection Checklist form. After we
correct any items noted during the orientation, repair of cosmetic surface damage that occurs after closing
is your responsibility.

Completion of Items

All areas or items noted on the Checklist will be repaired in accordance with the terms and conditions of
the National Home Warranty New Home Warranty. Our goal is to have these items completed
immediately if possible, and in all cases we will strive to complete them within the first 60 days after
closing.

Once this orientation is completed, you will be accepting your new home on an “as-is”
basis, except for the items documented during your orientation.

Questions Are Welcomed

Providing our homeowners with the tools they need to enjoy their new home is important to us. We
recommend that you take this time to read the maintenance information and warranty guidelines in this
manual. If you have any questions, please feel free to e-mail our Customer Care team at:
customercare@gablecraft.ca

All information subject to change without notice                                                   7|Page

2. PREPARING TO MOVE

You are responsible for all utilities in your new home. GableCraft RB Limited Partnership will have all
utilities removed from its name effective the documented closing date. You will need to arrange for
electrical & gas service to be provided in your name. For your convenience, we have included a list of
utility and service companies and contact information in Section 3 of this manual.

Change of Address Notification

Do not forget to send out change of address notifications ahead of time to prevent a disruption in service
or delivery. However, please note that mail delivery will not be allowed before occupancy.

              CREDIT UNIONS

              CARDS

              INE AND NEWSPAPER SUBSCRIPTIONS

All information subject to change without notice                                                   8|Page
3. MOVE-IN & MOVE-OUT PROCEDURES
After closing, you will be given the following:
         •         Home keys
         •         Garage door opener
         •         Manufacturer-provided warranties and literature

Interior Floor/Wall Protection

Damage to your home caused by moving is not covered under any warranty. Please inform your moving
crew that they will be responsible for any damage.

Insurance

Protecting the exterior and interior of your home against theft, natural disasters, fire, and any other non-
warranty vulnerabilities is your responsibility. GableCraft RB Limited Partnership shall not be held
responsible for any damage that is not immediately due to the original construction of your home and
covered under warranty.

We recommend that you obtain Personal Liability insurance in an amount of not less than $1 million per
occurrence. We would also recommend that this insurance be extended to include your personal contents
and belongings. Please consult with your insurance provider to determine the appropriate coverage for
your needs.

All information subject to change without notice                                                     9|Page
SECTION 3: YOUR NEW COMMUNITY
1. EMERGENCY CONTACTS

 Police Department:                     698 Atkins Avenue
                                        Victoria, BC
                                        1-250-474-2264 (Non-emergency)

 Fire Department:                       Colwood Fire Department
                                        3215 Metchosin Road
                                        Colwood, BC
                                        1-250-339-2432 (Non-emergency)

 Nearest Hospital:                      Victoria General Hospital
                                        1 Hospital Way
                                         Victoria, BC
                                         1-250-727-4212

                           FOR ALL EMERGENCIES
                                                   DIAL: 911

All information subject to change without notice                         10 | P a g e
2. UTILITY INFORMATION
Electricity: BC Hydro
Phone: 1-800-224-9376
www.bchydro.com
Gas: FortisBC
Phone: 1-800-224-2710
www.fortisbc.com
Telephone/TV/Internet: Telus
Phone: 1-866-558-2273
www.telus.com
Telephone/TV/Internet: Shaw
Phone: 1-888-472-2222
www.shaw.ca
Canada Post Office: Phone: 1-250-474-0900
www.canadapost.ca
City of Colwood: 3300 Wishart Road
Victoria, BC V9C 1R1
Phone: 1-250-478-5999
www.colwood.ca
3. SCHOOL INFORMATION
School District: School District No. 62 – Sooke Schools
3143 Jacklin Rd.
Victoria, BC V9B 5R1
Phone: 1-250-474-9800
www.sd62.bc.ca
Royal Roads University: 2005 Sooke Road
Victoria, BC V9B 5Y2
Phone: 1-800-788-8028
www.royalroads.ca
All information subject to change without notice 11 | P a g e4. TRANSPORTATION
Bluebird Taxi: Phone: 1-250-382-2222
www.taxicab.com
Public Transit: BC Transit
Phone: 1-250-382-6161
www.transitbc.com
BC Ferries: 430 Belleville St
Victoria, BC V8V 1W9
Phone: 1-250-386-2202
www.bcferries.com
Airport: Victoria International Airport
1640 Electra Blvd
Sidney, BC V8L 5V4
Phone: 1-250-953-7500
www.victoriaairport.com
5. OTHER COMMUNITY INFORMATION
Library: 119 – 755 Goldstream Ave
Victoria, BC V9B 0H9
http://gvpl.ca
Sports & Recreation: The Q Centre
1767 Old Island Hwy
Victoria, BC
Phone: 1-250-478-8384
www.westshorerecreation.ca
Royal Roads University Recreation Centre
2005 Sooke Rd, Victoria,
BC, V9B 5Y2
Phone: 1-250-391-2700
www.royalroads.ca
City Centre Park
1097 Langford Pkwy
Langford, BC
Phone: 1-250-391-1738
www.eagleridgecentre.com
All information subject to change without notice 12 | P a g eSECTION 4: NATIONAL NEW HOME WARRANTY
1. NEW HOME WARRANTY
A copy of the New Home Warranty Certificate will be mailed directly to you upon receipt of your
Warranty Commencement Date Certificate form by National Home Warranty.
The terms and conditions specified in any legal documents produced by National Home Warranty shall
overrule any statements made in this homeowner care & maintenance manual.
The Warranty coverage is as follows:
• First 12 months: coverage for any defect in materials and labour in the home.
• First 24 months: coverage for any defect in materials and labour supplied for electrical,
plumbing, heating, ventilation, and air conditioning, delivery and distribution systems. In
addition, coverage for any defect in materials and labour supplied for the exterior cladding,
caulking, windows and doors that may lead to detachment or material damage to the new home.
• 5-Year: coverage for any defects in the building envelope, including defects resulting
from unintended water penetration.
• 10-Year: coverage for structural defects, including:
-Any defect in materials and labour that results in the failure of a load-bearing part of the
new home.
-Any defect that causes structural damage, which materially and adversely affects the use
of the new home for residential occupancy.
For complete warranty information on coverage, exclusions, terms, etc., please refer to your National
Home Warranty New Home Warranty Certificate. The National New Home Warranty Program requires
you, the Owner, to maintain your new home and mitigate any damage to it. Please review Section 10 of
this manual, the National Home Warranty Homeowner Maintenance Manual, carefully and thoroughly for
more information on how to maintain items in your home.
* The drywall warranty applies to shrinkage cracks and nail-pops. We will repair them once only during
the Warranty period. We recommend that homeowners wait until the 12th month before requesting
drywall repairs. We will only repaint the areas we repair, not the entire wall. We cannot guarantee colour
match of the new paint. We will only repaint areas back to the original colour. In the event that the wall
has been repainted a different colour, the homeowner will be responsible for repainting the affected areas
with the matching colour.
All information subject to change without notice 13 | P a g e2. WARRANTY EXCLUSIONS
• Weathering and normal wear and tear, deterioration, or deflection consistent with normal industry
standards
• Normal shrinkage of materials caused by drying after construction
• Any loss or damage which arises while a new home is being used primarily or substantially for non-
residential purposes
• Materials, labour, or design supplied by an owner
• Any damage to the extent it is caused or made worse by an owner or third party, including:
i) negligent or improper maintenance or improper operation by anyone other than the
Residential Builder or its employees, agents, or sub-contractors
ii) failure of anyone, other than the Residential Builder or its employees, agents, or sub-
contractors, to comply with the warranty requirements of the manufacturers of appliances,
equipment, or fixtures
iii) alterations to the new home, including the conversion of the non-living space into living
space or the conversion of the new home into two (2) or more units, by anyone other than the
Residential Builder or its employees, agents, or sub-contractors while undertaking their
obligations under the Purchase and Sale Agreement
iv) changes to the grading of the ground by anyone other than the Residential Builder or its
employees, agents, or subcontractors
• Failure of an owner to take timely action to prevent or minimize loss or damage, including the failure to
give prompt notice to National Home Warranty of a defect or discovered loss or a potential defect or loss
• Any damage caused by insects or rodents and other animals, unless the damage results from non-
compliance with the Building Code by the Residential Builder or its employees, agents, or subcontractors
• Bodily injury or damage to personal property or real property which is not part of a new home,
including any bodily injury or damage to personal property caused by mold
• Any defect in, or caused by, materials or work supplied by anyone other than the Residential
Builder or its employees, agents or subcontractors
• Accidental loss or damage from acts of nature including, but not limited to, fire, explosion, smoke,
water escape, glass breakage, windstorm, hail, lightning, falling trees, aircraft, vehicles, flood, earthquake,
avalanche, landslide, and changes in the level of the underground water table which are not reasonably
foreseeable by the Residential Builder
• Changes, alterations, or additions made to a new home by anyone after initial occupancy, except those
performed by the Residential Builder or its employees, agents or subcontractors as required by the
Warranty Insurance Certificate or under the Construction Contract or Purchase and Sale Agreement
• Contaminated Soil
• Subsidence of the land around a new home or along utility lines, other than subsidence beneath footings
of a new home or under driveways or walkways
• Diminution in the value of a new home
• Landscaping, both hard and soft, including plants, fencing, detached patios, gazebos and similar
structures
• Non-residential detached structures including sheds, garages, carports or outbuildings, or any structure
or construction not attached to or forming an integral part of the new home
• Any commercial use area and any construction associated with a commercial use area
All information subject to change without notice 14 | P a g e• Roads, curbs, lanes • Site grading and surface drainage, except as required by the Building Code • The operation of municipal services, including sanitary and storm sewer • Septic tanks or septic fields • The quality or quantity of water, either from a piped municipal water supply or from a well • A water well, but excluding equipment installed for the operation of a water well used exclusively for the new home, which equipment is considered to be part of the plumbing system for the new home • Any loss or damage caused or made worse by the failure of an owner to take reasonable steps to mitigate any damage All information subject to change without notice 15 | P a g e
3. MANUFACTURER WARRANTIES

Additional warranties are provided from manufacturers who supply the appliances and
the fixtures in your home. Service work for appliances must be arranged directly through the
manufacturer. These manufacturer warranties are separate from the National Home Warranty New Home
Warranty. Customer service phone numbers are listed in the manufacturer-provided literature for each
product under warranty. The table below has been provided to easily store all appliance model numbers
and contact information for your home.

         When calling for warranty information be prepared to provide the model, serial number and
         closing date to the manufacturer.

Original Closing Date:

        Appliance               Manufacturer       Model #           Serial #         Service Phone #

           Range

       Refrigerator
    OTR Microwave
        Oven

       Dishwasher

           Dryer

          Washer

  Hood Fan (optional)

  Built-in Microwave
       (optional)

  Garburator (optional)
       Wine Fridge
        (optional)
        Fireplace
        (optional)

All information subject to change without notice                                              16 | P a g e
SECTION 5: CARING FOR YOUR HOME 1. HOMEOWNER USE AND MAINTENANCE GUIDELINES We strive to create lasting value in all of our communities. This is best achieved when you, as the homeowner, know and perform appropriate maintenance tasks. Periodic maintenance is necessary because of normal wear and tear, the inherent characteristics of the materials used in your home, and normal service required by the various systems and equipment in your home, including the mechanical system. Natural fluctuations in temperature and humidity also affect your home creating maintenance issues. Prompt Attention In addition to routine care, an immediate minor maintenance repair will often save you a more serious, time-consuming, and sometimes costly repair later. Note also that neglecting routine maintenance can void applicable warranty coverage on all or part of your home. Manufacturer Literature Please take time to read the literature (warranties and maintenance/use and care guides) provided by the manufacturers of consumer products and other items in your home. Activate specific manufacturer's warranties by completing and mailing any registration cards included with their materials. 2. EQUIPMENT A. ELECTRICAL The electrical system in your home has been installed in accordance with the requirements set out by the provincial electrical code. The power supply is fed to the home via underground piping. Due to underground servicing, contact your local service provider before digging in your yard. Your home has its own electrical service panel with breakers to control power supplied to the different electrical circuits throughout your suite. The service panel is generally located in the mechanical room/closet, mudroom or garage. All information subject to change without notice 17 | P a g e
Resetting Circuit Breakers
To reset a breaker, first isolate the problem that may have caused the breaker to trip and disconnect it.
Then make sure the breaker is flipped all the way to the off position before turning it back on again.

Switch Activated Outlets
Some switches control ceiling and wall lighting. Some homes may also include switches that will control
half of an electrical outlet. This will enable you to plug in a lamp, turn the lamp on, and then switch it on
and off from the wall.

Ground Fault Circuit Interrupter
We have installed GFCI outlets in areas of the home where water and electricity are in close proximity
(e.g. bathroom). The GFCI will protect you against hazardous electrical shock. You may still feel a shock
but the GFCI should cut off the power quickly enough that a person in normal health should not receive
serious injury.

         Testing a GFCI outlet:
         You should test the GFCI monthly. To test:
                   1. Plug in an appliance and turn it on
                   2. Push the test button
                   3. This should cause the reset button to pop out and turn the power off
                   4. If the power remains on and the reset button does not pop out, have the plug checked
                   by a qualified electrician
                   5. If the appliance is off and the reset button has popped out, press the reset
                   button to restore power
                   6. If the GFCI fails to reset, call a qualified electrician

B. PLUMBING

Water Shut-off Valves
Each home has main shut-off valves (hot and cold) installed to shut off the water in each home in case of
emergency. As well, most plumbing fixtures have individual shut off valves usually located below the
fixture going into the wall.

To minimize water damage in case of an emergency, turn off the water supply to the affected line.

All information subject to change without notice                                                     18 | P a g e
Toilets We recommend that you flush only normal waste to avoid blockages. Never flush any domestic products down the toilet. Hot Water Hot water for your home is supplied by an individual hot water tank. The water temperature of a domestic hot water tank can be adjusted on the thermostat located on the tank. An average setting for the water temperature is 140ºC, adequate for dishwashers. This temperature is hot enough for most uses but will not cause scalding or burns. Hot water tanks are equipped with pressure relief valves located on the top of the tank designed to let pressure go when safe operating conditions are exceeded. Typical tanks have a life expectancy of 8 to 12 years. Hose Bibs Hose bibs (garden hose connections) have a valve inside the home that can be shut off in order to drain them before winter to prevent freezing and possible bursting of the exterior section of the pipe. These shut off valves need to be shut off in the winter months. Once the valve has been shut off, the exterior valve should be opened to allow water to drain. C. INTERIOR ENVIRONMENT CONTROLS Failure of an owner to properly ventilate and maintain proper heating levels can seriously affect a new home and the health of the occupants. Any resultant damage due to an owner’s actions would not be covered under the National Home Warranty New Home Warranty. Thermostats Your home is equipped with thermostats. These allow you to control the heat distribution throughout your home. Thermostats should not be set to zero. Too low a temperature will create unnecessary condensation and possibly mold. Thermostats can vary by as much as 3 degrees C. Exhaust Fans and OTR Microwave Fans Exhaust fans, hood fans and over-the-range (OTR) microwave fans are provided to reduce or eliminate excess moisture and cooking odors. For efficient operation and to reduce potential fire hazards, filters should be cleaned on a regular basis. All information subject to change without notice 19 | P a g e
At least one of the fans in your home is programmed to run periodically throughout the day to maintain
air circulation and regulate humidity. Located in one of the bathrooms, the fan will occasionally turn itself
on and off automatically.

Heat Recovery Ventilation System (Select Homes)
The Heat Recovery Ventilation (HRV) System in your home provides fresh air and improved climate
control while saving energy by reducing heating and cooling requirements. The HRV unit is located in
one of the storage closets in the garage – it is important to keep the closet doors shut when the closet is
not being used in order to avoid the potential for car exhaust to enter the system. The closet doors are
sealed to prevent fumes from entering when the doors are closed. For specific operating and maintenance
instructions, please consult the owner’s manual.

Heated Flooring (Optional)
If the master bathroom has been installed with heated flooring, it can be controlled by the thermostat
located in the master bathroom. This is a programmable thermostat allowing you to specify operating
times and temperatures.

In floor heating is an extremely effective way of heating your bathroom, allowing the heat to originate
evenly across the floor and rise to the ceiling - eliminating hot spots and temperature variation across the
room.

D. DRYER VENTING

The dryer location in your home is located to maximize usable floor space versus being located on an
exterior wall. This creates an increase in the length of pipe required to vent your dryer to the outdoors and
therefore increases maintenance requirements.

To maintain a properly functioning dryer, make sure that the lint trap and all dryer venting is clear of lint.
Clean the lint trap after each use. Periodic cleaning and maintenance of your dryer ducts is an important
step to maintain proper dryer operation and to reduce fire hazard. This is your responsibility. If you notice
a sudden increase in drying time, call a qualified mechanical contractor to check the operation of the dryer
and venting distribution.

All information subject to change without notice                                                    20 | P a g e
E. FIRE SAFETY

Fire Extinguishers
We recommend that you keep a personal fire extinguisher on hand for your home. This type of
extinguisher is small and typically used to fight small kitchen fires. Keep your extinguisher in an
accessible place and not over an area such as the stove.

Smoke Detectors
We have installed smoke detectors in your home which are wired directly to your electrical panel. There
is a backup battery that operates in the event of emergency power.

Periodically you should verify that the alarm is active. Some models will have a small light that is on
when the alarm has power. You can see the light by standing directly under the detector.

3. CRAWL SPACE/UNFINISHED BASEMENT

Some of the homes are constructed over a crawl space/unfinished basement. The crawl space/unfinished
basement may be used for storage, but items should be raised off the floor to prevent moisture
penetration.

All information subject to change without notice                                                  21 | P a g e
SECTION 6: MAINTENANCE RECOMMENDATIONS
We recognize that it’s impossible to anticipate and describe everything needed for good home care, so we
focused on interior items that homeowners commonly ask about. The maintenance areas are listed in
alphabetical order to make finding answers to your questions convenient. For additional maintenance
instructions, including the exterior components of your home, please refer to the National Home
Warranty Maintenance Manual in Section 9.

1. CABINETS
> Homeowner Use and Maintenance Guidelines
It is confirmed at your home orientation that all cabinet parts are installed and that their surfaces are in
acceptable condition.

Cleaning
Products such as lemon oil or polishes that include scratch cover are suggested for wood cabinet care.
Follow container directions. Use such products a maximum of once every 3 to
6 months to avoid excessive build-up. Avoid paraffin-based spray waxes and washing cabinets with
water, as both will damage the luster of the finish. You may also contact the manufacturer for additional
recommendations.

Hinges
If hinges catch or drawer glides become sluggish, a small amount of silicone lubricant will improve their
performance.

Moisture
Damage to cabinet surfaces and warping can result from operating appliances that generate large amounts
of moisture (such as a crockpot) too near to the cabinet. When operating such appliances, place them in a
location that is not directly under a cabinet.

2. CARPET
> Homeowner Use and Maintenance Guidelines
Please refer to the manufacturers’ recommendations for additional information on the care
of your carpet.

All information subject to change without notice                                                     22 | P a g e
Burns
Take care of any kind of burn immediately. First snip off the darkened fibers, then use a soapless cleaner
and sponge with water. If the burn is extensive, talk with a professional about replacing the damaged
area.

Cleaning
You can add years to the life of your carpet with regular care. Carpet wears out because of foot traffic and
dirt particles that get trampled deep into the pile beyond the suction of the vacuum. The dirt particles
wear down the fibers like sandpaper and dull the carpet. The most important thing you can do to protect
your carpet is to vacuum it frequently.

Vacuum twice each week lightly and once a week thoroughly. Heavy traffic areas may require more
frequent cleaning. A light vacuuming is three passes; a thorough job may need seven passes. A vacuum
cleaner with a beater-bar agitates the pile and is more effective in bringing dirt to the surface for easy
removal.

Vacuuming high-traffic areas daily helps keep them clean and maintains the upright position of the nap.
Wipe spills and clean stains immediately. For best results, blot or dab any spill or stain; avoid rubbing.
Test stain-removers on an out-of-the-way area of the carpet, such as in a closet, to check for any
undesirable effects.

Have your carpet professionally cleaned regularly, usually after 18 months in your new home and then
once a year after that.

Crushing
Furniture and traffic may crush a carpet's pile fibers. Frequent vacuuming in high-traffic areas and glides
or cups under heavy pieces of furniture can help prevent this. Rotating your furniture to change the traffic
pattern in a room promotes more even wear. Some carpets resist matting and crushing because of their
level of fiber, but this does not imply or guarantee that no matting or crushing will occur. Heavy traffic
areas such as halls and stairways are more susceptible to wear and crushing. This is considered normal
wear.

Fading
Science has yet to develop a color that will not fade with time. All carpets will slowly lose some color

All information subject to change without notice                                                    23 | P a g e
due to natural and artificial forces in the environment.      You can delay this process by frequently
removing soil with vacuuming, regularly changing air filters in heating and air conditioning systems,
keeping humidity and room temperature from getting too high, and reducing sunlight exposure with
window coverings.

Filtration
If interior doors are kept closed while an air conditioning system is operating, air circulation from the
closed room flows through the small space at the bottom of the door. This forces the air over the carpet
fibers, which in turn act as a filter, catching particulate pollution. Over time, a noticeable stain develops at
the threshold.

Fuzzing
Some fuzzing is normal with brand new carpets and should be expected after initial installation--varying
by the type of carpet. In loop carpets, fibers may break. Simply clip the excess fibers. If it continues,
call a professional.

Pilling
Pilling or small balls of fiber can appear on your carpet, depending on the type of carpet fiber and the type
of traffic. If this occurs, clip off the pills. If they cover a large area, seek professional advice.

Rippling
With wall-to-wall carpeting, high humidity may cause rippling. If the carpet remains rippled after the
humidity has left, have a professional restretch the carpeting using a power stretcher, not a knee-kicker.

Seams
Carpet usually comes in 12-foot widths, making seams necessary in most rooms. Visible seams are not a
defect unless they have been improperly made or unless the material has a defect making the seam appear
more pronounced than normal. The denser and uniform the carpet texture, the more visible the seams will
be.

Carpet styles with low, tight naps result in the most visible seams. Seams are never more visible than
when the carpet is first installed. Usually with time, use, and vacuuming the seams become less visible.

Shedding

All information subject to change without notice                                                        24 | P a g e
New carpeting, especially pile, sheds bits of fiber for a period of time. Eventually these loose fibers are
removed by vacuuming.

Snags
Sharp-edged objects can grab or snag the carpet fiber. When this occurs, cut off the snag. If the snag is
especially large, call a professional.

Sprouting
Occasionally you may find small tufts of fiber sprouting above carpet surface. Simply use scissors to cut
off the sprout. Do not attempt to pull it, because other fibers will come out in the process.

Stains
No carpet is stain-proof.       Although many carpet manufacturers designate their carpet as stain-resistant,
some substances may still cause permanent staining. These include hair dyes, shoe polish, paints, and
India ink. Some substances destroy or change the color of carpets, including bleaches, acne medications,
drain cleaners, plant food, insecticides, and food or beverages with strongly colored natural dyes as found
in some brands of mustard and herbal tea.

Refer to your care and maintenance brochures for recommended cleaning procedures for your particular
fiber. Pretest any spot-removal solution in an inconspicuous area before using it in a large area. Apply
several drops of the solution, hold a white tissue on the area, and count to ten. Examine both tissue and
carpet for dye transfer and check for carpet damage.

3. CAULKING
> Homeowner Use and Maintenance Guidelines
Time and weather will shrink and dry caulking so that it no longer provides a good seal. Caulking at the
base of bathtubs where it meets the floor may also lift over time with excessive water accumulation on the
floor. As routine maintenance, check the caulking and make needed repairs. Caulking compounds and
dispenser guns are available at hardware stores. Read the manufacturer's instructions carefully to be
certain that you select an appropriate caulk for the intended purpose.

Colored Caulk
Colored caulking is available where larger selections are provided. As with any colored material, dye lots
can vary.

All information subject to change without notice                                                     25 | P a g e
Latex Caulk
Latex caulking is appropriate for an area that requires painting, such as where wood trim meets the wall.

Silicone Caulk
Caulking that contains silicone will not accept paint; it works best where water is present, for example,
where a tub meets tile or a sink meets a countertop.

Also see: Countertops, Expansion and Contraction, and Trim.

4. CERAMIC TILE & STONE
> Homeowner Use and Maintenance Guidelines
Variations in color or discontinued patterns should be expected.

Cleaning
Ceramic tile is one of the easiest floor coverings to maintain, simply vacuum when needed. Occasionally,
a wet mopping with warm water may be appropriate. Avoid adding detergent to the water. If you feel a
cleaning agent is required, use a mild solution of warm water and dishwasher crystals (they will not result
in a heavy, difficult-to-remove lather on the grout). Rinse thoroughly.

The ceramic tile installed on walls or countertops in your home may be washed with any nonabrasive
soap, detergent, or tile cleaner. Abrasive cleaners will dull the finish.

Grout Discoloration
Clean grout that becomes yellowed or stained with a fiber brush, cleanser, and water. Grout cleansers and
whiteners are available at most hardware stores. When grout is repaired or touched-up, new grout may
vary in colour from the original.

Sealing Grout
Sealing grout is your decision and responsibility. Once grout has been sealed, ongoing maintenance of
that seal is necessary.

Separations
Expect slight separations to occur in the grout between tiles. This grout is for decorative purposes only; it

All information subject to change without notice                                                   26 | P a g e
does not hold the tile in place. Cracks in the grout can be filled using premixed grout purchased from
flooring or hardware stores. Follow package directions.

Tile around bathtubs or countertops may appear to be pulling up after time. This is caused by normal
shrinkage of grout or caulk and shrinkage of wood members as they dry out. If this occurs, the best
remedy is to purchase tub caulk or premixed grout from a hardware store. Follow directions on the
container. This maintenance is important to protect the underlying surface from water damage.

5. CONDENSATION
> Homeowner Use and Maintenance Guidelines
When warm, moist air comes into contact with cooler surfaces, the moisture condenses. Outside we see
this as dew; inside you may see it as a layer of moisture on glass windows and doors. This condensation
comes from high humidity within the home combined with low outside temperatures and inadequate
ventilation.

Temperature
Avoid setting your thermostat at extreme temperatures. Heating your home will cause materials to dry out
faster, generating more moisture into the air; drying the materials out too fast also increases shrinkage
cracks and separations.

Ventilation
Develop the habit of using exhaust fans in bathrooms and over the stove. When weather conditions
permit, open windows so fresh air can circulate through your home. Keep the dryer exhaust hose clean
and securely connected.

Also see: Ventilation.

6. COUNTERTOPS
> Homeowner Use and Maintenance Guidelines
Use a cutting board to protect your counters when you cut or chop. Protect the counter from heat and
from extremely hot pans. If you cannot put your hand on it, do not put it on the counter. Do not use
countertops as ironing boards and do not set lit cigarettes on the edge of the counter. Do not sit on or
apply excessive force to your countertop overhang, this can cause permanent damage to your countertop.

All information subject to change without notice                                                   27 | P a g e
During your new home orientation, we confirm that all countertops are in acceptable condition. We
repair noticeable surface damage such as chips, cracks, and scratches noted during the new home
walkthrough. Repair of surface damage noted subsequent to this is one of your home maintenance
responsibilities.

Caulking
The caulking between the countertop and the wall along the edge at the backsplash and around the sink
may shrink, leaving a slight gap. Maintaining a good seal in these locations is important to avoid moisture
penetration. This is a homeowner maintenance item.

Cleaning
Avoid abrasive cleaners that will damage the luster of the surface, and be sure to blot up spills
immediately to avoid stains.

Engineered Stone
Engineered stone will not chip as readily as many other hard surfaces, but can be damaged by a sharp
blow. Avoid abrasive cleaners or razor blades on engineered stone; both damage the surface.

Laminates
Laminated countertops will have one or more discernible seams.

Also see: Ceramic Tile & Stone

7. DOORS AND LOCKS
> Homeowner Use and Maintenance Guidelines
The doors installed in your home are wood products subject to natural characteristics of wood such as
shrinkage and warpage. Natural fluctuations caused by humidity and the use of forced air furnaces,
showers, and dishwashers, may cause interior doors to require occasional adjustments.

Failure to Latch
If a door will not latch because of minor settling, you can correct this by making a new opening in the
jamb for the latch plate and raising or lowering the plate accordingly.

All information subject to change without notice                                                    28 | P a g e
Hinges
You can remedy a squeaky door hinge by removing the hinge pin and applying a silicone lubricant to it.
Avoid using oil, as it can gum up or attract dirt. Graphite works well as a lubricant but can create a gray
smudge on the door or floor covering beneath the hinge if too much is applied.

Keys
Keep a duplicate privacy lock key where children cannot reach in the event that a youngster locks himself
or herself in a room. The top edge of the door casing is often used as a place to keep the key. A small
screwdriver or similarly shaped device can open some types of privacy locks.

Locks
Lubricate door locks with graphite or other waterproof lubricant. Avoid oil, as it will gum up.

Shrinkage
Use putty, filler, or latex caulk to fill any minor separations that develop at mitered joints in door trim and
follow with painting. Panels of wood doors shrink and expand in response to changes in temperature and
humidity. Touching up the paint or stain on unfinished exposed areas is your home maintenance
responsibility.

Sticking
The most common cause of a sticking door is the natural expansion of lumber caused by changes in
humidity. When sticking is caused by swelling during a damp season, do not plane the door unless it
continues to stick after the weather changes.

Before planing a door because of sticking, try two other steps: first, apply either a paste wax,
light coat of paraffin, or candle wax to the sticking surface; or second, tighten the screws
that hold the door jamb or door frame. If planing is necessary even after these measures, use
sandpaper to smooth the door and paint the sanded area to seal against moisture.

Warping
If a door warps slightly, keeping it closed as much as possible often returns it to normal.

All information subject to change without notice                                                    29 | P a g e
Weather Stripping
Weather stripping and exterior door thresholds occasionally require adjustment or replacement.

8. DRYWALL
> Homeowner Use and Maintenance Guidelines
Slight cracking, nail pops, or seams may become visible in walls and ceilings. These are caused by the
shrinkage of the wood and normal deflection of rafters to which the drywall is attached.

Ceilings
The ceilings in your home are easy to maintain: periodically remove dust or cobwebs as part of your
normal cleaning and repaint as needed.

Repairs
With the exception of the one-time repair service provided by the Residential Builder, care of drywall is
your maintenance responsibility. Most drywall repairs can be easily made. This work is best done when
you redecorate the room.

Repair hairline cracks with a coat of paint. You can repair slightly larger cracks with spackle or caulk. To
correct a nail pop, reset the nail with a hammer and punch. Cover it with spackle, which is available at
paint and hardware stores. Apply two or three thin coats. When dry, sand the surface with fine-grain
sandpaper, and then paint. You can fill indentations caused by sharp objects in the same manner.

9. EXPANSION AND CONTRACTION
> Homeowner Use and Maintenance Guidelines
Changes in temperature and humidity cause all building materials to expand and contract. Dissimilar
materials expand or contract at different rates. This movement results in separation between materials,
particularly dissimilar ones. You will see the effects in small cracks in drywall and in paint, especially
where moldings meet drywall, at mitered corners, and where tile grout meets tub or sink. While this can
alarm an uninformed homeowner, it is normal.

Shrinkage of wood members of your home is inevitable and occurs in every new home. Although this is
most noticeable during the first year, it may continue beyond that time. In most cases, caulk and paint are
all that you need to conceal this minor evidence of a natural phenomenon. Even though properly installed,
caulking shrinks and cracks. Maintenance of caulking is your responsibility.

All information subject to change without notice                                                   30 | P a g e
10. FIREPLACE (SELECT HOMES)

> Homeowner Use and Maintenance Guidelines

Also see: Fire Prevention

The fireplace in your home is equipped with an electronic ignition system that lights the pilot burner
automatically in order to save natural gas. For specific operating and maintenance instructions, please
consult the owner’s manual.

11. GAS SHUT-OFF
> Homeowner Use and Maintenance Guidelines
You will find shut-offs on gas lines near their connection to each item that operates on gas. In addition,
there is a main shut-off at the meter. We point these out during the orientation.

Gas Leak
If you suspect a gas leak, leave the home and call the gas company immediately for emergency service.

12. HARDWARE
> Homeowner Use and Maintenance Guidelines
Door handles and locks should operate correctly with little attention. Over time, they may need slight
adjustments due to normal shrinkage of the framing.     Occasionally, you may need to tighten screws or
lubricate. We confirm that all hardware is in acceptable condition during your new home walkthrough
orientation.

13. HEATING SYSYEM: HEAT PUMP
> Homeowner Use and Maintenance Guidelines
If your home contains a heat pump system, you should be aware of the performance characteristics unique
to these systems. As with any system, read the manufacturer's literature and follow all instructions for
efficient operation and maintenance of your system. Clean or replace filters once a month. Provide
professional service for your system at least once every two years.

All information subject to change without notice                                                  31 | P a g e
Air Conditioning and Heating
A heat pump system operates differently from a gas forced-air furnace. The same system provides both
heat and air conditioning. This is possible because a refrigerant flows back and forth in the coils of the
heat pump, controlled by a reversing valve. In heating mode, the heat pump removes heat from the
outside air and transfers it to the inside air. In cooling mode, it does just the opposite, removing heat from
the inside air and discharging it outside of the home. The thermostat inside your home controls this
heating or cooling activity.

Air Temperature at Vents
Do not expect dramatic temperature differences in the air coming from the vents as is common with other
kinds of systems. The coils used in a heat pump system operate at lower temperatures than those common
in a gas forced-air system. As a result, in the heat mode, air from the supply vents will typically range
from 85 to 90 degrees F.

The vents will not feel hot, though the air discharged is warmer than the air in the room by as much as 20
degrees F.

Register Adjustment
Registers will require adjustment from time to time to maximize your comfort. Do not completely close
off more than one supply register at a time. This can restrict the airflow too much and reduce the
efficiency of the system. A good technique is to completely open all the vents, then gradually move the
temperature setting up until the coolest room is comfortable. Once the coolest room is comfortable,
gradually close the vents in the warmer rooms until all rooms are comfortable as well. Reverse this
process for air conditioning.

Night Setback
Unless you have a night setback thermostat designed to work with a heat pump system, do not turn the
thermostat down in the evenings. Adjust the temperature a fraction of a degree at a time until a
comfortable, permanent setting is found.

Return Air Vents
As with any heating system, return air vents must be clear so the air flows through the ducts unimpeded.
Before calling for service, check to confirm that the:
                                                               set above the room temperature.

All information subject to change without notice                                                   32 | P a g e
the tripped position to the off position before you can turn it back on.)
lter is clean to allow airflow.
s in individual rooms are open.
Air returns are unobstructed.
Even if the troubleshooting tips do not identify a solution, the information you gather will be useful to the
service provider you call.
14. LAMINATE FLOORING
> Homeowner Use and Maintenance Guidelines
While laminate floors can withstand a high level of dirt and traffic without much damage, routine care
and maintenance are still required to prolong the life of your laminate floor.
For daily cleaning, it is sufficient to vacuum the floor or sweep it with a soft broom. Avoid
using upright vacuums with beater bars as they can cause dents and scratches in the floor.
Footmarks and more stubborn dirt can be wiped off with a damp but well wrung out cloth. For heavier
cleaning, use a laminate flooring cleaner. However, never flood the surface with excessive amounts of
water or floor cleaners. Clean up liquid spills as soon as they occur as they may seep into the joints
causing them to become weakened or damaged. Delamination can also occur in severe cases.
Although laminate floors are protected against scratching and gouging with a tough coating, care should
still be taken to avoid coming into contact with sharp or damage causing objects. Dirt brought in on the
underneath of footwear is one of the biggest causes of scratches and an effective way of keeping it at bay
is to place wipe mats at entrances or take off your shoes inside your home. Use felt gliders or soft rubber
rollers under the feet of movable furniture items to protect laminate floors from wearing out.
During the cold periods or the heating season, the laminate floor may dry out. To avoid this, it is
recommended that you install a humidifier to maintain the room humidity at a constant level. This will
help prevent excessive expansion and contraction of the floor which may cause buckling and unattractive
gaps between the planks.
All information subject to change without notice 33 | P a g ePlease refer to the manufacturers’ Care and Maintenance Guide for specific recommendations for care and cleaning. 15. MILDEW > Homeowner Use and Maintenance Guidelines Mildew is a fungus that spreads through the air in microscopic spores. They love moisture and feed on surfaces or dirt. On siding, they look like a layer of dirt. To determine whether you are dealing with mildew or dirt, wipe the surface with a cloth or sponge dampened with bleach. If the bleach causes the surface to lose its dark appearance, you are most likely seeing mildew. Cleaning mildew from your home is your responsibility. Solutions that remove mildew are available from local paint or home improvement stores. Wear protective eyewear and rubber gloves for this task; the chemicals that remove mildew are unfriendly to humans. 16. MIRRORS > Homeowner Use and Maintenance Guidelines To clean your mirrors, use any reliable liquid glass cleaner or polisher available at most hardware or grocery stores. Avoid acidic cleaners and splashing water under the mirror; either can cause the silvering to deteriorate. Acidic cleaners are usually those that contain ammonia or vinegar. Avoid getting glass cleaners on plumbing fixtures as some formulas can deteriorate the finish. 17. PAINT AND STAIN > Homeowner Use and Maintenance Guidelines Because of changes in the formula for paint (such as the elimination of lead to make paints safer), painted surfaces must be washed gently using mild soap and as little water as possible. Avoid abrasive cleaners, scouring pads, or scrub brushes. Flat paints show washing marks more easily than gloss paints do. Often better results come from touching up rather than washing the paint. Stain For minor interior stain touch-ups, a furniture-polish-and-stain treatment is inexpensive, easy to use, and will blend in with the wood grain, Follow directions on the bottle. Touch-Up When doing paint touch-ups, use a small brush, applying paint only to the damaged spot. Touch-ups may not match the surrounding area exactly, even if the same paint mix is used. All information subject to change without notice 34 | P a g e
When it is time to repaint a room, prepare the wall surfaces first by cleaning with a mild
soap and water mixture or a reliable cleaning product.

Also see: Drywall

18. PLUMBING
> Homeowner Use and Maintenance Guidelines

Your plumbing system has many parts, most of which require little maintenance. Proper cleaning,
occasional minor attention, and preventive care will assure many years of good service from this system.

Aerators
Even though your plumbing lines have been flushed to remove dirt and foreign matter, small amounts of
minerals may enter the line. Aerators on the faucets strain much of this from your water. Minerals caught
in these aerators may cause the faucets to drip because washers wear more rapidly when they come in
contact with foreign matter.

Also see: Dripping Faucet

Cleaning
Follow manufacturer's directions for cleaning fixtures. Avoid abrasive cleansers. They remove the shiny
finish and leave behind a porous surface that is difficult to keep clean. Clean plumbing fixtures with a soft

All information subject to change without notice                                                  35 | P a g e
sponge and soapy water (a nonabrasive cleaner or a liquid detergent is usually recommended by
manufacturers). Then polish the fixtures with a dry cloth to prevent water spots.

Clogs
The main causes of toilet clogs are domestic items such as disposable diapers, excessive amounts of toilet
paper, sanitary supplies, Q-tips, dental floss, and children's toys. Improper garbage disposal use also
causes many plumbing clogs. Always use plenty of cold water when running the disposal.

This recommendation also applies to grease; supplied with a steady flow of cold water, the grease
congeals and is cut up by the blades. If you use hot water, the grease remains a liquid, then cools and
solidifies in the sewer line. Allow the water to run 10 to 15 seconds after shutting off the disposal.

You can usually clear clogged traps with a plumber's helper (plunger). If you use chemical
agents, follow directions carefully to avoid personal injury or damage to the fixtures.

Clean a plunger drain stopper—usually found in bathroom sinks—by loosening the nut under the sink at
the back, pulling out the rod attached to the plunger, and lifting the stopper. Clean and return the
mechanism to its original position.

Dripping Faucet
You can repair a dripping faucet by shutting off the water at the valve directly under the sink, then
removing the faucet stem, changing the washer, and reinstalling the faucet stem. The shower head is
repaired the same way. Replace the washer with another of the same type and size. You can minimize the
frequency of this repair by remembering not to turn faucets off with excessive force. (Please note that
some manufacturers do not use rubber washers.)

Extended Absence
If you plan to be away for an extended period, you should drain your water supply lines. To do this, shut
off the main supply line and open the faucets to relieve pressure in the lines. You may also wish to shut
off the water heater. Drain the tank by running a hose from the spigot on the bottom to the floor drain. If
you leave the tank full, set the temperature to its lowest or “vacation” setting. Check manufacturer’s
directions for additional hints and instructions.

All information subject to change without notice                                                   36 | P a g e
Leaks
If a major plumbing leak occurs, the first step is to turn off the supply of water to the area involved. This
may mean shutting off the water to the entire home. Then contact the appropriate contractor.

Low Pressure
Occasional cleaning of the aerators on your faucets (normally every three to four months)
will allow proper flow of water. The City of Nanaimo controls the overall water pressure.

Porcelain
You can damage porcelain enamel with a sharp blow from a heavy object or by scratching. Do not stand
in the bathtub wearing shoes unless you have placed a protective layer over the bottom of the tub. If you
splatter paint onto porcelain enamel during redecorating, wipe it up immediately. If a spot dries before
you notice it, use a recommended cleaner.
Running Toilet

With a combination of a clogged drain (see above) and a running toilet, you increase your chances for a
flood. A flood caused by this combination is excluded from the Builder’s Limited Warranty, and is your
responsibility.

To stop running water, check the shut-off float in the tank. You will most likely find it has lifted too high
in the tank, preventing the valve from shutting off completely. In this case, gently bend the float rod down
until it stops the water at the correct level. The float should be free and not rub the side of the tank or any
other parts. Also check the chain on the flush handle. If it is too tight, it will prevent the rubber stopper at
the bottom of the tank from sealing, resulting in running water.

Stainless Steel
Clean stainless steel sinks with soap and water to preserve their luster. Avoid using abrasive cleaners or
steel wool pads; these will damage the finish. Prevent bleach from coming into prolonged contact with the
sink as it can pit the surface. An occasional cleaning with a good stainless steel cleaner will enhance the
finish. Rub in the direction of the polish or grain lines and dry the sink to prevent water spots.

Avoid leaving produce on a stainless steel surface, since prolonged contact with produce can stain the
finish. Also avoid using the sink as a cutting board; sharp knives will gouge the finish.

All information subject to change without notice                                                      37 | P a g e
Toilet Tank Care
Avoid exposing the toilet to blows from sharp or heavy objects, which can cause shipping or cracking.
Avoid abnormal pressures against the sides of the tank. It is possible to crack the tank at the points where
it is attached to the bowl.

19. SHOWER DOORS OR TUB ENCLOSURES
> Homeowner Use and Maintenance Guidelines
Shower doors and tub enclosures require minimal care. Using a squeegee to remove water after a bath or
shower will keep mineral residue and soap film to a minimum. A coating of wax can also help prevent
buildup of minerals and soap.

Use cleaning products suggested by the manufacturer to avoid any damage to the trim and hardware.

Avoid hanging wet towels on corners of doors; the weight can pull the door out of alignment and cause it
to leak.

Check and touch-up caulking on an as needed basis.

20. SMOKE DETECTORS
> Homeowner Use and Maintenance Guidelines
Read the manufacturer's manual for detailed information on the care of your smoke detectors.

Cleaning
For your safety, clean each smoke detector monthly to prevent a false alarm or lack of response in a fire.
After cleaning, push the test button to confirm the alarm is working.

Locations
smoke detectors are installed in accordance with building codes, which dictate locations. The Builder
cannot omit any smoke detector and you should not remove or disable any smoke detector.

21. VENTILATION
> Homeowner Use and Maintenance Guidelines

Homes today are built more tightly than ever. This saves energy dollars but creates a potential concern.

All information subject to change without notice                                                  38 | P a g e
Condensation, cooking odours, indoor pollutants, radon, and carbon monoxide may all accumulate. We
provide mechanical and passive methods for ventilating homes. Your attention to ventilation is important
to health and safety.

Daily Habits
Your daily habits can help keep your home well ventilated:

                                                                                  when you are
         cooking.
                  your house by opening windows for a time when weather permits

22. WINDOWS AND GLASS DOORS
> Homeowner Use and Maintenance Guidelines
Contact a glass company for re-glazing of any windows that break. Glass is difficult to install without
special tools.

Aluminum
Clean aluminum metal surfaces with warm, clear water. Do not use powdered cleaner. After each
cleaning, apply a silicone lubricant. Clean glass as needed with vinegar and water, a commercial glass
cleaner, or the product recommended by the window manufacturer.

Condensation
Condensation on interior surfaces of the window and frame is the result of high humidity within the home
and low outside temperatures. Your family’s lifestyle controls the humidity level within your home. If
your home includes a humidifier, closely observe the manufacturer's directions for its use.

Sills
The most common maintenance activity for the window sills in your home is dusting. Twice a year, check
caulking and touch-up as needed. Wax is not necessary but can be used to make sills gleam. It is your
responsibility to protect the window sills from moisture. If you arrange plants on a sill, include a plastic
tray under the pot.

Sliding Glass Doors
Sliding glass doors are made with tempered glass which is more difficult to break than ordinary glass. If

All information subject to change without notice                                                    39 | P a g e
You can also read