User Manual US6100 / Eagle - Tile & Grout Cleaner - US STEAM Corporate Office 2440 Chambers Street, Ste A Venus, TX 76084 (817) 297-7745
←
→
Page content transcription
If your browser does not render page correctly, please read the page content below
User Manual
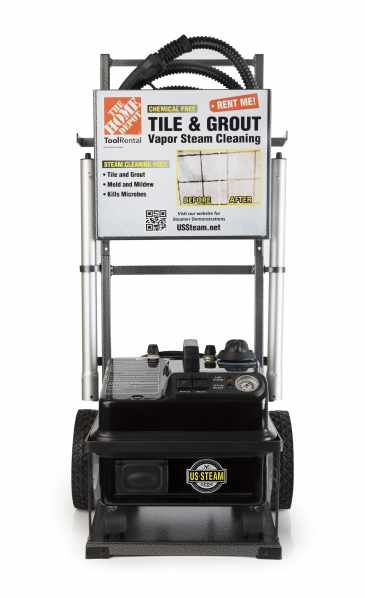
Tile & Grout Cleaner
US6100 / Eagle
US STEAM® Corporate Office
2440 Chambers Street, Ste A
Venus, TX 76084
(817) 297-7745
1Order Tile & Grout Cleaning Attachments
Number (order through Home Depot Tool Rental)
US100 Brush Kit Nylon
US 200 Brush Kit Brass
ACC0042 Floor Brush
Extension
ACC0006
Wands
ACC0028 1-Hole Nozzle
EAG0787 Water Tank Cap
EAG5680 Hose
EAG0045 WheelTable of Contents
Cleaning Tile & Grout ________________________________________________ 4
Quick Start Guide ________________________________________________ 5
Refilling ________________________________________________ 5
Shut Down Procedure ________________________________________________ 5
Descaling ________________________________________________ 6
Trouble Shooting ________________________________________________ 7
Notices ________________________________________________ 8
Support and Returns ________________________________________________ 9
STEAM GENERATED BY THIS MACHINE IS EXTREMLY HOT
AND WILL CAUSE INJURY IF IT COMES IN CONTACT WITH
THE SKIN OR EYES.
Ø Use only as directed in the user manual (download at
www.ussteam.net/manuals).
Ø Never place any body part in front of the steam nozzle.
Ø Only aim the steam nozzle at the cleaning area.
Ø Never unscrew drain plug while steamer is hot.
Ø Use only a 10 or12 gauge / 15AMP rated or higher extension cord. Max
25ft length.
Ø Only add tap water to the tank – NO CHEMICALS.
Ø Do not operate or leave unattended around children.
Ø Always turn OFF when not in use.
3Work Techniques
Bed Bugs & Dust Mites
Bed bugs and dust mites live close to their food source. Steam will kill bed bugs on contact.
To eliminate, you must kill the bugs and their larva.
Ø Use large triangle brush with bonnet.
Ø Steam mattresses, areas around bed, and all base boards.
Ø Bugs will die on contact so you will need to vacuum over treated areas.
Ø Mattress will be damp so let it air dry before putting on linens.
Ø It may take more than one cleaning to kill all bugs and larva.
CLEANING: Grout CLEANING: Tile
① Connect the silver extensions wands and ① Attach large floor brush.
nozzle to hose handle. ② Steam pressure: Medium
② Attach 1” nylon brush to nozzle. ③ Move slowly over tile allowing steam to
③ Steam pressure: Medium penetrate the pores in the tile.
④ Apply gentle pressure to the brush during ④ It may be necessary to wrap the brush with a
cleaning. towel for deeper cleaning.
ØLet the steam do the work.
ØSteam will push the dirt out of the grout.
Use a towel to wipe.
ØAngle the brush to clean the edges of grout
line.
Floors
ØVinyl or Wood – Use the large floor brush with a bonnet at low steam volume.
WHEN STEAMING A WOOD FLOOR, NEVER LET BRUSH STAND IN ONE PLACE
WHILE STEAM TRIGGER IS ON. ALWAYS KEEP BRUSH MOVING. GO OVER AREA
TWO OR THREE TIMES AS NEEDED.
4Quick Start Guide
Tank Cap
1) FILL TANK WITH WATER
Ø Remove the cap and pour tap water into the steamer.
Ø Do NOT put cleaning fluids in the steamer. THIS WILL VOID THE
WARRANTY
2) CONNECT HOSE
Ø Lift the socket cover on the front of the steam cleaner.
Ø Insert the square end of the hose into the socket until you hear a click.
3) PLUG INTO ELECTRICAL OUTLET
Ø Plug the power cord into an outlet.
Ø The steam cleaner should be the only appliance plugged into the outlet.
Ø Use only a 12-gauge 15AMP extension cord with maximum length of 25ft.
4)POWER ON THE STEAM CLEANER
Ø Press the POWER AND STEAM buttons.
Ø It will take 10 minutes before your steamer is ready to use.
Ø Pressure gauge will read greater than 4.
During use, the Steam Ready light will STEAM READY
blink indicating the boiler is heating. ON/OFF STEAM
5)BLEED THE HOSE BEFORE USING
Ø Squeeze the gray trigger on the hose handle to purge water from the hose into a towel for about 10
seconds.
Ø Select Cleaning Attachment.
LOW WATER ALERT & REFILLING
During start-up or use, the steamer may run low on water causing the ORANGE light to blink and the
alarm to sound. The Eagle steamer has a separate fill tank so there is no cool down requirements.
ØRemove cap, add water, and restart the steamer by turning OFF and ON the Power and Steam buttons.
6)STEAM CONTROL DIAL is used to control the amount of steam released.
Ø Increase steam pressure by turning the dial counter-clockwise.
Ø Decrease the steam pressure by turning dial clockwise.
Ø Do NOT turn the dial all the way clockwise. This is the lowest possible setting and no steam will come
out when pulling the trigger.
7) SHUT DOWN PROCEDURE
Ø Turn off Power and Steam buttons.
Ø If you do not use the steamer daily, unplug and drain water
from the boiler. Make sure steamer has cooled before draining
water from the boiler.
5Accessory Cleaning and Descaling
ACCESSORY CLEANING – AFTER EACH USE
Always wash accessory brushes with warm, mild soapy water after each use. Get in the good
habit of cleaning brushes before the dirt dries on them. All accessories can also be cleaned in the
dishwasher, except for the flexible hose. Accessories can be sanitized by steaming them with the
steam hose and the 1-hole nozzle.
DESCALING
Ø Every months or
Ø When the steamer takes longer than 10 minutes to heat.
Do NOT empty boiler when steamer is hot. Empty only after the steamer
has cooled for at least 30 minutes.
① Turn steamer over and unscrew (by hand) the drain plug.
② Drain all water in the steamer and replace the drain plug.
③ Pour a mixture of 2 cups vinegar and 2 cups water into the holding tank.
④ Push Power and Steam Release buttons to run the descaling mixture into the boiler.
⑤ After 1 minute or when the low water warning starts beeping, turn off Power button and let
unit set for 60 minutes.
⑥ Remove drain plug and completely empty boiler tank.
⑦ Replace drain plug when finished draining.
ØNote: O-Ring is required to make a water tight seal.
Rinse the Boiler Tank Before Use
① Refill steamer with tap water.
② Turn ON by pushing the Power and Steam Release Buttons allowing water to move from the
reservoir tank to the boiler.
③ Run for 1 minute.
③ Remove boiler drain plug and drain until empty.
④ Steamer is ready for use when there is no sediments coming from the water draining from the
boiler.
Ø This step may need to be repeated.
NEVER ADD CHEMICALS INTO THE TANK! Adding any form of chemicals or
fragrance to the tank will void the warranty and could result in malfunction or damage to the
system.
6Troubleshooting
PROBLEM SOLUTION
Push Power Button and Check electrical panel for tripped breaker:
steamer does not turn Ø The steam cleaner should be the only appliance plugged into an
ON outlet.
(No Lights) Ø Use only a 12 gauge / 15AMP extension cord with maximum
length of 25ft.
No response from the Check hose connection:
trigger button on the Ø Disconnect and reconnect.
hose handle Ø You should hear a “click” when connecting hose to the
steamer.
Steamer takes longer Have you descaled the boiler?
than Ø Your steamer needs to be descaled every 6 months or when you
15 minutes to heat notice a reduction in steam pressure.
Power but no steam The steamer is vapor locked and needs to be drained.
① Check hose Vapor lock: Air is trapped in the water pump:
connection. ① Turn OFF let the steamer cool for at least;10 minutes.
② Is the pressure dial ② Remove drain plug (by hand) located on bottom of the
reading less than 3? steamer.
③ Drain water and replace drain plug.
④ Close steam release valve.
⑤ Refill reservoir tank and restart.
If you are still having problems, contact our service team at (817) 888-8313
7Notices
Read all instructions before using this steam cleaner.
WARNING: STEAM GENERATED BY THE EAGLE IS EXTREMLY HOT AND MAY CAUSE
INJURY IF THE STEAM COMES IN DIRECT CONTACT WITH THE SKIN OR EYES. USE AS
ONLY AS DIRECTED BY THIS MANUAL AND ONLY AIM THE STEAM HANDLE AT THE
CLEANING AREA.
Ø DO NOT leave the steam cleaner unattended while plugged in.
Ø Turn off all controls and unplug the electrical cord when not in use, when moving to another location and
before servicing.
Ø DO NOT use with a damaged cord or plug. If the steam cleaner is not working as it should, has been
dropped, damaged, left outdoors or dropped into water, call for service before using.
Ø NEVER attempt to disassemble this steamer in a way not instructed in this manual.
Ø DO NOT handle the electrical plug with wet hands.
Ø DO NOT use near children.
Ø DO NOT pull or carry by power cord. Keep cord away from heated surfaces.
Ø ALWAYS set safety switch on hose handle into the locked position when not in use.
Ø Keep body, hands, and feet away from accessories or nozzle when steam is in active use.
Ø Not setting safety switch to locked position could result in an injury.
Ø ALWAYS test a small area before cleaning a large area on any type of surface to make sure no damage will
occur.
Ø DO NOT expose machine to freezing temperatures while not in use.
Ø This appliance is not rated for use in explosive environments.
ELECTRICAL CONNECTIONS
The steam cleaner uses 110 Volts and will pull 13.1 Amps. It should be the only appliance plugged into an
outlet.
Ø Use only a 12 gauge / 15AMP rated or higher extension cord.
Ø Any alteration of electrical cord supply on this steam cleaner will void all warranties.
Ø To lesson the possibility of tripped breakers, remove other appliances from the circuit being utilized by the
steamer. The combined electrical amperage of other equipment and the steam cleaner together may cause a
circuit breaker to trip.
Ø Always press the power button to OFF before you unplug the unit.
Ø Removing the ground prongs from the power cord will void any and all warranties and can cause risk of
shock or injury
KEEP FOR YOUR RECORDS. THIS MANUAL MUST BE RETAINED FOR FUTURE
REFERENCE. PLEASE READ, UNDERSTAND AND FOLLOW THE INSTRUCTIONS AND
WARNINGS CONTAINED IN THIS MANUAL BEFORE USING THIS VAPOR STEAM CLEANER.
In order to reduce the risk of fire, electric shock, personal injury or damage to property, follow these
instructions carefully. When using electrical appliances, basic safety precautions should be followed.
8Warranty SERVICE AND SUPPORT Many issues can be resolved by calling our service center at (817) 888-8313 / Monday-Thursday 9am-5:00pm CST, Friday 8-Noon. Before returning your steamer for service, please contact us by phone (817) 297-7745 or through email at cs@ussteam.net. Our customer service representative will explain how you must package and ship your Steamer to prevent further damage. You will be responsible for all shipping cost. Ship to: US STEAM® 2440 Chambers Street Ste A Venus, TX 76084 ATTN: Repairs WARRANTY Your steamer comes with a warranty which becomes effective on the date of purchase from US STEAM® and is granted to the initial customer and is nontransferable. Any claims under this warranty must be made before the end of the applicable warranty period. Your steamer is warrantied for a period of 1-year from original date of purchase for defective material, parts, and workmanship. The warranty EXCLUDES accessories, attachments and normal wear parts, when used in accordance with operating instructions under normal and reasonable use. During the term of the warranty, all labor and parts to place your product in proper operating condition will be a covered service. EXTENDED warranty covers 4 additional years for defective parts, boiler, heating element and housing. Extended warranty does not include labor cost and return shipping. US STEAM®’s responsibility is limited to repair, replacement, credit or refund, any of which may be selected by US STEAM® at its sole discretion. The limited warranty covers only defects arising from normal use and does not include malfunctions or failures arising from: misuse, abuse, neglect, alteration, usage not in accordance with user manual and instructions, depletion of consumables, acts of nature or damage caused by repairs where such repairs were made without US STEAM®’s express approval. Warranty is Void: § Damage due to misuse, abuse, negligence, and normal wear related to the product usage. § Any repair or attempted repairs outside of the US STEAM® Service Center will void all warranties. § Lack of proper maintenance or use not in accordance with the provided instructions and/or owner’s manual. § Disassembly or attempted disassembly of your steamer. § If the steamer is designated for residential but utilized in a commercial application. § Using an improper electrical source such as using an extension cord that is not at least 12 gauge / 15AMP rated or higher extension cord § Adding chemicals or cleaning solution to the boiler or reservoir tank. § Parts subject to wear and tear not determined defective or items such as O-rings, brushes, hoses, accessories. GOVERNING LAW, JURISDICTION AND COSTS All disputes arising out of or related to the warranty shall be governed by the laws of the State of Texas. In the event the customer and US STEAM® LLC are unable to resolve any customer dispute, and any collection action, suit, or other judicial proceeding is commenced, the prevailing party in any such action, suit, or proceeding shall be entitled to recover any cost and attorney fees incurred. 9
Floors, Kitchen, Grills & Bathrooms
Restaurant   Chemical free cleaning in all food prep and storage areas. A Better Way to clean
             floors and bathrooms.

             Patient Beds, Chairs & Curtains
 Hospital    Steam is a proven killer of virus and infection causing germs. Steam can
             sanitize areas too difficult to treat with chemicals.
             Delis, Freezers & Butcher Areas
 Grocery     Chemical free cleaning in areas of food storage and preparation.

             Desk, Tables & Partitions
 Office      Cleaning with steam guarantees a clean, germ-free work environment increasing
             productivity, employee retention and reducing sick days.

             High Touch Areas, Bathrooms, Locker Rooms, and Gym Mats
  School     Steam kills on contact, no dwell time.

             Equipment, Lockers and Saunas
   Gym       Kill viruses and germs found on workout equipment and gym floors.

             Toys, Playgrounds & Beds
 Day Care    Steam clean high touch areas where kids pass germs. Extreme cleaning with
             steam can reduce sick days for kids and employees.

             Seats and Floors
Automotive   Combine steam and extraction into one system for more efficient detailing.

  A Better Way to Clean

                      Corporate Office
                 2440 Chambers Street, Ste A
                      Venus, TX 76084
                       (817) 297-7745
You can also read