TEXT AS IMAGE: FUN WITH STENCILS - MARCH 2021 FAMILY ART & SCIENCE ECOUNTER
←
→
Page content transcription
If your browser does not render page correctly, please read the page content below
TEXT AS IMAGE: Fun with Stencils
Welcome to Family Art & Science Encounters with the Kennedy Museum of Art
and the OHIO Museum Complex! This month, we’re making our own fonts,
stencils, and ink!

This activity is inspired by the Spring 2021 exhibition in Kennedy Museum of Art,
Legacy: Don Adleta and Karen Nulf, 60 Years of Graphic Design.

                                Making Stencils!
Materials:

Craft Foam

Scissors

Paint (any)

Paper (any)

Brushes

Ink

Feel free to use store bought or make your own scavenged ink! Instructions
included at the end of the document.

Step One: Think of a Phrase
     Think about a word, a phrase,
     a name, or initials that you want
     to use for your stencil.
Step Two: Make a Font
Think about how the words or
letters you have chosen can be
emphasized by the type of font you
make your stencil in. A font is a style
of writing letters, for example a
word in ARIAL and a word in
TIMES NEW ROMAN are in different
fonts. Can you see the differences
between the letters?
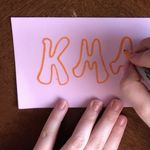
On paper, practice drawing your letters
in your own style.
Step Three: Transfer to Foam
Write your phrase on foam in the
font you’ve created.
Step Four: Cut Out
Have an adult help you with scissors
to cut out your letters. You can
either use positive space (the actual
letter) to make a template or
negative space (everything except
the letter) to make a stencil.
Something to keep in mind: the capital letters A, B, D, O, P, Q, and R have in-
terior cut outs that make them more complicated as stencils. If you are using
negative space to stencil, you will need to keep the interior space of the letter
attached to the exterior foam.Step Five: Print!
Lay your stencil or template down
on a new piece of paper. Then with
a brush, apply paint or ink to the
inside of the letters (or around the
outside if you’re using a template).
Don’t worry about staying in the
lines!
Lift the stencil up and repeat as
many times as you like however
you like! Will your background be
totally blank to showcase your
stencils? Or will you stencil so many
times that it is impossible to read?
Play around!
Remember:
-Add too much ink or paint and the
stencil will leak.
-Use a brush or sponge to get an
even application.
-Stenciling over wet ink will smear
previous stencils.
-You can leak or smear on purpose
to create different effects!
Materials
-Salt
-Bowls
-Lidded Jars
-Hot Water
-Organic Materials
Some items that work well: dandelions, onion skins, spices, coffee grounds)
Check out our past encounter on vegetal dyes to learn more!Scavenger Ink Recipe
Add base organic material to a bowl.
Add hot water and a little salt.
Mix.
Transfer mixture to a jar with a lid.
Shake!
Let sit overnight, shaking again when you
can.
Strain.
Post your finished stencils to our Facebook group: Kennedy Museum of Art
Experiences Group, or tag us on Instagram: @KennedyMuseumArtEDU
To view the virtual exhibition of Legacy: Don Adleta and Karen Nulf, 60 Year
of Graphic Design, visit https://www.ohio.edu/museum/virtual/virtual-exhibi-
tions-tours/legacy
For more information on naturally occurring pigments, check out our Vegetal
Dyes Art Encounter at: https://www.ohio.edu/museum/learn/community/sunday/
encounters-2You can also read


