MINISTRY OF EDUCATION - Secondary Engagement Programme Transition Class Activity Sheets
←
→
Page content transcription
If your browser does not render page correctly, please read the page content below
MINISTRY OF EDUCATION

 Secondary Engagement

      Programme

    Transition Class
      Activity Sheets
         Term 3

            1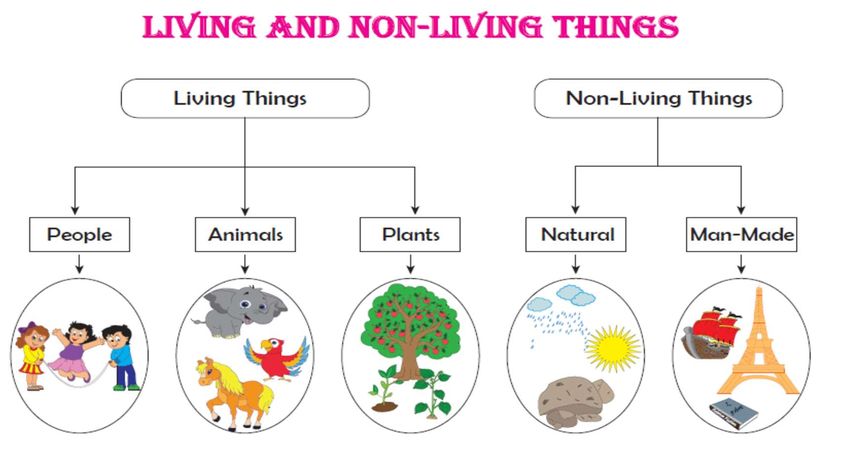
MINISTRY OF EDUCATION
                  SECONDARY ENGAGEMENT PROGRAMME - 2021
Week: 1                                                                         Lesson: 1
Topic: Things in the Science Laboratory
Sub- Topics: Equipment found in the Science laboratory

Name of Student …………………………………………………..
Date………………………………………

Here are some of the things found in the Science laboratory.

    Balance          spatula        thermometer                 tongs                 beaker

Bunsen burner      dropper         flask              funnel         measuring cylinder     ruler

   Stool        stop clock     test tube holder         test tubes      ring stand        table

                                                  2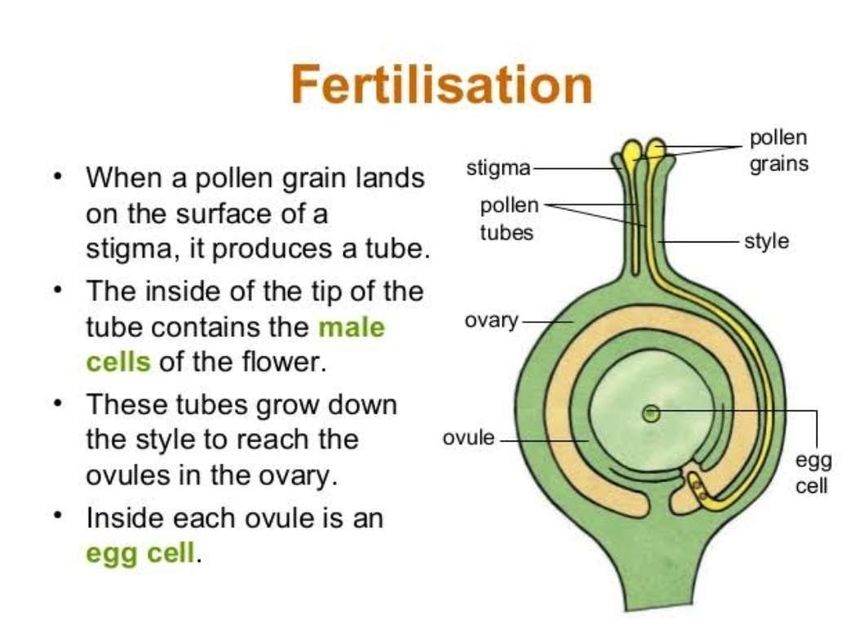
Activity: 1. Place the correct name at the bottom of each of the equipment.

 ______________________        ______________________           ______________________

_____________________           _______________________            ______________________

_______________________          ________________________            _____________________

______________________                 ________________________

                                               3
MINISTRY OF EDUCATION
                        SECONDARY ENGAGEMENT PROGRAMME - 2021
      Week: 1                                                                    Lesson: 2
      Topic: Things in the Science Laboratory
      Sub-Topic: The functions of some of the things in the Science Laboratory
      Name……………………………………………………
      Date………………………………..
Picture of Equipment   Name of Equipment                           Function of Equipment

                       Ruler                    Used to measure lengths

                       Table                    Used to write on and to do demonstrations and experiments in
                                                the laboratory

                       Stool                    Used to sit on
                                                Used to check boiling point, freezing point or temperature of
                       Thermometer              other substances

                                                Used to provide single, continuous flame by mixing gas with
                       Bunsen Burner            air in a controlled fashion

                                                A cylindrical container used to store, mix and heat liquid in
                       Beaker                   the laboratory

                       Test Tubes               Used to handle chemicals during experiments

                       Measuring Cylinder       Used to measure the volume of a liquid

                                                Used for making solutions or for holding, containing,
                       Flask                    collecting or measuring chemical, solutions etc.

                       Balance                  An instrument used for measuring an object’s mass

                       Stop clock               It is a handheld timepiece used to measure the amount of time
                                                elapse for an activity from beginning to end

                                                     4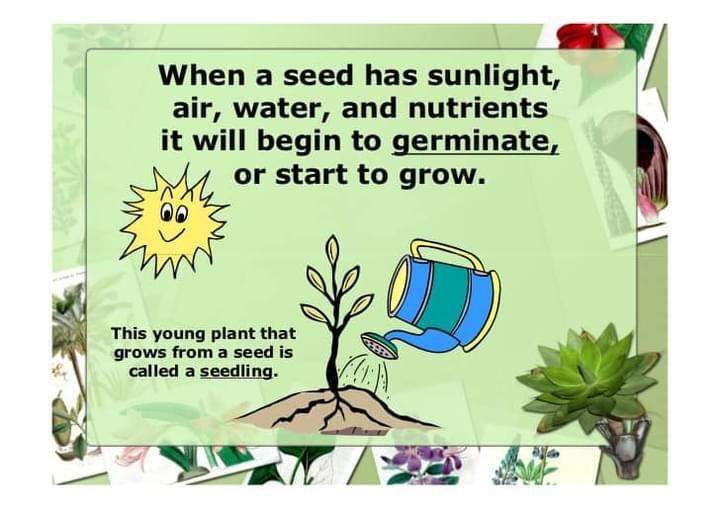
Activity:
 Fill in the blanks
   1. Ruler is used to measure ___________________________.

   2. ________________________ is used to handle chemicals.

   3. Test tube is used to handle chemicals during _____________________.

   4. _______________________ is used to measure an object’s mass.

   5. Stop clock is used to measure the amount of _____________________ elapse for an
       activity from beginning to end.

   6. _________________________ is used to sit on in the laboratory.

   7. The table is used to _____________________________.

   8. ________________________ is used to provide single continuous flame.

                                            5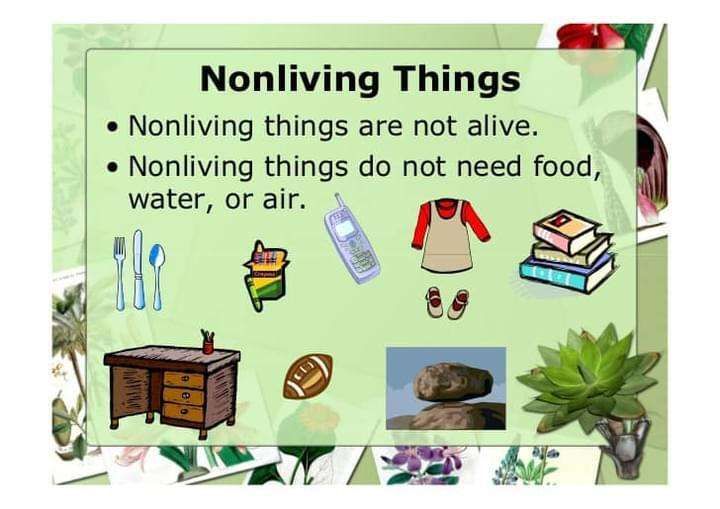
MINISTRY OF EDUCATION
                  SECONDARY ENGAGEMENT PROGRAMME - 2021
Week: 1                                                                Lesson: 3
Topic: Things in the Science Laboratory
Sub-Topic: Equipment in the Science Laboratory
Name of Student …………………………………………………..
Date………………………………………
                                    THE MATERIALS
Some non-metals are made of the following materials. These are glass, wood, and plastic.
Write the names of at least four materials for the respective headings below.

            GLASS                         WOOD                          PLASTIC

                                             6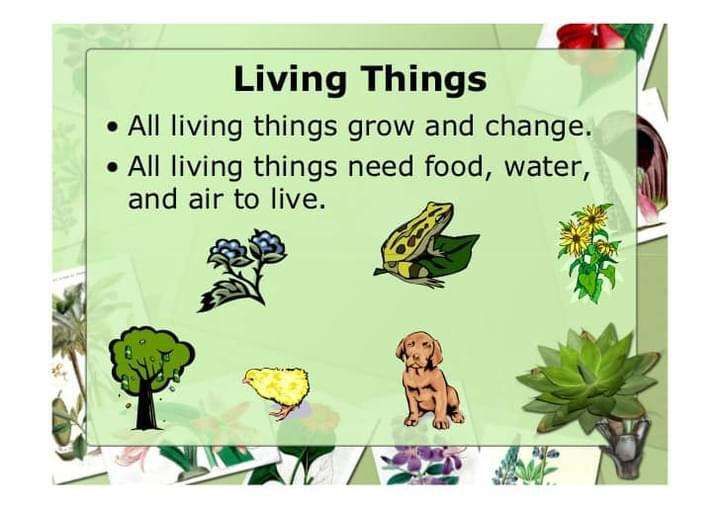
MINISTRY OF EDUCATION
                 SECONDARY ENGAGEMENT PROGRAMME - 2021
Week: 2                                                                 Lesson: 1
Topic: Things found in the Laboratory
Sub-Topic: Safety Equipment used in the Science Laboratory
Name of Student …………………………………………………..
Date………………………………………
  Picture of Safety           Name of Safety      The function of Safety Equipment
  Equipment                   Equipment
                                                  The Fire Bucket is painted in red and
                              Fire Bucket         labelled FIRE. It contains sand. When
                                                  thrown on fire sand prevents air from
                                                  reaching the flame and the flame goes
                                                  out.

                                                  The Fire Blanket is used to put out a
                              Fire Blanket        fire. It is made of a material that does
                                                  not burn. It stops air from getting to
                                                  the fire.

                                                  Some Fire Extinguishers help to
                              Fire                smother flames by preventing air from
                              Extinguisher        getting to the fire. Others cool the
                                                  burning area below ignition
                                                  temperature causing the flame to go
                                                  out.

                              Water               Clean pure water is used to flush out
                                                  harmful chemicals from the eyes.

                              First Aid Kit       The First Aid Kit is a little cupboard
                                                  marked with a cross as an identity
                                                  symbol containing items that can be
                                                  used as immediate aid in case of
                                                  accidents.
                                                  Examples of items in a First Aid Kit
                                                  are cotton wool, swab, cleaning lotion,
                                                  gauge, bandages, adhesive dressing,
                                                  antiseptics, soap.

                                              7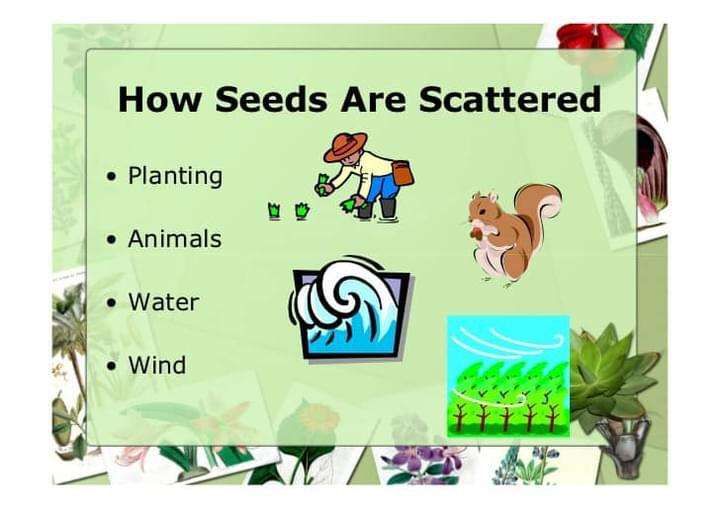
MINISTRY OF EDUCATION
                 SECONDARY ENGAGEMENT PROGRAMME - 2021
Week: 2                                                                Lesson: 2
Topic: Things found in the Science Laboratory
Sub-Topic: Safety Symbols/Warning Symbols

Name of Student …………………………………………………..
Date………………………………………

                             Safety in the Science Laboratory
Safety is necessary when using flames, handling glassware, chemicals and electricity in the
Laboratory.
            SAFETY SYMBOLS                            NAMES                 FUNCTIONS

                                                                        This signifies
                                                                        chemicals that may
                                                                        cause damage to
                                                      Harmful           health- a substance
                                                                        that may cause
                                                                        irritations to the skin,
                                                                        eyes or inside your
                                                                        body.
                                                                        This signifies
                                                                        substances that may
                                                                        ignite and continue to
                                                                        burn in the air.
                                                                        Examples: gases,
                                                    Flammable           liquids, solids,
                                                                        cleaning materials
                                                                        commonly used in the
                                                                        lab.
                                                                        The skull and
                                                                        crossbones symbol is
                                                                        used as a warning of
                                                                        the danger of death,
                                                       Toxic            particularly in
                                                                        regards to poisonous
                                                                        substances.

                                                8
It denotes the need
                  for caution to avoid
                  contamination with or
    Radioactive   undue exposure to
                  atomic radiation.

                  Serves as a constant
                  warning to workers
                  entering the area that
                  serious hazards exist
     Explosive    and that safety is
                  essential.

                  The corrosive
                  material hazard lab
                  sign indicates
                  corrosive substances
    Corrosive     in the lab that can eat
                  away the skin if you
                  come into direct
                  contact with them.

9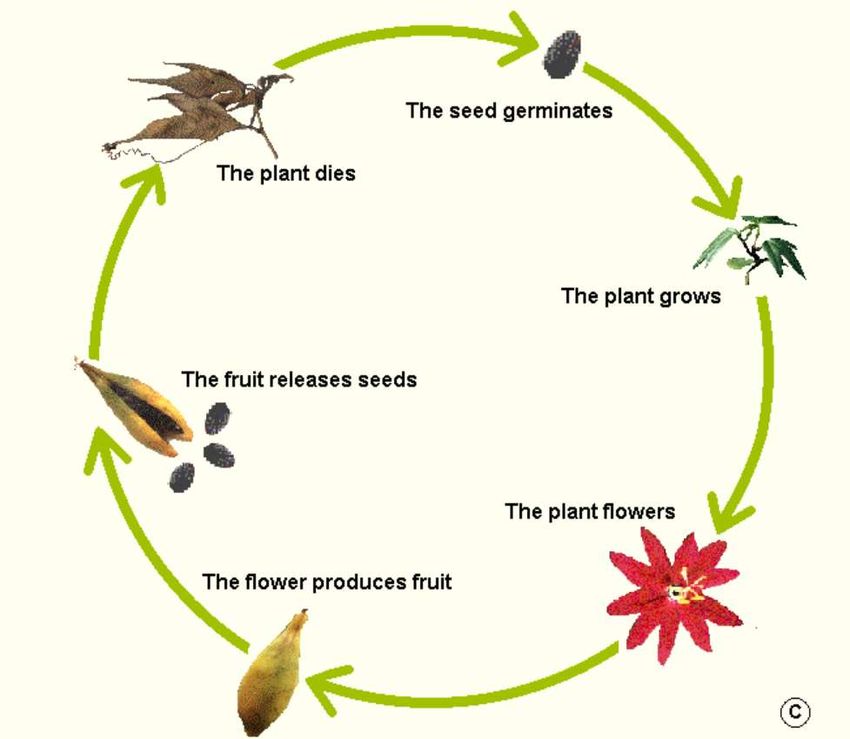
Activity

           Match pictures with names

                                         Corrosive

                                         Explosive

                                         Harmful

                                        Toxic

                                       Highly Inflammable

                                       Radioactive

                      10
MINISTRY OF EDUCATION
SECONDARY ENGAGEMENT PROGRAMME - 2021
Week: 2 Lesson: 3
Topic: Things found in the Science Laboratory
Sub-Topic: Safety Symbols/Warning Symbols
Name of Student …………………………………………………..
Date………………………………………
Physical Safety Symbols
Gloves
This is used to protect the hand when handling hazardous or harmful materials even in small
quantities. Gloves like chemical resistant gloves or heat resistant gloves are 2 types that should
be used.
Boots
Chemical resistant overshoes or boots should be used to avoid possible exposure to corrosive
chemicals or large quantities of solvents or water that might penetrate normal foot-wear.
11Safety glasses
Eyeshields, also called safety glasses, goggles, or spectacles, protect against flying debris and
chemical splashes in the lab.
Breathing Masks
Respirators are designed to prevent contaminated air from entering the body. “Full face”
respirator that covers the entire face and “hood” or “helmet” style respirators to cover the entire
head is advised to be used.
Lab Coat
The lab coat makes sure your street clothes and body are protected from spills, splashes, drops,
and unanticipated reactions. It is a barrier that keeps you from being exposed to accidents in the
Lab and, in some cases, might save you from injury or even save your life.
12MINISTRY OF EDUCATION
SECONDARY ENGAGEMENT PROGRAMME - 2021
Week: 3 Lesson: 1
Topic: Things found in the Science Laboratory
Sub-Topic Safety in the Laboratory
Name of Student …………………………………………………..
Date………………………………………
SAFETY CHART
Some Rules that give information on things you should always do in a Laboratory.
LABORATORY RULES
• Always wait for the teacher’s permission before
entering the laboratory.
• Always report accidents quickly.
• Always move carefully when carrying equipment
and chemicals.
• Always keep the workbench/place clean and tidy.
• Always clean up spilt liquid quickly.
• Always read labels carefully before using the
contents of a bottle.
• Always make sure you know what to do in an
emergency.
• Always clean up after your work is done.
13SAFETY CHART
Some Rules to follow when you are in a Laboratory.
LABORATORY RULES
• Never enter the laboratory without the teacher’s
permission.
• Never start activities before reading instructions
and labels carefully.
• Never turn on gas without the teacher’s
permission.
• Never taste, eat or drink in the laboratory.
• Never run in or out of the laboratory.
• Never remove anything from the lab without the
teacher’s permission.
• Never throw solids down the sink.
• Never use your fingers to stir or hold chemicals.
• Never put things other than plugs into electrical
sockets or operate electrical equipment with wet
hands.
• Never play with safety equipment.
• Never play in a laboratory.
14MINISTRY OF EDUCATION
SECONDARY ENGAGEMENT PROGRAMME - 2021
Week: 3 Lesson: 2
Topic: Things in the Science Laboratory – The First Aid Kit
Sub-Topic Treating Emergencies in the Laboratory using the First Aid Kit
Emergencies Items in the First Aid Kit used to treat emergencies
Bruises
cotton mercurochrome
Cuts
bandage (plaster)
Wounds
bandage
Fire burns
Gauze
Acid
Sodium Hydrogen Carbonate
Fractures
Splints
Insect bites or stings
Alcohol
Headaches
Acetaminophen
Liquid entering eye
Eyewash
15Activity:
Make a First Aid Kit using a shoebox and Insert one item for each emergency listed above.
16MINISTRY OF EDUCATION
SECONDARY ENGAGEMENT PROGRAMME - 2021
Week: 3 Lesson: 3
Topic: Measuring in Science
Sub-Topic: Origin of various units of measurement
Name of student ………………………………………………………………….
Date ………………………………………………….
Definition
Measurement is the size, length or amount of something as established by measuring
Origin of various units of measurements
List of Units of Origin
Measurements
Cubit The average length of a man’s hand from elbow to the tip of the finger
Inch Width of a man’s thumb taken at the first Knuckle
Foot The average length of a man’s foot
Yard A length measured from the tip of the nose to the end of his outstretch
hands
17The weight of a barley corn seed gathered from the middle of an ear
Grain
The average weight of a stone in the field was used by the British to
weigh dry products.
Stone
The distance between the tip of the thumb and the tip of the little finger of
Length - Hand span the outstretch hand- A hand span.
18Activity:
Match the following units of measurement with pictures depicting the origin.
Units of measurement Pictures depicting origin
1. Yard
2. Foot
3. Inch
4. Handspan
19MINISTRY OF EDUCATION
SECONDARY ENGAGEMENT PROGRAMME - 2021
Week: 4 Lesson: 1
Topic: Measuring in Science
Sub-Topic: Measuring the length of objects in the home using hand-span
Name of student ………………………………………………………………….
Date ………………………………………………….
Use the Hand Span to measure the length of the objects stated below. For example - the length of
the door is ……… Hand Spans.
Names of Objects Estimated number of Hand Actual Number of Hand
Spans Spans
Door
Table
Cupboard top
book
20carpet/mat
stove
Television
Step Treader
Chair
Wallpaper
21MINISTRY OF EDUCATION
SECONDARY ENGAGEMENT PROGRAMME - 2021
Week: 4 Lesson: 2
Topic: Measuring in Science
Sub-Topic Modern Instruments used to measure length
Name of student ………………………………………………………………….
Date ………………………………………………….
Ruler Measuring tape
Yardstick Meter rule
Some Instruments used to measure Length and their purpose/use
Measuring Instruments The purpose or use of Measuring Instrument
Ruler Used to measure in inches and is 12 inches long. It is designed to be
used in the labs and classrooms
Meter stick Used for construction purpose. It measures meter, centimetre, and
millimetres and is 100 centimetres long.
Yard stick Used to measure feet, inches and yards, and is 3 feet long.
Tape Measure A flexible instrument used for measuring lengths and distances
22Activity:
Instruction: First estimate [guess] the length of the object, then put the answer under Estimated
Length. Next, measure the length using the ruler or the tape, and put your answer under Actual
Length.
Objects Estimated Length Actual Length
Door
Table
Cupboard
Book
Carpet/Mat
Stove
Television
Step treader
Chair
Wallpaper
23MINISTRY OF EDUCATION
SECONDARY ENGAGEMENT PROGRAMME - 2021
Week: 4 Lesson: 3
Topic: Measuring in Science
Sub-Topic Measuring length/height in mm, cm, m, km
Name of student ………………………………………………………………….
Date ………………………………………………….
What is the length?
Length is the distance between 2 points.
Measures of Length
10 millimetre (mm) = 1 centimetre (cm)
1 millimetre (mm) = 1/10 centimetre (cm)
10 centimetres (cm) = 1 decimetre or 100 millimetres (mm)
1 centimetre (cm) = 1/100 metre (m)
100 centimetres (cm) = 1 metre (m) =1000 millimetres (mm)
1000 metres (m) = 1 kilometres (km)
Operations of Length
To get Centimetres from Metres, you multiply the Meters by 100
You Have: 23 Metres
You want Centimetres: So centimetres = 23 metres x 100 = 2300 cm
There are 2300 centimetres in 23 metres or 100 centimetres for every metre
24Activity:
Exercise to complete
You have 4 meters: you have……………………………… centimetres
You have 75 meters: you have……………………………. centimetres
You have 6100 centimetres: you have……………………. metres
You have 200 centimetres: you have………………………metres
25MINISTRY OF EDUCATION
SECONDARY ENGAGEMENT PROGRAMME - 2021
Week: 5 Lesson: 1
Topic: Measuring in Science
Sub-Topic: Measuring mass
Name of student ………………………………………………………………….
Date ………………………………………………….
Definition of Mass:
Mass is a large body of matter with no definite shape.
In the market or shops, we can buy plantain, eddoes, sugar, flour and other goods. We often
purchase these ‘goods’ in pounds and ounces. These are units of measurement for mass in the
British system of units.
However, in the Metric System, we always measure mass in grams or kilograms. We sometimes
use the word weight when we mean mass.
The instrument used to measure Mass: Mass is measured with a balance e.g. a spring balance or
a balance scale.
Balance Scale Spring Balance
26Names of types of Balances used in the Laboratory Pictures
The Triple Beam Balance
The Lever Arm Balance
The Equal Arm Balance (Balance scale)
The Precision Balance
The Analytical Balance
Activity:
Make an Equal Arm Balance (balance Scale) using sanitary cups, clothes hanger, twine
27MINISTRY OF EDUCATION
SECONDARY ENGAGEMENT PROGRAMME - 2021
Week: 5 Lesson: 2
Topic: Measuring in Science
Sub-Topic:1. Measuring Weight/Mass
2. Converting units of mass
Name of student ………………………………………………………………….
Date ………………………………………………….
Measures if Weight/Mass
10 Milligrams = 1 Centigram
10 Centigrams = 1 Decigram
10 Decigram = 1 Gram
10 Grams = 1 Decagram
10 Decagrams = 1 Hectogram
10 Hectograms = 1 Kilogram
Activity:
Conversion Exercise:
If 1000 Grams [g] = 1 Kilogram [kg]
Then 3000 Grams = ------ Kilograms
If 1000 Grams [g] = 1 Kilogram [kg]
Then 500 Grams = ------- Kilogram
28MINISTRY OF EDUCATION
SECONDARY ENGAGEMENT PROGRAMME - 2021
Week: 5 Lesson: 3
Topic: Measuring in Science
Sub-Topic 1. Measurement of Mass: Addition with Conversion
Name of student ………………………………………………………………….
Date ………………………………………………….
Remember 1000 grams (g) = 1 kilogram (kg)
Add the following and give your answer in grams
1. 2 kg + 5 kg = ___________________ grams (g)
2. 1 kg + 1700g = ___________________ grams (g)
3. 6 kg + 3 kg = ___________________ grams (g)
4. 1000g + 5kg = ___________________ grams (g)
5. 1 kg + 7 kg = ___________________ grams (g)
6. 4 kg + 900 g = ___________________ grams (g)
7. 8 kg + 6 kg = ___________________ grams (g)
8. 2500 g + 100 g = ___________________ grams (g)
9. 1.5 kg + 1.5 kg = ___________________ grams (g)
10. 5 kg + 2 kg = ___________________ grams (g)
29MINISTRY OF EDUCATION
SECONDARY ENGAGEMENT PROGRAMME - 2021
Week: 6 Lesson: 1
Topic: Measuring in Science
Sub-Topic: Measuring Temperature
Name of student ………………………………………………………………….
Date ………………………………………………….
Temperature is a measurement of how hot or how cold something is, especially, a measure of the
average kinetic energy of the particles in an object, which is a type of energy associated with
motion.
Temperature is measured with a thermometer. The temperature scale in a thermometer is either
Fahrenheit, Celsius or Kelvin.
In Guyana, the temperature is measured in degree Celsius (°C).
The Celsius scale thermometer has 0°C as the freezing point of water and 100°C as the boiling
point of water.
The human body temperature is 37°Celsius.
Note: we can estimate how hot or cold water is by using the hand or finger. But we measure how
hot or cold water is by using a thermometer
30Activity:
Answer the questions below:
1. Water boils at ________________ °C.
2. Our normal body temperature is _______________ °C.
3. Water freezes at ________________ °C.
4. We measure temperature with a ________________________.
5. Guyana uses ___________________ (Fahrenheit/Celsius) as its unit of measurement for
temperature.
31MINISTRY OF EDUCATION
SECONDARY ENGAGEMENT PROGRAMME - 2021
Week: 6 Lesson: 2
Topic: Measuring in Science
Sub-Topic: The Uses of the Thermometer
Name of student ………………………………………………………………….
Date ………………………………………………….
Remember the thermometer measures temperature.
It measures air temperature
A thermometer measures the air temperature. Most thermometers are closed glass tubes
containing liquids such as mercury or alcohol. When the air around the tube heats the
liquid, the liquid expands and moves up the tube. A scale then shows what the actual
temperature is.
It is used in the Laboratory
A Laboratory thermometer is used to measure the boiling point and freezing point during
Science experiments. It is also used to measure the temperature of substances. It
measures temperature ranging between -10 degrees Celsius and 110degrees Celsius.
It is used at home
At home, a thermometer is useful for the following reasons.
1. To measure body temperature when someone is ill to determine if he/she has a
fever.
2. To measure the temperature of meat after it is cooked to make sure that it is
warm enough to have killed off bacteria and, therefore safe to consume.
3. To measure the temperature of an oven.
4. To measure the temperature of a pool.
It is used at the Hospital /Clinics
Doctors and nurses use the thermometer to measure the body temperature of patients.
32Remember: A thermometer is used to measure temperature.
Types of thermometers- Pictures of thermometers:
1. Digital thermometer
2. Electronic ear thermometer
3. Non-Contact Digital Infra-Red Thermometer
4. Plastic strip thermometer
5. Pacifier thermometer
336. Glass and mercury thermometer
Activity:
Choose a thermometer from the list of thermometers above. Draw the thermometer, label it and
show it to your teacher.
34MINISTRY OF EDUCATION
SECONDARY ENGAGEMENT PROGRAMME - 2021
Week: 6 Lesson: 3
Topic: Measuring in Science
Sub-Topic Measuring time.
Name of student ………………………………………………………………….
Date ………………………………………………….
At what time does school start? What time do you go to bed? What time do you wake up in the
morning? When is your birthday?
Can you imagine what would happen if our time-keeping instruments were not exact?
In ancient times ancient ways were used to measure time. Today, we have time-keeping devices
that are very accurate because of advances in modern electronics.
We need to know about time to order our events in sequence and know how long they would
last.
Can you think of another reason why we need to know about time?
---------------------------------------------------------------------------------------------------------------------
We can estimate time. But to be able to measure
Time accurately, a clock is used.
Some ancient ways of measuring time:
Time is the interval between two events/periods. Some instruments used in measuring time long
ago are sundials, water clocks, candles, watches, clocks, and lamp clocks.
Hourglass Sundial
35Japanese lamp clock Wrist watch
Wall clock Water clock
Candle clock
36MINISTRY OF EDUCATION
SECONDARY ENGAGEMENT PROGRAMME - 2021
Week: 7 Lesson: 1
Topic: Measuring in Science
Sub-Topic: Measuring time.
Name of student ………………………………………………………………….
Date ………………………………………………….
Modern Ways of measuring time.
Today, the usual measuring instruments for time are clocks and watches. For a highly accurate
measurement of time, an atomic clock is used.
Types of Clocks and Watches
Digital Clocks/ Watches
Night Dial Clocks
Speaking Clock- They talk and tell the time hourly.
37Stop Clock- A button is used to start the clock/Watch and then press to stop it.
The Minute and the Second
After the day was divided into hours, the hour was further sub-divided into minutes., with sixty
minutes in one hour and sixty seconds in one minute. The SECOND, however, is now used as
the standard unit of time in the international system (SI) system.
The second is based on a certain number of vibrations of the CAESIUM atom. The time interval
of vibration is constant and does not vary or change.
Activity:
Draw five (5) clocks with five (5) different names.
38MINISTRY OF EDUCATION
SECONDARY ENGAGEMENT PROGRAMME - 2021
Week: 7 Lesson: 2
Topic: Characteristics of living things
Sub-Topic: living and Non-Living things
Name of student ………………………………………………………………….
Date ………………………………………………….
Everything in the environment can be put into two (2) groups- Living and non-Living things.
39Activities:
1: Take a tour of your yard or the immediate environment. Identify living and non - living
things.
2: List the things identified under Living and Non-Living. [Draw or write the names]
Living Things Non-Living things
e.g. Worms A piece of stick
40MINISTRY OF EDUCATION
SECONDARY ENGAGEMENT PROGRAMME - 2021
Week: 7 Lesson: 3
Topic: Characteristics of Living Things
Sub-Topic: Living and Non-Living Things
Name of Student ………………………………………………………………….
Date ………………………………………………….
All Non-Living things do not do the things Livings things do, they do not have senses.
{
41Activities:
1: Fill in the Blanks to complete the questions
1. Living things need __________________ to continue to live.
2. Non-living things do not ________________________.
3. Living things (can/cannot) ______________________ move.
4. Non-living things (can/cannot )______________________ reproduce.
2: List four characteristics of living things:
1. ____________________________________________________________
2. _____________________________________________________________
3. _____________________________________________________________
4. _____________________________________________________________
42Exercise 2: Have fun with the Living and Non-Living worksheets as you recall there
characteristics
43MINISTRY OF EDUCATION
SECONDARY ENGAGEMENT PROGRAMME - 2021
Week: 8 Lesson: 1
Topic: Looking at organisms in our environment
Sub-Topic: Plants and animals in the environment
Name of Student ………………………………………………………………….
Date ………………………………………………….
Living things are grouped as plants and animals based on their physical characteristics and way
of life.
Plants
Plants are usually green (chlorophyll gives the leaves the green colour) and fixed in the soil.
They may be large and of various shapes. They make use of simple, mineral food material from
the soil.
Plants give off Oxygen and take in Carbon dioxide given off by animals through a process called
transpiration. They have no or very basic ability to sense.
44Animals
Most animals can move fairly freely. They cannot make their own food and are dependent on
plants and other animals for food.
Animals breathe out Carbon dioxide, which plants need to make food and take in oxygen which
they need to breathe.
Animals have a more developed sensory and nervous system.
Activity:
Write one sentence to show the difference between an animal and a plant.
45MINISTRY OF EDUCATION
SECONDARY ENGAGEMENT PROGRAMME - 2021
Week: 8 Lesson: 2
Topic: The seed
Sub-Topic: Germination of seed (the flower)
Name of Student ………………………………………………………………….
Date ………………………………………………….
Parts of a flower
The flower is the reproductive organ of many plants.
Common Parts of a flower
The table describes the main parts of a flower and its functions.
STRUCTURE FUNCTION
Sepals Protects the unopened flower
Petals Maybe brightly coloured to attract insects
46Stamen The male parts of the flower (each consists of an anther held up by a
filament)
Anthers Produce male sex cells (pollen grains)
Stigma The top of the female part of the flower that collects pollen grains
Ovary Produces the female sex cells contained in the ovules
Nectary Produces a sugary solution called nectar, which attracts insects.
Activity:
Label the flower below by placing these names at the right places:
Petal, Septal, Anther, Filament, Ovary, Stigma, Style
47MINISTRY OF EDUCATION
SECONDARY ENGAGEMENT PROGRAMME - 2021
Week: 8 Lesson: 3
Topic: The seed
Sub-Topic: Plant reproduction
Name of Student ………………………………………………………………….
Date ………………………………………………….
There are five (5) stages in the reproduction of the flowering plant.
The five (5) stages are:
1. Pollination
2. Fertilization
3. Seed Formation
4. Seed Dispersal
5. Germination
Stage one (1) in the process of reproduction of a flowering plant.
Pollination
Pollination is the transfer of pollen grains from the male anther of a flower to the female stigma.
48Agents of Pollination
1. Water 4.Bats
2. Wind 5. Insects
3. Birds 6. Plants
Activity:
Answer the following question. Fill in the blanks.
1. What is pollination?
________________________________________________________________________
________________________________________________________________________
2. ----------------------------- and -------------------------- are agents of pollination.
3. ----------------------------- and -------------------------- are parts of a flower.
4. The first stage of reproduction is? ___________________________________________
49MINISTRY OF EDUCATION
SECONDARY ENGAGEMENT PROGRAMME - 2021
Week: 9 Lesson: 1
Topic: The seed
Sub-Topic: Plant reproduction – Fertilization and seed formation
Name of Student ………………………………………………………………….
Date ………………………………………………….
Stage two (2) in the process of reproduction of a flowering plant.
Fertilization
Fertilization is the fusion of the male gametes (pollen) with the female gametes (ovum) to form a
zygote.
Part of Flower showing fertilization
50Stage three (3) in the process of reproduction of a flowering plant
Seed formation
Flower showing formation of the seed
After fertilization, the ovary of the flower develops into the fruit and the ovules develop into the
seeds.
Activity:
Complete the statements below
1. Pollination is to stigma as fertilization is to ------------------------ (ovary, petal).
2. Fertilization is the fusion of --------------------- and -------------------------
3. After fertilization, the ovary of the flower becomes the ---------------------, and the ovule
becomes the ------------------------
51MINISTRY OF EDUCATION
SECONDARY ENGAGEMENT PROGRAMME - 2021
Week: 9 Lesson: 2
Topic: The seed
Sub-Topic: Plant reproduction – Seed dispersal (scattering of seeds)
Name of Student ………………………………………………………………….
Date ………………………………………………….
Stage four (4) in the process of reproduction of a flowering plant
Seed Dispersal
Seed dispersal is the movement, spread or transport of seed away from the mother plant.
Do you know the story of Johnny Apple-Seed, the man who planted apple seeds where-ever he
went? Why do you think he did this? Imagine a world where all the mango trees grew in one
place and all the coconut trees in one place and so on. What a world it would have been.
For seeds to give rise to new plants they must first get to new places. When this happens the
plants get more space and light and so they are healthier. Because of these reasons, seeds are
dispersed or scattered.
Agents of dispersal are water, wind, animals including birds, and man.
Diagram showing how seed are dispersed
52Activities:
1: Answer the questions below
After eating a fruit, the mother threw the seeds in the back yard. Father threw the seeds in the
front yard. Mother and father were involved in seed------------------------------------------------------
-
Agents of dispersal are -----------------------, -----------------------, --------------------- and ------------
-------------------------------------
2:Match the following condition and sources
sunlight wind
water sun
air rain
53MINISTRY OF EDUCATION
SECONDARY ENGAGEMENT PROGRAMME - 2021
Week: 9 Lesson: 3
Topic: The seed
Sub-Topic: Plant reproduction – Germination
Name of Student ………………………………………………………………….
Date ………………………………………………….
Stage five (5) in the reproductive process of a flowering plant.
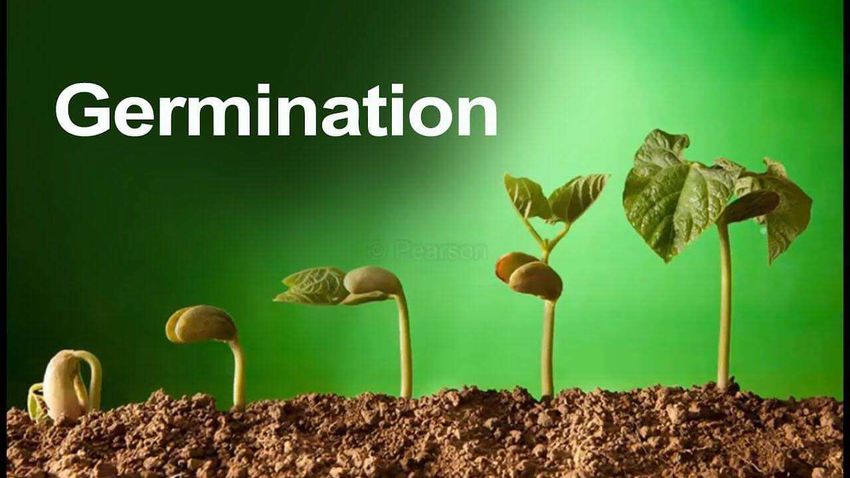
What is Germination:
Germination the development of a new plant from a seed.
The life of a plant begins with a seed. Once you plant and water a seed, it begins to germinate.
54Parts of a Germinated seed
55MINISTRY OF EDUCATION
SECONDARY ENGAGEMENT PROGRAMME - 2021
Week: 10 Lesson: 1
Topic: The seed
Sub-Topic: Plant reproduction – Conditions necessary for Germination
Name of Student ………………………………………………………………….
Date ………………………………………………….
As we have already learnt, seeds are scattered by wind, water, animals and man. If the conditions
are right they will grow into new plants. This development of a new seed into a new plant is
called germination. Conditions necessary for germination are air, water, warmth (sunlight) and
nutrients.
56If conditions are right, seeds will develop into new plants.
PICTURE SHOWING SEED DEVELOPMENT:
57MINISTRY OF EDUCATION
SECONDARY ENGAGEMENT PROGRAMME - 2021
Week: 10 Lesson: 2
Topic: The seed
Sub-Topic: Plant reproduction – Stages of Germination
Name of Student ………………………………………………………………….
Date ………………………………………………….
Topic: The seed
Sub-Topic: Stages of Germination
When a seed is planted and conditions are right, it will become metabolically activated and
germination will proceed according to the following stages: The seed coat (testa) ruptures and
the embryonic root (radicle) grows into the ground to extract key nutrients and minerals. The
cotyledons emerge and produce the growing shoot’s first leaves.
The diagram below shows the following:
1. The seed coat (testa) ruptures (splits) and the radicle grows into the ground.
2. The cotyledons emerge and produce the growing shoot.
3. The shoot’s first leaves.
58Activities:
1: Answer the questions below
Germination
List the condition necessary for germination. -----------------, -----------------, ----------------and ----
----------------------------------------------
Germination is the development of a ------------------- ------------------ from a --------------------.
2: Rearrange the following to show the stages of germination
1. First leaves
2. Radicle grows into the ground
3. Cotyledons emerge and produce the growing shoot
4. Split testa
59MINISTRY OF EDUCATION
SECONDARY ENGAGEMENT PROGRAMME - 2021
Week: 10 Lesson: 3
Topic: The seed
Sub-Topic: Germination of the seed
Name of Student ………………………………………………………………….
Date ………………………………………………….
Life Cycle of a flowering plant
60Summary
The main function of the flower is reproduction.
Pollination is the transfer of pollen grains from the anther to the stigma.
The pistil and the stamen are the reproductive parts of the flower.
Agents of pollination are wind, water, insects, birds, animals, butterflies, etc.
The union between the pollen grains and the ovules is called fertilization.
After fertilization the fruits and seeds develop.
Pollination and fertilization are important to life.
Germination is the development of a new plant from a seed.
Seeds are scattered before they germinate.
Agents of dispersal are animals, wind, water, man.
61MINISTRY OF EDUCATION
SECONDARY ENGAGEMENT PROGRAMME - 2021
Week: 11
Annual Assessment
Name of Student ………………………………………………………………….
Date ………………………………………………….
Instruction: Answer all questions. Each question carries two marks.
1. All things found in the environment are divided into …….. groups.
A.2 B.3 C.4 D.6
2. One of the groups is ……….
A. Plant B. Living Things C. root D. People
3. We use a ……… to keep us safe.
A. Fire Bucket B. Matches C. Bin D. Broom
4. The unit used in Guyana to measure temperature is ……...
A. Fahrenheit B. Kelvin C. Degree Celsius D. None of the above
5. If 10 Centimeters = 100 Millimeters. Then 40 Centimeters = ………… Millimeters
A. 4000 B. 4400 C. 40 D. 400
6. A warning sign helps us to keep ………….
A. Happy B. Fearful C. Smart D. Safe
7. Insects visit the flower for ………………
A. Honey B. Nectar C. Milk D. Food
8. We use ………. to measure time.
A. Ruler B. Balance C. Clock D. Thermometer
9. Temperature shows how ……… or how cold a substance is.
A. warm B. Soft C. Bright D. hot
10. We measure temperature with a …………
62A. Balance B. Ruler C. Clock D. Thermometer
11. An original way of measuring length is by using …………
A. Stone B. Elbow C. Ruler D. Tape Measure
12. The root of a plant is at the …………. of a plant.
A. Top B. Bottom C. Middle D. End
13. We find the mass of an object by using a …………
A. Thermometer B. Balance C. Clock D. Ruler
14. Non-Living things ………… breadth.
A. can B. cannot C. always D. will
15. Plants breathe out ………….
A. Oxygen B. Carbon Dioxide C. Heat D. Water
16. The main source of heat on the earth is the ……………
A. Moon B. Sun C. Fire D. Iron
17. Plants need ………. water and sunlight in order to grow.
A. Air B. Seed C. Rock D. Paper
18. Our normal body temperature is ………… degrees Celsius.
A. 100 B. 37 C. 0 D. 360
19. Water boils at ……… degrees Celsius.
A. 100 B. 37 C. 0 D. 360
20. Living things are divided into ……….. and animals.
A. Stone B. Plants C. Human D. Birds
21. The ……………is a part of a plant.
A. Leaf B. Air C. Sun D. Eye
22. Another name for seed coat is …...
A. Leaf B. Cloak C. Tester D. Cotyledon
23. Human beings have …………. senses.
A. 2 B. 5 C. 4 D. 3
Fill in the blank. Each question carries 2 marks.
6324. Mass is ………………………………………………………………………
25. We should not ……………… and ………….... in the laboratory.
Read the statements. Circle TRUE if they are correct and FALSE if they are incorrect.
26. Fish is an animal. True False
27. A dry leaf needs water to grow. True False
28. A beaker is found in a Science laboratory. True False
29. All living things eat food to grow. True False
30. A First Aid Kit has spoons and forks in it. True False
END OF EXAMINATION
64You can also read


