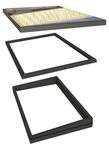
Installation Guide Wendland Flat Skylight - Wendland UK
←
→
Page content transcription
If your browser does not render page correctly, please read the page content below
KERB INSTALLATION
Thank you for choosing the Wendland Flat Skylight product. This guide WENDLAND KERB CUSTOMER SUPPLIED KERB
is designed to make fitting as straight forward as possible.
Kerb construction rules
1
Min 150mm
4o
This guide is written on the basis that the surveyor has Any feedback - positive or negative - is welcome so we
undertaken correct checks for the capability / structural can make our systems even better.
performance of any existing flat roof to verify it is fit for Please contact the Tech Support Team
purpose. A timber kerb and weatherproofing materials on 01200 452 318 or email
for the deck/kerb interface are not provided. customerservice@wendland.uk.com
80mm Overall including roof covering,
excluding plasterboard
Construct the up stand
IMPORTANT NOTES Align Wendland kerb assembly with the aperture. Fix 90°
to flat roof and fit roof
covering.
• Take care when opening package. angle bracket (FRKBA001) 150mm from end face using 2x
• Always wear appropriate PPE when handling glass; Cut level 5 gloves, cut resistant sleeves, eye protection. Self drilling screw (FRFC008-60) into pre drilled holes. Fix
NOTE: Measure diagonal
• Ensure the skylight is fitted in the correct sequence and orientation. appropriately to roof using suitable screws. Position 4x tilt corners to check sizes
• Check that the up stand is square by measuring diagonals. fillets (NRPA/7). NOTE: Fasteners to roof (not supplied)
• Larger units will require multiple persons to lift.
• Not suitable to walk on the glass.
Torch on system
ROOF COVERINGS WITH WENDLAND KERB
ASSEMBLIES & PARTS INCLUDED Guidance only, always consult your roof covering supplier prior to fitting.
Membrane:
Option 1 Lap membrane over the top of the kerb ensuring that a watertight finish
Top glass frame
is achieved.
Option 2 Wrap the membrane up to the top face of the kerb, knife flush and fix
using sealant/adhesive - ensuring that a watertight finish is achieved.
Clip (FRICB001M) Bitumen Felt and torch on Systems: The Wendland kerb should be primed and
90° Angle bracket (FRKBA001)
normal application methods followed. For torch on products, the torch should be
PVCu welded base directed at the waterproofing and not directly at the Wendland skylight kerb (see
frame image). Fibreglass
Asphalt: The Wendland kerb should be primed and expanded metal lathe (EML)
metal should be attached using 10mm maximum length nails or screws. First coat
Tilt Fillet (NRPA/7)
Plasterboard trim (LVCT) asphalt should be applied cooler than normal (approx 180°), and should be a thin
NOT INCLUDED as practically possible. The first coat must be completely cool before applying
successive coats which can be applied at normal temperatures and thicknesses.
OPTIONAL
Wendland kerb
Fibreglass: The Wendland kerb should be primed to ensure an excellent bond
between PVCu liners and GRP reinforcement. Microseal T20 is recommended.
50mm timber deck
screws (suggested) Apply an even layer by brush onto the PVCu. Leave surface for 45 - 60 minutes.
Then apply first coat of catalysed polyester resin. The fibre reinforcing is then
Screws supplied as required added and built up to the required thickness (max thickness 10mm).
E.D.P.M Rubber:The Wendland kerb should be primed and normal application
methods followed. Refer to supplier for further information.
100mm (FRFC008-100) 200mm (FRFC008-200) 250mm (FRFC008-250) Self drilling screw
Surplus fasteners may be supplied in some instances but do not require fitting. (FRFC008-60) Single Ply Systems: This may be solvent or hot air welded and mechanically
fixed to the Wendland skylight kerb, dependant on the type of membrane. Refer to
TOOLS REQUIRED supplier for further information.
Post Skylight Installation: Roof coverings can be applied before or after the
skylight is installed. When applying roof covering after the skylight it must be
wedged behind the aluminum frame.
Drill/ Screwdriver Tape Measure Spirit Level Stanley Knife Sealant Gun 5mm Drill BitFLAT SKYLIGHT INSTALLATION
1 2
Apply a generous, continuous bead of silicone to the top Position PVCu welded base frame and align with internal
surface of the kerb as shown. NOTE: If Wendland kerb kerb face.
remove adhesive film prior to silicone application.
3 4
Slope
Ensure you use all the clips provided. Position clips Fit the top glass frame onto the PVCu frame. Carefully
(FRICB001M) into location holes and fix using a screws as lower into position and then apply downwards pressure to
outlined below into the kerb. opposite sides to activate clips locking feature. (You will
Screw length supplied: hear a click).
100mm (FRFC008-100) – If customers supply their own kerb.
NOTE: Larger units will require multiple persons to lift.
200mm (FRFC008-200) – Always required with Wendland Kerb
250mm (FRFC008-250) – If slope is between 1301 - 1400mm, ensure 2
screws are used in clips in the lowest corners.
5
Plasterboard trim fitting - INSTALLATION IS COMPLETE
OPTION ONE - Fit to edge of plasterboard and then fix
plasterboard appropriately
OPTION TWO - Position as shown and then fix; using a
countersunk screw and adhesive (not supplied) and then
fit plasterboard.
NOTE: Top edge to be flush with internal glass.
www.wendland.uk.com
© Wendland - Our policy is one of continuous improvement and we reserve the right to change specification and design at any time
without prior notice.
Job No.7075 Wendland Flat Skylight V1 02/21You can also read


