INSTALLATION GUIDE RESYSTA LUSSO SIDING SYSTEM
←
→
Page content transcription
If your browser does not render page correctly, please read the page content below
INSTALLATION GUIDE
  RESYSTA LUSSO SIDING SYSTEM

                                                 1. Introduction

                                                    Sec.1 Material Components

                                                    Sec.1 Basics

                                                    Sec.1 Scope of Profiles

                                                 2. Installation Guide

                                                 3. General Guidelines

                                                    Sec.3.1 Walls higher than

                                                              12’ long

                                                    Sec.3.2 Expansion Joint

                                                    Sec.3.3 General Note

                                                    Sec.3.4 Disclaimer

RESYSTA USA – LUSSO SIDING INSTALLATION (2023)                                  1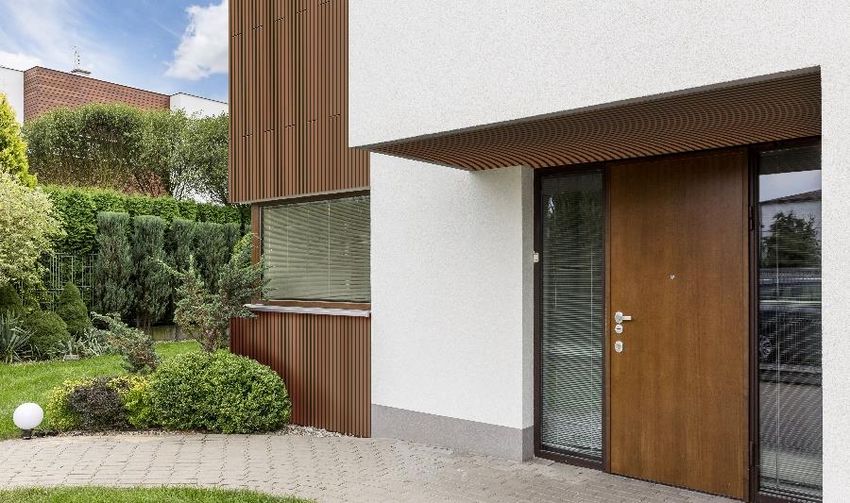
1. Introduction
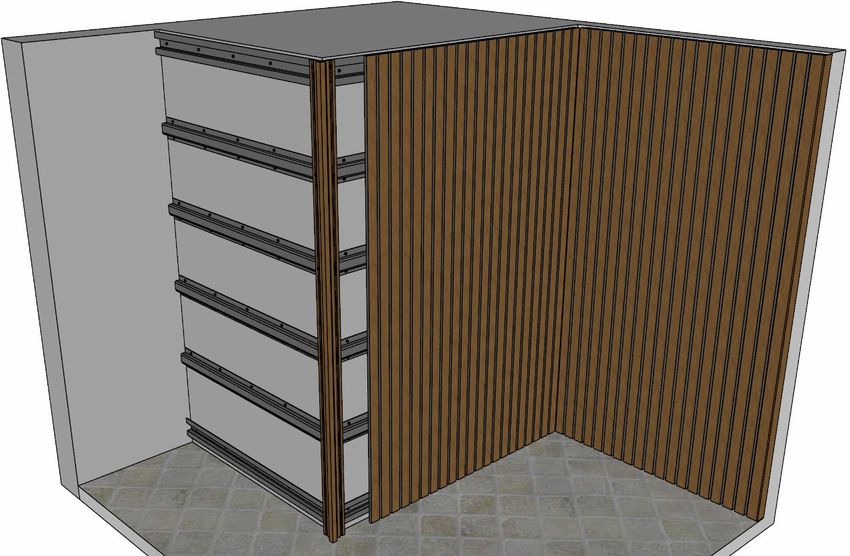
Resysta is an extremely durable, timber look-alike, building material. It is resistant to damage from the sun,
rain, snow and even salt water. Unlike wood, it requires minimal maintenance and is highly resistant to pests, mold
and cracks. Unlike other composite materials, it closely resembles the look and feel of natural wood, with a smooth
surface finish. Resysta meets most of the future environmentally sustainable material requirements concerning
recycled and fully recyclable materials. Resysta is used for its architectural aesthetic, and not for structural support.
SECTION 1 – Material Components
A combination of these three basic raw materials make up the simple components that create Resysta.
This innovative material offers designers and architects new creative horizons to utilize its compelling and
unique appearance.
Approx. 60% RICE HUSK + Approx. 22% COMMON SALT + Approx. 18% MINERAL OIL = RESYSTA PRODUCT
SECTION 2 – Basics
OVERVIEW OF PARTS
RESIN25812
End Cap
RESLP340612
Board
RESDCH343412
Corner Profile
RESSHTC10P Hat Channel
ISOMETRIC VIEW
RESCPSS25 Screw
BASIC PARTS OF RESLP340612
RESYSTA USA – LUSSO SIDING INSTALLATION (2023) 2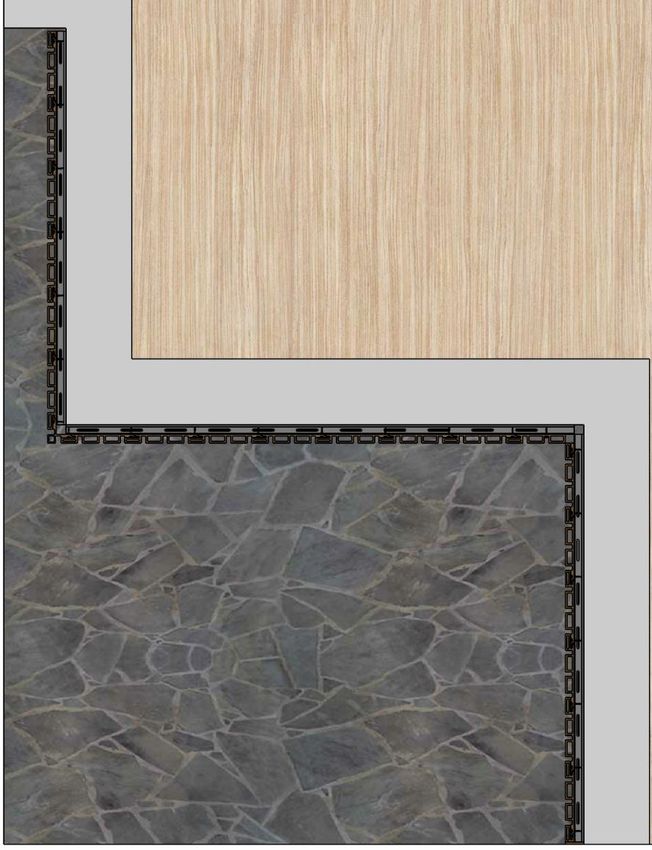
SECTION 3 – Scope of Delivery

       NO.          PRODUCT NAME AND               ISOMETRIC VIEW                         FRONT VIEW
                      SPECIFICATION

        1     RESLP340612
              ¾” x 5 ¾” x 12’
              Lusso Hollow Cladding Profile

        2     RESDCH343412
              ¾” x ¾” x 12’
              Corner Profile

        3     RESSHTC10P
              Aluminium Hat Channel Runner

        4     RESCPSS25
              TEC Shoulder Sliding Screw

    NOTE: Table above shows products commonly used for wall cladding. To view a complete list of products, please refer
    to our Resysta brochure or visit our web site https://www.resystausa.com/

    2. Installation Guide

         PROCEDURES:

             2.1 Check the layout and designed direction of the Lusso cladding to be installed; whether it is
                 horizontal, vertical or depends on the design requirements. Also check the layout for existing
                 plumbing and electrical wiring to make sure that there is not any interference.

             2.2 Check the surface wall level to be 100% levelled before installing the aluminium Runner
                 RESSHTC10P.

RESYSTA USA – LUSSO SIDING INSTALLATION (2023)                                                                        3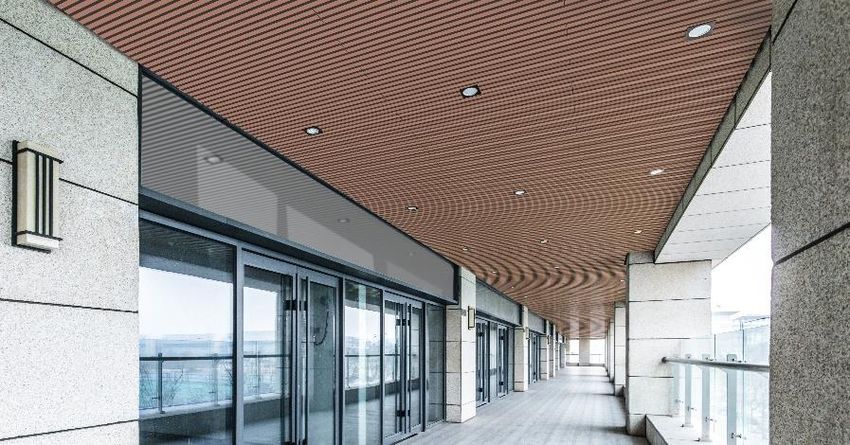
2.3 Establish gridline for the aluminum hat channel RESSHTC10P, minimum of 2 ½” from finish
                     ceiling line to center of first hat channel and followed by minimum 16” spacing center to center
                     hat channel. The last hat channel needs to have a maximum 4 ½” from finish floor line to center
                     of hat channel.
                              FINISH CEILING LINE
                                                                                                 2 ½”

                                                                                         16”
                                                                                         16”
                                                                                         16”
                                                                                         16”
                                                        GRID LINE
                               FINISH FLOOR LINE                                                 4 ½”

                                                     FRONT ELEVATION

                 2.4 Install the first horizontal hat channel on a reverse orientation starting from the finish ceiling
                     line to the center of hat channel with a minimum 2 ½” and followed by minimum of 16” center
                     to center. Note that the last hat channel needs to have a maximum 4 ½”from finish floor line
                     to center of hat channel.
                                                           F.C.L. TO CENTER
                                                              OF RUNNER
                                                              MIN. 2 ½”,

F.C.L.
    3

                                                                                                                  CENTER TO CENTRE
    4     9

                                                                                                                     OF RUNNER
                                                                                                                      MIN. 16”,
              REVERSE HAT CHANNEL

              HAT CHANNEL
                                                                                                            16”
                                                                                                            16”

              GRID LINE
                                                                                                                  F.F.L. TO CENTER OF
                                                                                                            16”

                                                                                                                   MAX. 2 ½” FROM

                                                                                                                         RUNNER

F.F.L.

         FRONT ELEVATION
                                                                                       Min. 3”

                                                                              F.F.L.

    RESYSTA USA – LUSSO SIDING INSTALLATION (2023)                                                                           4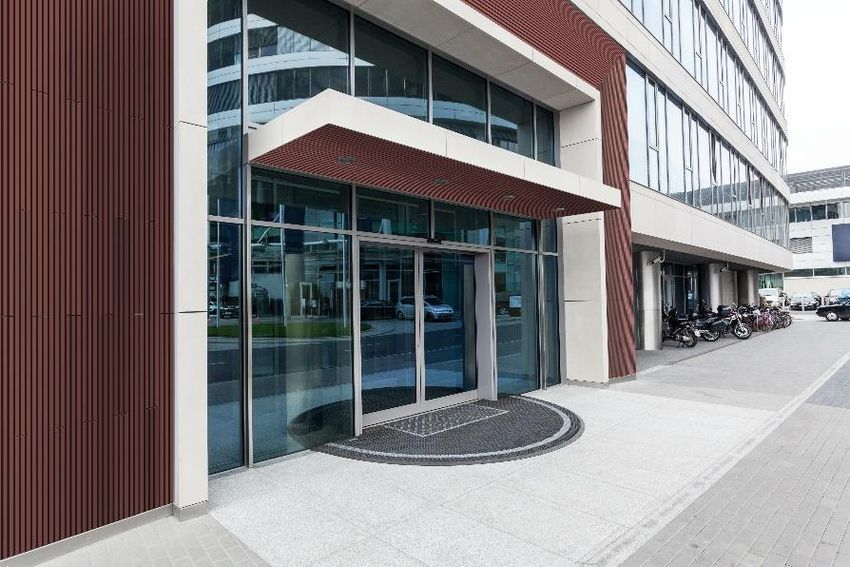
2.5 Screw the RESDCH343412 corner profile directly into the hat channel using RESCPSS25 screw
                 and make sure that the corner is plumb.

  Reverse
      Hat
  Channel
                                                                                            Reverse
                                                                                            Hat Channel

RESDCH343412
                                                                                            RESDCH343412
 Corner Profile
                                                                                            Corner Profile

RESCPSS25
    Screw
                                                                                            Hat Channel
                          FIN. CEILING LINE
                  Min.
                   1”

                                                  FRONT ELEVATION

              2.6 Slide and screw in the first RESLP340612 aligned into the hat channel and make sure that the
                  corner is plumb.                                    RESDCH343412 Corner
                                                                                  Profile

                    Max. ½”
                           FIN. CEILING LINE

Metal
Screw

    Reverse
Hat Channel

                                                                                                RESLP340612
     RESLP340612
                                                                                                 RESCPSS25
RESCPSS25 Screw
                                                                                                 Screw
     Hat Channel
                                                                                                 Reverse
      Metal Sheet                                                                                Hat Channel
           Screw                                                 FRONT
                               Min.

                                                             ELEVATION                           Metal Sheet
                                3”

                                       FIN. FLOOR LINE                                           Screw

RESYSTA USA – LUSSO SIDING INSTALLATION (2023)                                                                 5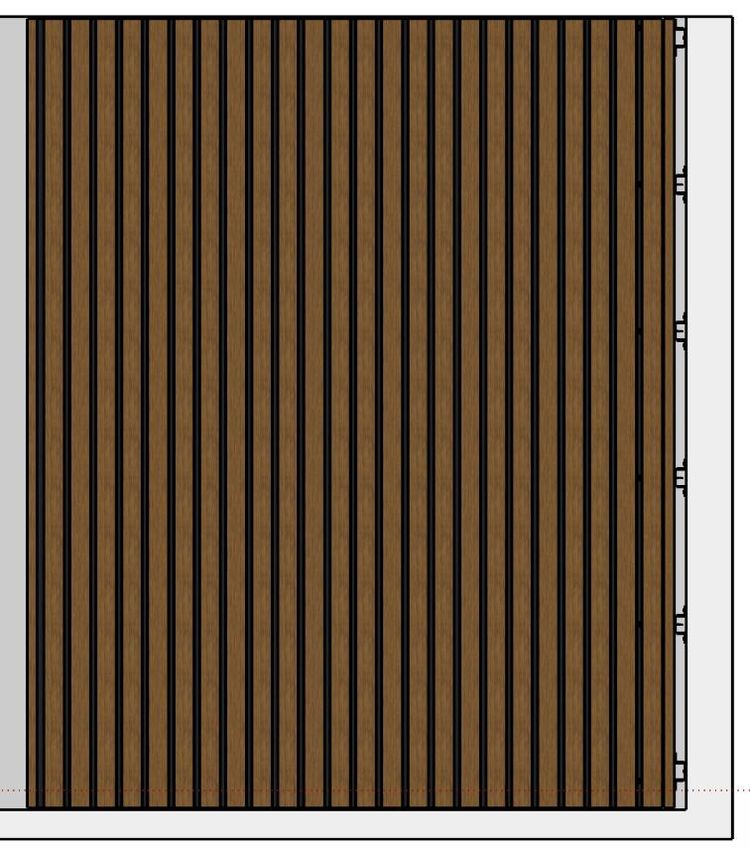
2.7 Slide in the second RESLP340612 aligned into the first RESLP340612 board. And use a 3/8’’
                 Shim in between of these two boards. Screw the second board and then remove the shim.

                                                 RESCPSS25 Screw

                                                 RESLP340612
                                                 Reverse Hat Channel

                        Hat Channel
                    RESDCH343412
                     Corner Profile

                                                                                                FRONT ELEVATION

                                                                       3/8’’ Shim Space

                                                                                    Note:
                                                                                    Ensure the shim with a space
                                                                                    gap of 3/8’’ from one board to
                                                                                    another board.

RESYSTA USA – LUSSO SIDING INSTALLATION (2023)                                                                       6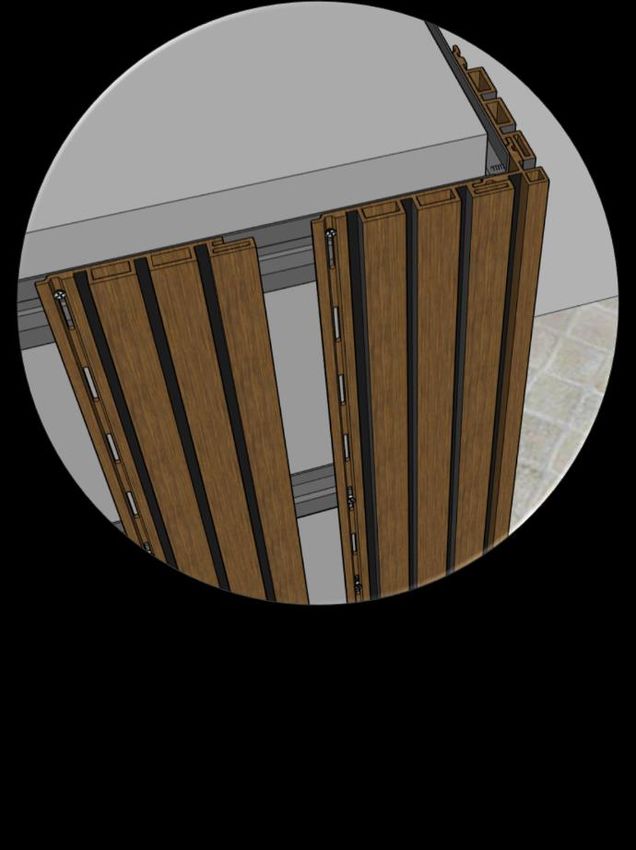
2.8 Repeat step 2.7 until reaching the end of the wall and make sure that the corner is plumb based
                  on the project layout.

 Reverse Hat
    Channel

                                                                                                     Hard fasten first
    RESLP340612                                                                                      screw on top part
                                                                                                     of the hole.

 Hat Channel

RESDCH343412
 Corner Profile
                                                                                                  Loose for the rest of
                                                                                                  the screw placed it on
                                                                                                  the centre of the hole
                                                              FRONT ELEVATION                     to allow movement.
                      FRONT ELEVATION

              2.9 The last board needs to be cut and glued to the previous board tongue using PL Premium
                  adhesive.

OPTION 01 Cutting the male part RESLP340612
                  (BOARD ENDING PERPENDICULAR INTO A WALL)

                                                                                                           Black flat
                                                                                                           head screw

        1-Resysta                                2-Cut the male part of       3-Use a Router or similar to provide
        RESLP340612                              the board.                   an 1/8” x 2” hole in the board at every
        Cladding                                                              runner location for the screw.

RESYSTA USA – LUSSO SIDING INSTALLATION (2023)                                                                       7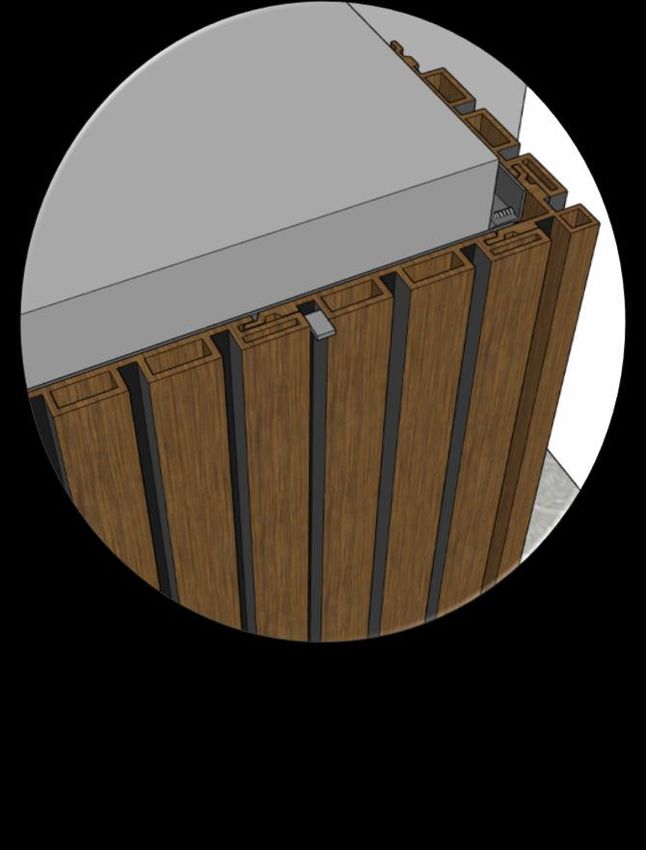
Tighten the
                                                                                       Black flat
                                                                                       head screw

                                                                               Tighten the first black flat
                                                                               head screw used as face
                                                                               screw on top part of the
                                                                               hole.

                                                                                   Slightly loose
                                                                                   Black flat head
                                                                                   screw

                                                                               Install remaining black flat
                                                                               head screws in the center
                                                                               of the hole and slightly
  FRONT ELEVATION                                                              loose to allow movement.

OPTION 02 Cutting the female part RESLP340612
                   (BOARD ENDING PERPENDICULAR INTO A WALL)

                                                                                          PL Premium
                                                                                          adhesive

     1-Resysta RESLP340612                       2-Cut the female part   3-Apply PL Premium adhesive
     Cladding                                    of the board.           on this area to hold the cut
                                                                         female board.

RESYSTA USA – LUSSO SIDING INSTALLATION (2023)                                                          8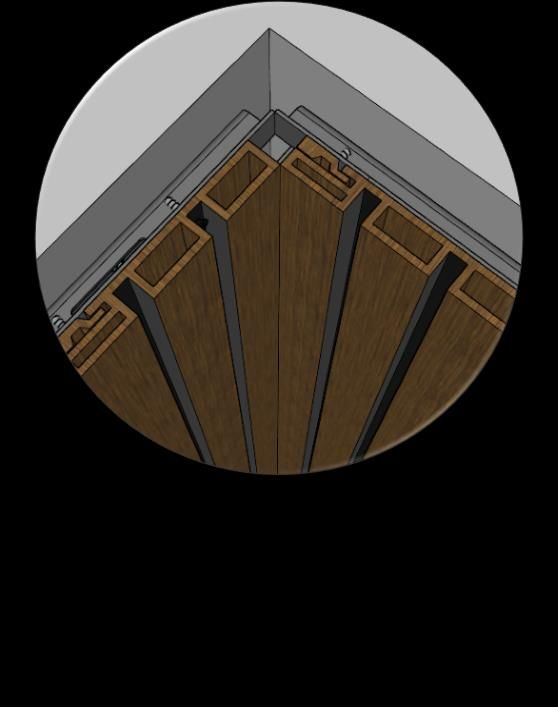
RESCPSS25 Screw

            Cut Female
          RESLP340612

           Reverse Hat
              Channel

         RESLP340612

                                                               FRONT ELEVATION

              2.10       To hide the exposed hat channel, glue together the cut RESLP340612 and RESIN25812
                 to the previous board tongue using PL Premium adhesive.

                                                                                         Cut RESLP340612

                                                                                         Exposed Hat
                                                                                         Channel

                                                                                         RESLP340612

                                                                                           RESIN25812
                                                                                           End Cap

                                                                                           Cut RESLP340612

     FRONT ELEVATION                                             END WALL DETAIL

RESYSTA USA – LUSSO SIDING INSTALLATION (2023)                                                             9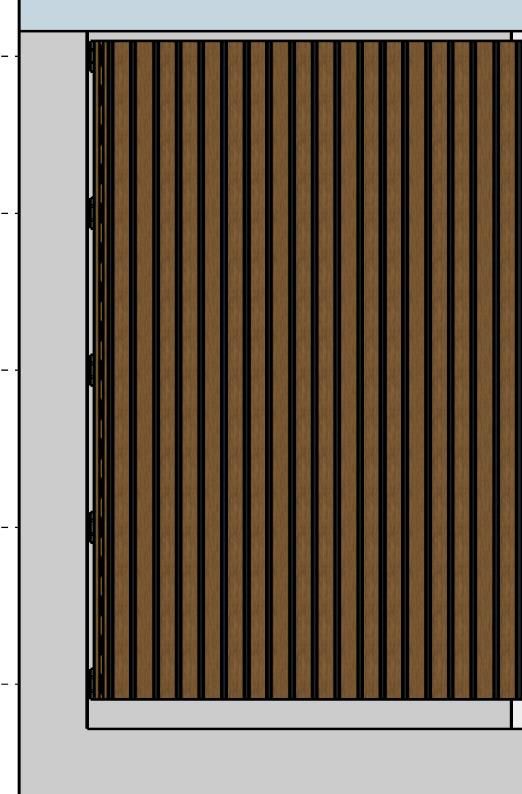
Resysta RESLP340612 Termination Corner Details

                                         Cut female
                                         RESLP340612
                                                                                        Reverse Hat
                                                                                        Channel

                                                                                        Cut male
                                                                                        RESLP340612

                                                                                        Black flat
                                                                                        head screw

   RESCPSS25                                                                            RESLP340612
       Screw

 RESLP340612                                              INTERIOR                      INTERNAL
  Reverse Hat                                              AREAS                         CORNER
     Channel                                                                              DETAIL

 PERPENDICULAR
  WALL DETAIL

                                                         EXTERIOR
                                                          AREAS

                                                    PLAN LAYOUT
                                                 RESYSTA RESLP340612
                        Hat Channel
                                                          Reverse Hat Channel
                        RESCPSS25 Screw
                                                             RESCPSS25 Screw
                        RESLP340612                             RESLP340612

                        RESDCH343412                   Cut female RESLP340612

     EXTERNAL CORNER                                              RESIN25812
          DETAIL
                                                                      END WALL DETAIL

RESYSTA USA – LUSSO SIDING INSTALLATION (2023)                                                        10
3. General Advice
SECTION 3.1 – Walls higher than 12’ long
In case the project requires more
than 12’ long of Resysta Lusso
Cladding it is adviced to have a single
butt joint termination for every set of
two (2) RESLP340612. The single butt
joint will be the location of the hard
pinning of the boards, it will allow
the boards to have an expansion
joint. The boards can freely expand
eighter moving upward or moving
downward depending on the
temperature or climate of the
project.
Metal sheet screw
Reverse Hat Channel
RESCPSS25 Screw
RESLP340612
FRONT ELEVATION
SECTION 3.2 – Expansion Joint
Expansion joint caters for temperature- dependent linear expansion of 1/16” gap per board every 10 degrees
in temperature change between the ends of the planks. e.g. 9 ½’ plank= approx. 1/8” distance. If the planks
are installed closed to a wall the distance here should be ½”. ( Refer to expansion chart).
Table 1.1
Surface Temperature Gap (9 1/2’ board) Gap (12’ board) Ending
30C- 40C 1/16” 1/8” ½”
15C- 30C 1/8” 3/16” ½”
40C- 60C 1/16” 1/16” ½”
60C- 70C none none 3/16”
3.1.1 The Dimensional change of Resysta is solely dependent on the thermal expansion. Air,
humidity and water have no influence on dimensional change. Thermal expansion must
be considered at installation.
RESYSTA USA – LUSSO SIDING INSTALLATION (2023) 113.1.2 Cutting to length should be carried out at consistent material temperature. Therefore, the
materials should be stored in the shade or in areas where it is not exposed to direct
sunlight. The material can warm up considerably in the sun, leading to an increased change
in length . In the case of more distinct fluctuations in material temperature, cutting to
length may have to be adapted accordingly.
3.1.3 Resysta has a high vapor diffusion resistance. Please consider at installation.
3.1.4 Resysta has a class A fire rating (ASTM-E84).
3.1.5 Cut-off pieces and/or abrasive dust have to be disposed separately. Please comply with
regulations of your competent waste management. You may under no circumstances burn
Resysta yourself.
SECTION 3.3 – General Notes
3.1.6 Resysta building products is not responsible for information shown on all details beyond
specification scope of work BID/quoted and as indicated contract documents.
3.1.7 Details of adjustment work are shown for completeness only. The project Architect /
Project Engineer / Erecting Contractor supplying and/or installing the structural support is
responsible for its design/installation to accommodate all loads imposed upon the
products.
3.1.8 Our Engineer is limited to the load carrying components of the siding system and its
fasteners shown on the subsequent drawings. The components are supplied by other
parties.
3.1.9 These drawings are the copyright property of Resysta Building Products, Inc.
3.1.10 Please read our installation and design recommendation documents for further
information that may be important for your specific project or installation.
3.1.11 Ensure a steady material temperature when cutting the boards to size. The cutting has to
be done under constant conditions. e.g. inside or in shade.
3.1.12 Always consider the linear expansion of Resysta, which is dependent on the temperature
but not air humidity. See Table 1.1 for more information.
3.1.13 Minimum runner/batten spacing for the 8” siding system.
3.1.14 Slots should be used to attach siding to runner/battens.
3.1.15 Overhang siding boards to a maximum of 1”.
3.1.16 Only use construction fastening material and hardware suitable for outdoor use (e.g.
Stainless Steel Screws).
SECTION 3.4 – Disclaimer
Resysta Lusso Cladding has been specially developed for their named application and are not
a structural material. The items have no general technical approval and are therefore not suitable for
supportive construction purposes. Local building codes as well as installations and technical information
should be considered. Resysta products should be stored on a flat and level surfaces. If planks are stored on
stickers/slats ensure that there is a distance of no more 12” between them. The Resysta cladding must be
installed by an authorized professional installer.
For more details please visit our web site https://www.resystausa.com
RESYSTA USA – LUSSO SIDING INSTALLATION (2023) 12You can also read