(PITU) Set Up & Operation Guide - PATIENTS CAN NOW BE SAFELY ISOLATED AND TRANSPORTED - FDA
←
→
Page content transcription
If your browser does not render page correctly, please read the page content below
PATIENTS CAN NOW BE SAFELY ISOLATED AND
              TRANSPORTED

                                                     (PITU)
                                            Set Up & Operation Guide
            A & R TARPAULINS, INC.
            dba AR TECH, AR INDUSTRIES
                   16246 Valley Blvd.
                Fontana, California 92335
                     (909)829-4444
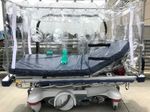
Patient Isolation & Transport Unit: Operation Guide
Setup Instructions: Initial Frame
Unpacking 4. Placement of PITU Base Device
Inspect the packaging contents for shipping damage and ensure
all components are present. The product should be inspected A. In the packaging you will find 4 base pins to secure the
before each use. PITU frame to the gurney.
B. Place each pin into the previously identified equipment
1. Opening & Initial Device Inspection: ports on the gurney.
C. Have a person at the head and foot of the PITU frame and
A. Unpack the Patient Isolation & Transport Unit (PITU)
lift the frame. Align the 4 frame poles onto the 4 base pins.
from shipping packaging.
Picture A D. Once the frame poles are in place, secure the pole and
B. Identify the square frame portion—this is the top of PAPR Motor and P100 Setup
base pin with the bolt and nuts provided in the packaging.
the PITU unit. E. Ensure the patient enclosure is stretched over the gurney.
C. Ensure the device is sitting upright with the patient F. Place the gurney mattress into the patient enclosure so
enclosure freely hanging off the frame. that it rests on top of the PITU enclosure's sealed bottom
D. Check all sides and panels for any tears or section.
punctures.
NOTE: Check all sides and panels for any tears or punctures. If 5. Blower Motor Setup
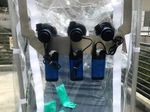
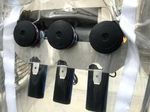
any punctures or tears are identified, do not use the damaged A. In the packaging you will find 6 P100 filters, 3
enclosure. Obtain a new enclosure before proceeding. motors and 3 rechargeable batteries.
B. Attached the batteries to each blower motor.
C. Secure the battery to the holder below the motor.
2. Evaluation & Prepping of Patient Gurney: D. Turn on the motor and check the airflow with the
A. Identify the patient transport gurney to be used with airflow indicator
(See Section: WARNING & INSTRUCTION; SECTION VI
Stryker ER Gurney the PITU device and remove the mattress. Attach Inner P100 Filters to PAPR Motor
PERFORMANCE CHECK).
B. In this example is a commonly used Emergency
E. Attach each motor to the motor mount at the foot of
Department Gurney manufactured by Stryker.
the enclosure by placing the motor intake manifold
C. At the head of the Stryker Gurney is a right and left
through the motor mount and corresponding hole in the
equipment port.
enclosure from the outside and then screw the threaded
D. Identify each equipment port and ensure both are
male end of the P100 Filter into the female threaded
free from blockage and not in use.
motor intake manifold on each blower motor from inside
E. Next identify the equipment ports at the foot of the
the enclosure. Remove the filter cap covers. Save
Stryker gurney.
caps/covers.
F. Again, ensure both these equipment ports are free
F. Attach the P100 Filters to other inlet vents at the
from blockage and not in use.
head of the PITU by placing the threaded portion of
the filter through the vent plate and corresponding holes
3. Expanding the PITU Unit in the enclosure. Secure the filters in place
Stryker Gurney: Head of Bed Equipment Ports Checking PAPR Motor Airflow
A. The PITU unit is designed to fit many types and sizes by threading the plastic nut onto the threaded portion of
of commonly used hospital beds/gurneys. the filter from inside the enclosure and hand tighten.
B. Place the PITU device by the gurney and expand the Remove the filter cap covers. Save caps/covers.
length of the PITU to the appropriate length so that each G. Negative Pressure Check: The enclosure walls
foot of the PITU will match the length of the gurney's become taut and bowed inward (slightly concave) when
previously identified equipment ports. the unit is generating negative pressure. Healthcare
C. Repeat this same procedure to expand the width of personnel can easily monitor the function of the unit by
the PITU to match the width of the equipment ports. visually inspecting the enclosure for presence of taut and
D. Once the frame has been adjusted to match the concavity of the walls or ceiling to know that the unit is
gurney's equipment port measurements, ensure the generating negative pressure.
fabric enclosure is expanded to match the frame size.
AT THIS TIME THE PITU IS READY FOR PATIENT
USE
Stryker Gurney: Foot of Bed Equipment Ports Additional Item PocketPatient Isolation & Transport Unit: Operation Guide
Setup Instructions: Preparing For Patient Care
1. PITU is Ready for Patient Care 4. Passing Objects into the Enclosure
A. Prior to a patient being placed in the PITU, place A. Transfer Pocket is available in the event a patient needs
necessary supplies in the enclosure based on each additional supplies
patient's condition and needs. B. Open the outside zipper to the transfer pocket
B. If EKG monitoring, respiratory support, IV lines, etc. are C. Place the object inside the pocket
needed they can be pre-placed through the additional
D. Zip up the pocket
port located on the patient's right upper region of the
PITU Device Deployed E. Place your hands into the premade glove ports next to Battery Placement for PAPR Motors
PITU device.
C. Any additional equipment needed can be safely passed the transfer pocket.
through the compartment on the patient left side of the F. Unzip the inside pocket and obtain the item
PITU. G. Zip the inside pocket closed after obtaining the items in
the pocket.
2. Placement of cords
A. Open the port located at the head of the gurney 5. Disposal
B. Pull the lining outward A. Fabric enclosure and Filters
C. Place monitoring cords through the port The disposable portion of the device (enclosure and filters)
D. Twist the lining around the cords should be placed inside of a biohazard bag
E. Tape the lining to the cords forming a seal (See Section: WARNING & INSTRUCTION; XIV DEVICE
F. Push the cords and lining inward DISPOSAL) and disposed of per the healthcare facilities
G. Ensure all monitoring probes are connected to cords medical waste disposal policy. Exchange Bag for Supplies
Location Port for Lines, Oxygen and IV lines H. Repeat this process for Oxygen and IV tubing on the B. Reusable components.
second port The reusable portions of the unit (tent frame, blower
motors, motor mounts, batteries and vent stabilization
3. Opening of the Isolation Gurney plates) can be disinfected as per facility disinfection or
A. Each zipper located on the zipper ring should be used to decontamination policies.
fully open the PITU patient entry flap. (See Section: WARNING & INSTRUCTIONS; XVI
CLEANING AND STORAGE)
B. Once each zipper is moved to the right and left lower
portion of the zipper ring, drop the PITU flap straight
down.
C. Ensure that there is no PITU flap that may obstruct the
patient's path to placement into the device.
D. If needed fold the flap under the gurney to facilitate the
gurney being placed in a lower position for patient
Opening of PITU Battery in ON Position
transfer.
E. Once the patient is placed in the PITU device, run all
additional support lines through the port on the right.
F. Ensure all EKG leads, IV lines and oxygen are
connected prior to closing the PITU unit.
G. Once patient and all support lines, leads, and oxygen is
secured, then close the flap by zipping both sides until A & R TARPAULINS, INC.
dba AR TECH, AR INDUSTRIES
they meet at the top of the PITU unit. 16246 Valley Blvd.
H. Turn on the blower motors; you should see the sides Fontana, California 92335
“bow” inward as negative pressure builds up. (909)829-4444
mail@artech2000.com
www.artarpaulins.com
Opening of PITU Battery in OFF PositionYou can also read


