Pigeon Point Shelf Manager User Guide - Release 2.3 July 28, 2006
←
→
Page content transcription
If your browser does not render page correctly, please read the page content below
Pigeon Point Shelf Manager User Guide

     ShMM-500              ShMM-300

                                    Release 2.3
                                  July 28, 2006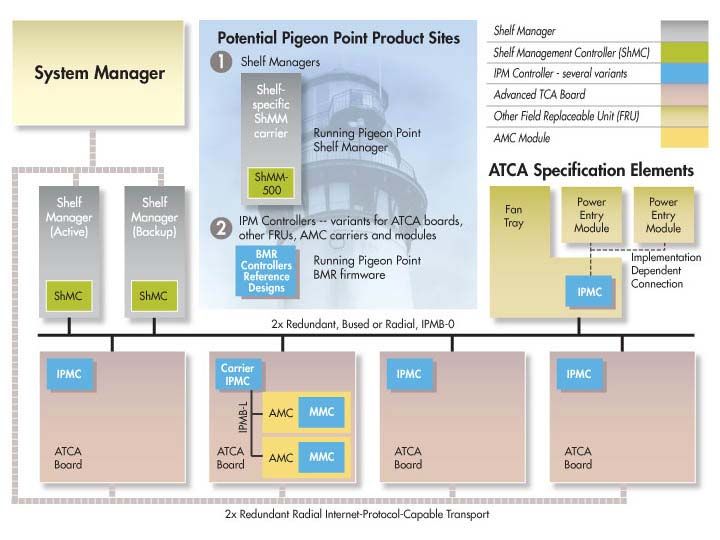
© 2002-2006 Pigeon Point Systems. All rights reserved.

Pigeon Point Shelf Manager and ShMM-300/ShMM-500

This document is furnished under license and may be used or copied only in accordance with the
terms of such license. The content of this manual is furnished for informational use only, is subject
to change without notice, and should not be construed as a commitment by Pigeon Point Systems.
Pigeon Point Systems assumes no responsibility or liability for any errors or inaccuracies that may
appear in this book.

Except as permitted by such license, no part of this publication may be reproduced, stored in a
retrieval system, or transmitted, in any form or by any means, electronic, manual, recording, or
otherwise, without the prior written permission of Pigeon Point Systems.

Pigeon Point and Monterey Linux are trademarks of Pigeon Point Systems. Linux is a registered
trademark of Linus Torvalds.

Pigeon Point Shelf Manager User Guide                                                         i
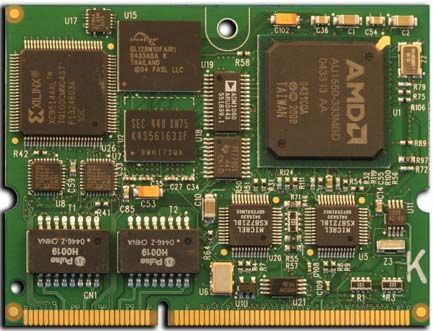
TABLE OF CONTENTS

PART I: GETTING STARTED ..................................................................................................... 1
   1. INTRODUCTION ....................................................................................................................... 2
   1.1.     OVERVIEW OF INTELLIGENT PLATFORM MANAGEMENT IN ATCA ...................................... 2
   1.2.     PIGEON POINT BOARD MANAGEMENT REFERENCE: HARDWARE AND FIRMWARE ............... 4
   1.3.    PIGEON POINT SHELF MANAGER AND SHMM ..................................................................... 5
      1.3.1.      Pigeon Point Shelf Manager Features........................................................................ 5
      1.3.2.      Support for Dual Redundant Operation ..................................................................... 6
      1.3.3.      System Manager Interface .......................................................................................... 7
      1.3.4.      Pigeon Point ShMM Shelf Management Mezzanines ................................................. 8
   2. CONFIGURATION .................................................................................................................... 9
   2.1.     SETTING UP U-BOOT ............................................................................................................ 9
      2.1.1.      U-Boot Interface ......................................................................................................... 9
      2.1.2.      U-Boot Environment Variables................................................................................. 10
      2.1.3.      Assigning Values to Environment Variables............................................................. 13
      2.1.4.      Configuration Environment Variables for the Shelf Manager ................................. 13
   2.2. SETTING UP ETHERNET ...................................................................................................... 15
      2.2.1.      Usage of the First Ethernet Interface ....................................................................... 15
      2.2.2.      Usage of the Second Ethernet Interface.................................................................... 16
         2.2.2.1.      Redundant Usage of the Two Network Interfaces............................................ 16
         2.2.2.2.      Parallel Usage of the Two Network Interfaces ................................................. 17
      2.2.3.      Using Dual USB Network Interfaces for Redundant Communication...................... 18
      2.2.4.      Changing the Default ShMM Network Parameters .................................................. 20
      2.2.5.      Assigning IP Addresses to the Shelf Manager via DHCP ........................................ 23
   2.3.     SETTING UP SHELF MANAGER CONFIGURATION FILE ........................................................ 24
      2.3.1.      Verbosity Level Description...................................................................................... 38
      2.3.2.      Configuring the FRU Information ............................................................................ 38
         2.3.2.1.      Accessing the Shelf FRU Information.............................................................. 38
         2.3.2.2.      Setting up the Shelf FRU Information .............................................................. 40
         2.3.2.3.      Other FRU Information Repositories................................................................ 41
   2.4.     CONFIGURING LOCAL SENSORS ......................................................................................... 42
   2.5.     SETTING AUXILIARY FIRMWARE REVISION ....................................................................... 47
   2.6.     SETTING UP THE CLOCK .................................................................................................... 47
      2.6.1.      Obtaining Date and Time from a Time Server.......................................................... 48
   2.7.     SETTING UP AND USING SHMM-500 POWER ON SELF TESTS ........................................... 49
   3. USING THE SHELF MANAGER .............................................................................................. 51
   3.1.     SHMM LOGIN .................................................................................................................... 51
   3.2.     STARTING SHELF MANAGER .............................................................................................. 51
   3.3.     REDUNDANT OPERATION ................................................................................................... 56
   3.4.     OPERATION IN RADIAL SHELVES ....................................................................................... 58
   3.5.     AUTOMATIC SEL TRUNCATION ......................................................................................... 60
   4. CUSTOMER SUPPORT............................................................................................................ 61

Pigeon Point Shelf Manager User Guide                                                                                              ii
PART II: RE-INITIALIZING AND RE-PROGRAMMING THE SHMM-500 ..................... 62
   5. RE-INITIALIZING THE SHMM-500.......................................................................................... 63
   5.1. RE-INITIALIZING THE U-BOOT ENVIRONMENT ................................................................... 63
   5.2.    RE-INITIALIZING THE FILE SYSTEM .................................................................................... 64
   5.3.    RESETTING THE LOGIN PASSWORD .................................................................................... 64
   6. RE-PROGRAMMING THE SHMM-500................................................................................... 65
   6.1.    FIRMWARE RELIABLE UPGRADE PROCEDURE .................................................................... 65
      6.1.1.   Reliable Upgrade Procedure Overview.................................................................... 65
      6.1.2.   Flash Partitioning..................................................................................................... 66
      6.1.3.   The /var/upgrade File System ................................................................................... 71
      6.1.4.   Reliable Upgrade Procedure Status File.................................................................. 72
      6.1.5.   Reliable Upgrade Utility........................................................................................... 72
      6.1.6.   Reliable Upgrade Utility Use Scenarios................................................................... 77
      6.1.7.   Reliable Upgrade Examples ..................................................................................... 78
PART III: RE-INITIALIZING AND RE-PROGRAMMING THE SHMM-300.................... 85
   7. RE-INITIALIZING THE SHMM-300....................................................................................... 86
   7.1. RE-INITIALIZING THE ARMBOOT ENVIRONMENT .............................................................. 86
   7.2. RE-INITIALIZING THE FILE SYSTEM .................................................................................... 87
   7.3. RESETTING THE LOGIN PASSWORD .................................................................................... 87
   8. RE-PROGRAMMING THE SHMM-300................................................................................... 88
   8.1. VERIFYING OPERATION OF THE ARM INJECTOR ................................................................ 88
   8.2. PROGRAMMING THE CPLD ................................................................................................ 89
   8.3. PROGRAMMING THE FLASH ................................................................................................ 90
PART IV: APPENDICES ............................................................................................................. 92
   A. APPENDIX A - REVISION HISTORY ............................................................................................ 93
   A.1. RELEASE 2.1.0....................................................................................................................... 93
   A.2. RELEASE 2.2.0....................................................................................................................... 93
   A.3. RELEASE 2.3.0....................................................................................................................... 94

Pigeon Point Shelf Manager User Guide                                                                                              iii
PART I: Getting Started Pigeon Point Shelf Manager User Guide 1
1
                                                                                         Chapter

        1. Introduction
This chapter provides an overview of the Pigeon Point Systems Pigeon Point Shelf Manager (ShM) and
Shelf Management Mezzanine (or ShMM, currently ShMM-300 or ShMM-500) products.

The Pigeon Point Shelf Manager is a shelf-level management solution for AdvancedTCA™ (ATCA)
products. The Pigeon Point ShMM, when coupled with a corresponding carrier board, provides the
necessary hardware to run the Shelf Manager within an ATCA shelf. This document focuses on aspects of
the Shelf Manager and ShMM that are common to any ShMM carrier used in an AdvancedTCA context.
Carrier-specific details are separately documented.

The Pigeon Point Shelf Manager is adaptable to manage CompactPCI and (when available) CompactTCA
platforms as well. This document focuses primarily on AdvancedTCA contexts, but provides CompactPCI-
specific comments where appropriate.

                    1.1. Overview of Intelligent Platform Management
                       in ATCA
The Pigeon Point products are the first Intelligent Platform Management building blocks designed from the
ground up for modular platforms like AdvancedTCA, in which there is a strong focus on a dynamic
population of Field Replaceable Units (FRUs) and maximum service availability. The Intelligent Platform
Management Interface (IPMI) specification provides a solid foundation for the management of such
platforms, but requires significant extension to support them well.

IPMI defines a management infrastructure that is widely used across the PC and server industry. PICMG
3.0, the AdvancedTCA specification, defines the necessary extensions to IPMI. In fact, more than 30% of
the 460 pages of PICMG 3.0 are devoted to shelf management, including the definition of 25 new
commands, six new FRU Information data structures—several quite complex—and 2 new sensor types.

The strategy for the Pigeon Point Shelf Manager is to fully support these extensions and also map them to
other platform architectures such as CompactPCI and CompactTCA.

Pigeon Point Shelf Manager User Guide                                                               2
Figure 1 shows the logical elements of an example AdvancedTCA shelf1, identified in terms of the ATCA specification and potential sites for incorporation of Pigeon Point products. Figure 1 Management Aspects and Potential Pigeon Point Product Sites in an Example AdvancedTCA Shelf An AdvancedTCA Shelf Manager communicates inside the shelf with IPM Controllers, each of which is responsible for local management of one or more Field Replaceable Units (FRUs), such as boards, fan trays or power entry modules. Management communication within a shelf occurs primarily over the Intelligent Platform Management Bus (IPMB), which is implemented on a dual-redundant basis as IPMB-0 in AdvancedTCA. The PICMG Advanced Mezzanine Card (AdvancedMC or AMC) specification, AMC.0, defines a hot- swappable mezzanine form factor designed to fit smoothly into the physical and management architecture of AdvancedTCA. Figure 1 includes an AMC carrier with a Carrier IPMC and two installed AMC modules, each with a Module Management Controller (MMC). On-carrier management communication occurs over IPMB-L (“L” for Local). 1 AdvancedTCA has adopted the term “shelf” for alignment with typical practice in telecommunications applications. Traditionally (for instance, in the CompactPCI specifications), the term “chassis” has been used with essentially the same meaning. Pigeon Point Shelf Manager User Guide 3
An overall System Manager (typically external to the shelf) can coordinate the activities of multiple shelves. A
System Manager typically communicates with each Shelf Manager over Ethernet.

The next two sections address the board and shelf levels of management, highlighting the following Pigeon
Point products and their capabilities as well as the relevant AdvancedTCA functionality:

    •   Pigeon Point Board Management Reference firmware and corresponding hardware reference design,
        which together implement various types of management controllers.

    •   Pigeon Point Shelf Manager software and ShMM mezzanine module, which together with an
        appropriate ShMM carrier board, implement an AdvancedTCA-compliant Shelf Manager and Shelf
        Management Controller (ShMC).

                    1.2. Pigeon Point Board Management Reference:
                       Hardware and Firmware
This level includes the local management of full-size 8U AdvancedTCA boards as well as other auxiliary
FRUs, such as fan trays or power entry modules. Based on the interfaces specified by IPMI and extended by
AdvancedTCA and AdvancedMC, any compliant Shelf Manager can work with any compliant IPM
Controller and the FRUs that it represents, including AMCs. This section focuses on controllers based on
Pigeon Point technology as a concrete example.

The Pigeon Point BMR reference designs can be implemented as part of any board or other FRU, and
executes the corresponding firmware, thereby realizing a compliant IPM Controller. The BMR firmware
represents one or more FRUs (via IPMB-0) to the Shelf Manager, including:

    •   Providing inventory information identifying each such FRU, including its manufacturer and other
        data.

    •   Describing and implementing a set of logical sensors (such as for temperature, state of IPMB-0, and
        operational state for each FRU (activated, deactivated, etc.)).

    •   Generating events (typically directed to the Shelf Manager) for exceptional conditions detected by
        any sensor, based on its configured event generation settings.

    •   Negotiating with the Shelf Manager for resources needed by the FRU(s), including power and
        interconnects.

BMR firmware running on an AMC Carrier IPMC additionally represents its installed AMCs to the Shelf
Manager, including negotiating for power resources on their behalf. Furthermore, a Carrier IPMC negotiates
with its AMCs and on-carrier switching resources regarding interconnect configurations. The AMC
management architecture is purposely designed to: 1) avoid impacting existing ATCA Shelf Managers and 2)
minimize the resources required to implement a Module Management Controller, since board real estate and
cost are at a premium on AMCs.

Pigeon Point Shelf Manager User Guide                                                                   4
There are Pigeon Point BMR variants for AdvancedTCA and CompactPCI IPM Controllers, as well as for
AMC Carrier IPMCs and MMCs. Currently, the principal BMR variants are based on the Atmel AVR
ATmega and Renesas H8S/2168 microcontroller families.
Pigeon Point Board Management Starter Kits for each of these BMR variants include all the materials
necessary (documentation, schematics, bill of materials, firmware source code and development tools, etc.)
for Intelligent FRU developers to integrate a reference design directly into their boards and take immediate
advantage of the fully validated BMR firmware.
More details (including product briefs) on the available Pigeon Point BMR variants and corresponding
Starter Kits are available at www.pigeonpoint.com/products.htm.
1.3. Pigeon Point Shelf Manager and ShMM
The Pigeon Point Shelf Manager (consistent with AdvancedTCA Shelf Manager requirements) has two main
responsibilities:
• Manage/track the FRU population and common infrastructure of a shelf, especially the power,
cooling and interconnect resources and their usage. Within the shelf, this management/tracking
primarily occurs through interactions between the Shelf Manager and the IPM Controllers over
IPMB-0.
• Enable the overall System Manager to join in that management/tracking through the System
Manager Interface, which is typically implemented over Ethernet.
Much of the Pigeon Point Shelf Manager software is devoted to routine missions such as powering a shelf
up or down and handling the arrival or departure of FRUs, including negotiating assignments of power and
interconnect resources. In addition, the Shelf Manager can take direct action when exceptions are raised in
the shelf. For instance, in response to temperature exceptions the Shelf Manager can raise the fan levels or, if
that step is not sufficient, even start powering down FRUs to reduce the heat load in the shelf.
1.3.1. Pigeon Point Shelf Manager Features
• Executes on the ShMM, a compact SO-DIMM form-factor module, installed on a suitable
carrier board for the shelf.
• Conforms to the AdvancedTCA specification.
• Monitors activities within the shelf via the ATCA-specified dual redundant Intelligent Platform
Management Bus (IPMB).
• Accepts and logs events posted by any intelligent FRU in the shelf (reflecting exceptions in
temperatures, voltages, etc.); posts alerts outside the shelf based on configurable IPMI Platform
Event Filters.
• Supports hot swapping of Field Replaceable Units (FRUs), while maintaining full management
visibility.
Pigeon Point Shelf Manager User Guide 5• Interfaces to standard “Telco Alarm” infrastructures, via ShMM carrier-implemented dry contact
relays.
• Supports redundant Shelf Manager instances for high availability.
• Integrates a watchdog timer, which resets the ShMM if not periodically strobed; such resets
automatically trigger a switchover to the backup ShMM, if configured.
• Includes battery-backed real-time clock for time-stamping events.
• Implements rich set of shelf-external interfaces accessible over Ethernet, including Remote
Management Control Protocol (RMCP, required by AdvancedTCA), command line, web
browser, Simple Network Management Protocol (SNMP).
The Pigeon Point Shelf Manager can also be used in CompactPCI shelves and is already substantially
compatible with the CompactTCA specification, currently in development within PICMG.
1.3.2. Support for Dual Redundant Operation
The Pigeon Point Shelf Manager can be configured with active/backup instances to maximize availability.
Figure 2 shows how both instances are accessible to the System Manager, with only the active instance
interacting at any given time. Similarly, only the active instance communicates over IPMB-0 with the IPM
Controller population in the shelf. The two instances communicate over TCP/IP, with the active instance
posting incremental state updates to the backup. (On the ShMM-500, these state updates can occur via USB
connections between the ShMMs.) As a result, the backup can quickly step into the active role if necessary.
Figure 2: Pigeon Point Shelf Manager Redundancy Support
Pigeon Point Shelf Manager User Guide 6Three cross-connected signals between the two Shelf Manager instances enhance their coordination:
• Presence: each Shelf Manager instance knows whether the other instance is present in the
shelf.
• Health: each instance knows whether the other instance considers itself “healthy.”
• Switchover: the backup instance can force a switchover if necessary.
When dual ShMM-500s are configured for state updates via USB, both Ethernet interfaces become
available for external communication. This allows support for an ATCA feature that was recently
adopted by PICMG: ShMC cross-connects. As shown in Figure 2, ShMC cross-connects allow both
ShMMs to be connected with both Base Interface Hubs. This improves system availability because
either hubs or ShMMs can switchover independently, if necessary.
1.3.3. System Manager Interface
Another major subsystem of the Pigeon Point Shelf Manager implements the System Manager Interface.
“System Manager” is a logical concept that may include software as well as human operators in the “swivel
chairs” of an operations center. The Pigeon Point Shelf Manager provides a rich set of System Manager
Interface options, which provide different mechanisms of access to similar kinds of information and control
regarding a shelf.
One such mechanism is the IPMI LAN Interface. To maximize interoperability among independently
implemented shelf products, this interface is required by the AdvancedTCA specification and supports IPMI
messaging with the Shelf Manager via the Remote Management Control Protocol (RMCP). A System
Manager that uses RMCP to communicate with shelves should be able to interact with any ATCA-compliant
Shelf Manager. This relatively low level interface provides essentially complete access to the IPMI aspects of
a shelf, including the ability for the System Manager to issue IPMI commands to IPM Controllers in the
shelf, using the Shelf Manager as a proxy.
In addition, the Pigeon Point Shelf Manager provides two interfaces oriented towards human users rather
than programmatic ones:
• Command Line Interface (CLI): This interface provides a comprehensive set of textual
commands that can be issued to the Shelf Manager via either a physical serial connection or
Telnet.
• Web-based Interface: This interface enables essentially the same functionality as the CLI, with
access to the Shelf Manager via a web browser.
Using either of these mechanisms, the System Manager can access information about the current state of the
shelf, including current FRU population, sensor values, threshold settings, recent events and overall shelf
health.
Finally, the Pigeon Point Shelf Manager supports Simple Network Management Protocol (SNMP) access to
the shelf. This popular management protocol is supported with a custom Management Information Base
(MIB) providing Get and Set access to a wide range of information and controls regarding the shelf.
Pigeon Point Shelf Manager User Guide 7These aspects of the ATCA’s System Manager Interface are considered to be the Pigeon Point Shelf-
External Interfaces. They are documented separately in a corresponding reference guide.
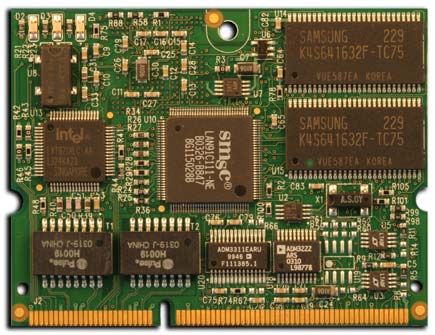
1.3.4. Pigeon Point ShMM Shelf Management Mezzanines
The Pigeon Point Shelf Manager executes on the ShMM, a small (67.60mm x 50.80mm) Shelf
Management Mezzanine that conforms to the Small-Outline Dual Inline Memory Module (SO-DIMM)
specification. There are currently two ShMM variants: ShMM-300 and ShMM-500. The following table
shows the key characteristics of these variants.
Feature ShMM-300 ShMM-500
CPU Texas Instruments AMD Alchemy Au1550
TMS320VC5471 (C5471)
Processor core(s) 47.5 MHz ARM7 and 100 MHz 333 Mhz MIPS-32
C54x DSP
SDRAM 16 Mbytes 64 or 128 Mbytes
Flash 8 Mbytes 16 or 64 Mbytes
Ethernet Dual 10/100 Mbit Dual 10/100 Mbit
Serial Two, one with modem controls Two, one with modem controls
Universal Serial Bus (USB) No Host and device ports
Duplex IPMB-0 Yes Yes
ATCA watchdog timer Yes Yes
Real-time clock, optionally Yes Yes
battery backed on ShMM carrier
General Purpose I/O signals Nine Nine
Shelf Manager redundancy and Yes Yes
hot swap interface, with on-
board CPLD assist
High speed interface(s) to on- Serial Peripheral Interface (SPI) Multiple ports supporting either
carrier devices SPI or SMBus
JTAG interface for processor Yes Yes
debug and flash programming
Pigeon Point Shelf Manager User Guide 82
Chapter
2. Configuration
The Shelf Manager runs on top of Monterey Linux (www.montereylinux.com), a specialized implementation
of Linux with separate editions for the ShMM-300 and the ShMM-500. The lowest layer of Monterey Linux
is the firmware monitor, which is called ARMboot on the ShMM-300 and U-Boot on the ShMM-500. U-
Boot works on multiple processor architectures, not just ARM and is generally upward compatible with
ARMboot. In the remainder of this chapter, the firmware monitor is generally referenced as U-Boot, except
where it is important to distinguish the two variants.
2.1. Setting up U-Boot
On a power-up/reset of the ShMM, the hardware starts executing the U-Boot firmware in Flash. The
firmware performs basic initialization of the ShMM, and unless the user explicitly disables the Autoboot
feature (thus forcing the firmware to switch to the maintenance user command interface), commences
booting the Linux kernel. Linux is booted from the kernel and root file system images residing in Flash. U-
Boot relocates the kernel image to RAM, sets up kernel parameters, and passes control to the kernel entry
point.
2.1.1. U-Boot Interface
U-Boot is accessible via the Serial port of the ShMM and requires configuration specific to the intended
operational environment. When the ShMM is powered up, text like following will be displayed on the
console:
For ShMM-300:
ARMboot 1.0.2 (Apr 18 2003 - 14:58:54)
ARMboot code: 10f00000 -> 10f156a4
DRAM Configuration:
Bank #0: 10000000 16 MB
Flash: 8 MB
Hit any key to stop autoboot: 0
ShMM #
For ShMM-500:
Pigeon Point Shelf Manager User Guide 9U-Boot 1.1.2 (Apr 27 2005 - 19:17:09)
CPU: Au1550 324 MHz, id: 0x02, rev: 0x00
Board: ShMM-500
S/N: 00 00 00 00 00 00 00 00 00 03 03 03
DRAM: 64 MB
Flash: 16 MB
In: serial
Out: serial
Err: serial
Net: Au1X00 ETHERNET
Hit any key to stop autoboot: 0
shmm500
“ShMM #” (or “shmm500”) is the prompt allowing for user commands to be entered. For a complete set of
supported commands, type “help”.
2.1.2. U-Boot Environment Variables
U-Boot includes a set of environment variables that should be configured prior to use. The following table
describes the default set of variables available:
Environment Description
Variable
addmisc Appends quiet, reliable_upgrade and console settings to bootargs. This
variable is normally not modified.
baudrate Serial port baud rate, default=115200 (=9600 on ShMM-300).
bootargs Command line to be passed to the Linux kernel. May contain references
to other U-Boot environment variables, which will be resolved at run-
time. On ShMM-500, the default value is:
root=/dev/ram rw console=ttyS0,115200 reliable_upgrade=y.
On ShMM-300, the default value is:
console=ttyS0,9600 root=/dev/ram0 IPADDR=$(ipaddr)
IPDEVICE=$(ipdevice) IP1ADDR=$(ip1addr)
IP1DEVICE=$(ip1device) GATEWAY=$(gatewayip)
RMCPADDR=$(rmcpaddr) TIMESERVER=$(time_server)
TZ=$(timezone) HOSTNAME=$(hostname) RC2=$(rc2)
FLASH_RESET=$(flash_reset)
PASSWORD_RESET=$(password_reset)
START_RC2_DAEMONS=$(start_rc2_daemons)
RC_IFCONFIG=$(rc_ifconfig) LOGGING=$(logging)
bootcmd U-Boot command executed to accomplish auto-booting. Normally, this
is something similar to bootm BFB00000 BFC40000 (bootm 0x20000
on ShMM-300), which starts the Linux image stored in Flash.
Pigeon Point Shelf Manager User Guide 10Environment Description
Variable
bootdelay Autoboot delay value, in seconds. Default setting: 3.
bootfile Parameter that specifies what kernel image should be used by the net and
nfs boot options
console Setting for the kernel and init script console port and baud rate. Default
is console=ttyS0,115200
ethaddr MAC address of the primary on-chip Ethernet controller. The value of
this variable is set automatically by U-Boot. This address is passed to the
kernel Ethernet driver.
eth1addr MAC address of the secondary Ethernet controller. The value of this
variable is set automatically by U-Boot. This address is passed to the
kernel Ethernet driver.
flash_reset Instructs Linux to erase the flash filesystems (/etc and /var), restoring to
factory default (y/n). The system startup script sets this variable back to
“n” after the flash erase. Default is “n”.
gatewayip Default gateway IP address. This variable can be passed as a part of the
kernel command line to automatically configure routing for the network
interfaces. Default setting: 192.168.0.1.
hostname Network host name; default is “sentry”
io_config Determines if the PSC controllers are configured for the dual-slave-
address-configuration (y/n). Default setting: y.
ipaddr IP address used by the primary on-chip Ethernet interface. This variable
is used to configure the network interface specified by ipdevice
automatically if the rc_ifconfig variable is set to “y”. Note that the system
startup script sets the least significant bit of this variable to the least
significant bit of the Hardware Address for the ShMM carrier; that is, if
the Hardware Address is an even value, the last bit in the IP address is set
to 0, otherwise it is set to 1. This is done in the startup script
/etc/netconfig to support coordinated IP address configurations on
redundant ShMMs. To disable this functionality, simply remove the
/etc/readhwaddr file.
ip1addr IP address used by the secondary Ethernet interface. This variable can be
passed as a part of the kernel command line to automatically configure
the corresponding kernel network interface.
ip1device Device corresponding to ip1addr; “eth1” is default.
kernel_start The absolute starting address of the kernel image in Flash. This variable
is set automatically by U-Boot during bootstrap.
logging Specifies if messages log file should be maintained in ram or flash.
Default is “ram”, which is the recommended option.
Pigeon Point Shelf Manager User Guide 11Environment Description
Variable
net This variable can be used as a replacement for bootcmd as a means of
booting a kernel and rfs image from TFTP. Use run net.
netmask Network netmask, default=255.255.255.0
nfs This variable can be used as a replacement for bootcmd as a means of
booting and running with an NFS mounted root filesystem. See the
Monterey Linux User Guide sample NFS project for details
password_reset Instructs Linux to restore factory default password for user “root”
(which is the empty password “”). Default is “n”.
post_normal Determines the list of POST tests that are executed on each boot-up. If
not set, compile-time default settings are used. The test names listed in a
value of this variable are separated by space characters.
post_poweron Determines the list of POST tests that are executed after power-on reset
only (vs. on each boot-up). If not set, compile-time default settings are
used. The test names listed in a value of this variable are separated by
space characters.
quiet Instructs the kernel upon bootup not to print progress messages to the
serial console. Default is quiet=quiet.
ramargs Sets the kernel command line in the bootargs variable as appropriate for
the root filesystem to be mounted from a ramdisk.
ramdisk Specifies what .rfs image should be used by the net and nfs boot options.
ramsize Size of the system memory, in bytes. Default setting: calculated from the
SDRAM configuration encoding in the build-time configuration block
rc_ifconfig Allows the /etc/rc script to set up the IP address instead of shelfman.
Default is “n” (allow shelfman to set up IP addresses).
rc2 Specifies secondary RC script that is to be invoked. This is the carrier-
specific startup script. Default is /etc/rc.carrier3 or other appropriate
script for given target platform.
reliable_upgrade Determines if the reliable software upgrade procedure is enabled on the
ShMM-500 (y/n). Default setting: y. Setting this variable to n is not
currently supported. If the variable is set to n, on the ShMM-500’s next
boot, it will issue an error message and hang.
rfs_start The absolute starting address of the root filesystem image in Flash. This
variable is set automatically by U-Boot during bootstrap.
rmcpaddr Default IP address for the RMCP service.
serverip IP address of the TFTP server
Pigeon Point Shelf Manager User Guide 12Environment Description
Variable
start_rc2_daemons Instructs the secondary startup script to start or not start the snmpd/boa
and shelfman daemons after bootup. Default is “y”.
time_proto Protocol used to retrieve time from a network time server; possible
values are “ntp” and “rdate”.
time_server Time server for synchronization at runtime. If this variable is not
specified, time is extracted from the hardware clock at system startup.
timezone Local time zone in CCCn format where n is the offset from GMT and
optionally negative, while CCC identifies the time zone. The default is
UTC0.
2.1.3. Assigning Values to Environment Variables
To assign a value to an environment variable, use the format (in this example and examples below, ShMM-
500 users see the command prompt “shmm500” instead of the ShMM-300-oriented prompt that is shown):
ShMM # setenv
For example:
ShMM # setenv bootdelay 1
Once all of the environment variables have been properly set, you need to save them back out to the Flash
so that they will remain after the ShMM is powered down. The “saveenv” command is used for this
purpose.
ShMM # saveenv
The setenv functionality is also available as a Linux utility with the same usage. To display U-Boot variables
at the shell prompt, use the additional getenv utility or issue the setenv command without parameters.
2.1.4. Configuration Environment Variables for the Shelf Manager
When U-Boot is started for the first time, the following default environment variables are defined.
For ShMM-300:
bootcmd=run setup_bootargs; bootm 20000 120000
bootdelay=3
baudrate=9600
ethaddr=00:50:C2:22:xx:yy
eth1addr=00:50:C2:22:xx:zz
serverip=192.168.0.7
netmask=255.255.0.0
Pigeon Point Shelf Manager User Guide 13hostname=sentry
gatewayip=192.168.0.1
ipdevice=eth0
ip1addr=192.168.1.3
ip1device=eth1
rc2=/etc/rc.acbfc
ipaddr=192.168.0.2
start_rc2_daemons=y
flash_reset=n
password_reset=n
logging=ram
rc_ifconfig=n
setup_bootargs= setenv bootargs console=ttyS0,9600 root=/dev/ram0
IP1ADDR=$(ip1addr) IP1DEVICE=$(ip1device)
IPADDR=$(ipaddr) IPDEVICE=$(ipdevice)
HOSTNAME=$(hostname) RC2=$(rc2)
GATEWAY=$(gatewayip) RMCPADDR=$(rmcpaddr)
TIMESERVER=$(time_server) TZ=$(timezone)
FLASH_RESET=$(flash_reset) PASSWORD_RESET=$(password_reset)
RC_IFCONFIG=$(rc_ifconfig)
START_RC2_DAEMONS=$(start_rc2_daemons)
LOGGING=$(logging)
For ShMM-500:
bootcmd=run setup_bootargs; bootm BFB00000 BFC40000
bootdelay=3
baudrate=115200
ethaddr= 00:00:1a:18:xx:yy
eth1addr= 00:00:1a:18:xx:zz
serverip=192.168.0.7
netmask=255.255.0.0
hostname=sentry
gatewayip=192.168.0.1
ipdevice=eth0
ip1addr=192.168.1.3
ip1device=eth1
rc2=/etc/rc.acbfc
ipaddr=192.168.0.2
start_rc2_daemons=y
flash_reset=n
password_reset=n
logging=ram
rc_ifconfig=n
bootfile=sentry.mips.kernel
ramdisk=sentry.mips.rfs
net=tftp 80400000 $(bootfile); tftp 80800000 $(ramdisk); bootm 80400000
80800000
rmcpaddr=192.168.1.15
timezone=EST
bootargs=root=/dev/ram rw console=ttyS0,115200 reliable_upgrade=y
Several of these environment variables need be reconfigured with values that are appropriate to the network
context in which the ShMM will be used.
Pigeon Point Shelf Manager User Guide 142.2. Setting up Ethernet The ShMM uses two Ethernet ports, one of them being used for shelf-external access. Since RMCP is the only shelf-external interface that is required by ATCA, the shelf-external Ethernet port is referenced as the RMCP port, though the other shelf-external interfaces (HTTP, TELNET, FTP) are accessible via this port as well. The other Ethernet port can be used for communication between redundant Shelf Managers, or potentially for other purposes if the redundancy link is provided by another mechanism. 2.2.1. Usage of the First Ethernet Interface Since the RMCP Ethernet port will be directly connected to the site network, the IP address should be set up appropriately for that network. For example, if the site uses the IP address range 192.168.0.x, the RMCP Ethernet port should be set to a unique IP address within that range such as 192.168.0.2. In a redundant ShMM setup, it is important to note that only one ShMM (the active ShMM) has the RMCP IP address enabled on the RMCP Ethernet port. The backup ShMM assigns the same IP address to the RMCP Ethernet port, but only enables it when that ShMM assumes the active role. This way, the RMCP IP address maintains availability in a failover situation. Assigning an Additional IP Address to the First Network Interface In the default configuration, no IP address is assigned to the first network interface (and the ShMM is not accessible over the network) until the Shelf Manager starts and the RMCP IP address is assigned. However, it may be useful in some cases to assign an IP address to the RMCP network interface and have the ShMM accessible over the network as soon as the operating system is booted. In that case, it is also desirable that when the Shelf Manager is started, for the RMCP IP address to coexist with the originally assigned IP address rather than replacing it. To achieve this configuration, it is necessary to instruct the Shelf Manager to assign the RMCP IP address not to the first network adapter itself (“eth0”) but to its first alias (“eth0:1”). The initial IP address will be assigned in that case to the network adapter itself (“eth0”) during the start of the operating system. This initial assignment happens in the initialization script /etc/rc; it is accomplished by: 1) enabling the U-BOOT variable “rc_ifconfig” (setting it to “y”), 2) assigning the original IP address to the U-BOOT variable “ipaddr”, for example: setenv rc_ifconfig y setenv ipaddr 192.168.1.240 and 3) changing the value of the Shelf Manager configuration parameter RMCP_NET_ADAPTER to “eth0:1”. In a redundant configuration, the U-BOOT variable “ipaddr” is allowed to have the same value on both ShMMs. The actual initial IP address assigned to each of the two redundant ShMMs will be based on the value of “ipaddr” but will be modified depending on the hardware address of the ShMM. The least significant bit of the IP address will be set to the least significant bit of the hardware address. In the example above, the IP address will be 192.168.1.240 for the ShMM with an even hardware address, and will be 192.168.1.241 for the ShMM with an odd hardware address. This modification of the IP address can be turned off by removing the file “/etc/readhwaddr”. Pigeon Point Shelf Manager User Guide 15
RMCP Address Propagation

There is an optional feature of the Shelf Manager that allows the backup ShMM also to be exposed on the
external network with an IP address that is different from the RMCP IP address only in the least significant
bit. The netmask and default gateway on the backup ShMM will be the same as on the active ShMM. For
example, if the RMCP IP address is 192.168.0.2, the backup ShMM will have the corresponding IP address
192.168.0.3, with the same netmask and default gateway. To enable this feature, it is necessary to define the
Shelf Manager configuration parameter PROPAGATE_RMCP_ADDRESS as TRUE in the Shelf Manager
configuration file.

2.2.2. Usage of the Second Ethernet Interface
Originally, the second Ethernet interface was dedicated for use as a private network between redundant
ShMMs and was used to synchronize state information between the active and backup ShMMs. This is still
the only usage mode for this interface for ShMM-300. Unlike the RMCP Ethernet port, this second Ethernet
interface is always enabled on both the active and backup ShMM, but with a small twist – both the active and
backup ShMM specify the same IP address for the redundancy interface, but software assigns the next logical
IP address to the ShMM with an odd hardware address. For instance, the default setting for the redundancy
Ethernet port is 192.168.1.2. The odd-addressed ShMM will assume the address 192.168.1.3. This way the
active and backup ShMM can be identically configured but still assume unique IP addresses for the
redundancy Ethernet link.

On the ShMM-500, this second network interface can potentially be used for other purposes, such as for
support in the Shelf Manager for ShMC cross connects, in accordance with the PICMG ECN 3.0-2.0-001.
In that case, the second network interface connects the Shelf Manager with one of the ATCA network hub
boards. Dual USB-based network interfaces can be used for communication between the redundant Shelf
Managers (see the next section).

To configure the Shelf Manager to support cross-connects, it is necessary to define the configuration
parameter RMCP_NET_ADAPTER2. In that case, if the backplane and hub boards also support cross-
connects, the Shelf Manager will use the two network adapters (RMCP_NET_ADAPTER and
RMCP_NET_ADAPTER2) for RMCP communication. Two usage models are available for this
feature:
    • Redundant usage.
    • Parallel usage.

         2.2.2.1. Redundant Usage of the Two Network Interfaces
The two network interfaces can be used in a redundant way. At any given time, RMCP communication will
pass through only one adapter (initially this is RMCP_NET_ADAPTER). However, if the Shelf Manager
detects that the adapter currently used for RMCP communication becomes physically disconnected from the
network (link broken), it automatically switches to the other adapter. The first adapter is turned off, the
RMCP IP address is transparently moved to the other adapter, and three ARP notifications are broadcast to
notify other systems about the address change. This change is transparent for the System Manager and does
not break existing RMCP connections.

Pigeon Point Shelf Manager User Guide                                                               16
However, if the Shelf Manager detects that the other network adapter is also physically disconnected from
the network, it does not perform the IP address switchover described above, but performs a full switchover
to the backup Shelf Manager. A full switchover is also performed if the Shelf Manager detects physical
disconnection of the network adapter used for RMCP communication, in non cross-connect configurations.
Detection of physical disconnection of the RMCP network adapter is controlled by the Shelf Manager
configuration parameter SWITCHOVER_TIMEOUT_ON_BROKEN_LINK. The value of this
parameter is the time interval in seconds during which the adapter stays physically disconnected, before the
Shelf Manager performs an IP address switchover or full switchover. Detection and switchover is disabled if
the value of this parameter is equal to -1.
Another configuration parameter, INITIAL_SLOW_LINK_DELAY, specifies the time interval from the
start of the Shelf Manager, during which detection of physical disconnection is not performed. This allows
using Ethernet links that are slow to start and need some time after shelf power up to establish the physical
connection.
Usually the parameter RMCP_NET_ADAPTER2 is assigned the value “eth1”, while the value of the
configuration parameter RMCP_NET_ADAPTER (the main network adapter used for RMCP
communication) is “eth0”, as in the following sample.
RMCP_NET_ADAPTER = “eth0”
RMCP_NET_ADAPTER2 = “eth1”
However, other configurations are possible. For example, values “eth0:1” and “eth1:1” can be used if
additional (permanent) IP addresses need to be assigned to both network interfaces.
The two network interfaces are used in redundant mode if the configuration parameter
USE_SECOND_CHANNEL is set to FALSE.
2.2.2.2. Parallel Usage of the Two Network Interfaces
The approach to network interface redundancy outlined in the previous section seems to be insufficient for
some configurations where the network connection between the Shelf Manager and the System Manager
goes through several switches and may break on an Ethernet segment that is not adjacent to the ShMM. This
type of failure cannot be immediately recognized by the Shelf Manager. Checking the accessibility of the
System Manager from the Shelf Manager does not seem practical in this case, since the architecture of the
System Manager and its usage of IP addresses is not defined in the ATCA specification and the Shelf
Manager design should not artificially limit it. The solution in this case should be implemented at the System
Manager level.
Some new features introduced in ECN-002 to the ATCA specification (PICMG 3.0 R2.0) facilitate a
solution. The command “Get Shelf Manager IP Addresses” allows the System Manager to retrieve the IP
addresses exposed by the Shelf Managers, both active and backup. Using this information, the System
Manager can check the availability of the Shelf Managers and the current distribution of responsibilities
between them (active vs. backup).
In parallel mode, instead of having a single RMCP network address that is switched between the two
network interfaces, the Shelf Manager supports RMCP on both interfaces with different IP addresses, as two
Pigeon Point Shelf Manager User Guide 17separate IPMI channels (channels 1 and 2). Each channel has its own set of LAN configuration parameters that includes the IP address, network mask, default gateway, etc. Both addresses are available via the “Get Shelf Manager IP Addresses” command. The System Manager, in this case, is responsible for switching over to a different IP address if the currently used IP address becomes unavailable, or maintaining two parallel RMCP sessions to both addresses. If IP addresses on both interfaces become unavailable, the System Manager can access one of the IP addresses on the backup Shelf Manager and initiate a switchover in a non- standard way (for example, log in to the backup ShMM via telnet and issue the command “clia switchover”). The parallel mode is enabled by setting the configuration parameter USE_SECOND_CHANNEL to TRUE. In this case, the configuration parameter DEFAULT_RMCP_IP_ADDRESS_2 should be set to a non-zero IP address. This IP address becomes the default IP address for the channel 2, and the configuration variables DEFAULT_RMCP_NETMASK2 and DEFAULT_GATEWAY_IP_ADDRESS2 specify the network mask and default gateway IP address for the channel 2, respectively. The values of the above-mentioned configuration parameters take no effect if the correspondent values in the channel configuration parameter file are non-zero. The channel configuration parameters for the channel 2 are stored in the file “/var/nvdata/ch2_param” on the ShMM. In parallel mode, the IP addresses on both network interfaces are switched over to the backup ShMM as a result of a switchover. 2.2.3. Using Dual USB Network Interfaces for Redundant Communication On the ShMM-500, two additional network interfaces are implemented over the two USB connections. In this configuration, they always connect the two redundant Shelf Managers. These interfaces are named “usb0” and “usb1”. The interface “usb0” always exists, while the interface “usb1” exists only if the interface “usb0” is active on the peer Shelf Manager (which means that the peer Shelf Manager is physically installed and running). Also, the interfaces are cross-connected: “usb0” on the first Shelf Manager is connected to “usb1” on the second Shelf Manager, and vice versa. The Shelf Manager supports usage of the USB network interfaces for communication between the redundant Shelf Managers. To use this feature, it is necessary to define two redundancy network adapters in the Shelf Manager configuration file /etc/shelfman.conf, as follows: REDUNDANCY_NET_ADAPTER = “usb0” REDUNDANCY_NET_ADAPTER2 = “usb1” One additional consideration relates to the definition of the subnet mask for the redundancy network interfaces. In the legacy case, when only one redundant network adapter is used, two different IP addresses are derived from the redundancy IP address specified in /etc/shelfman.conf. They are assigned to the two endpoints of the redundancy connection and differ only in the least significant bit. However, when two redundancy network adapters are used, four different IP addresses are used, one for each of the endpoints (two endpoints on each of the two redundant Shelf Managers). To ensure proper operation, the two endpoints on the same Shelf Manager (“usb0” and “usb1”) must belong to different logical networks, while “usb0” on one Shelf Manager and “usb1” on the other Shelf Manager must belong to the same logical network. This is achieved by dividing the IP address space into two ranges. These ranges (logical networks) are defined by the subnet mask given by the parameter REDUNDANCY_NETMASK from the configuration file /etc/shelfman.conf. If the network mask is 255.255.255.128 then the first range is Pigeon Point Shelf Manager User Guide 18
192.168.1.0 - 192.168.1.127 and the other is 192.168.1.128 – 192.168.1.255. The “usb0” endpoint on the first
Shelf Manager and the “usb1” endpoint on the other Shelf Manager will be in the first range. The “usb1”
endpoint on the first Shelf Manager and the “usb0” endpoint on the other Shelf Manager will be in the
second range.

The 4 IP addresses in question can be derived from one IP address (for example, the IP address assigned to
“usb0” on the Shelf Manager with the even hardware address) and the network mask (for which the
recommended value is 255.255.255.128). The rules are as follows:

             -    The IP address for “usb0” on the Shelf Manager with the even hardware address must
                  always be set even if the file /etc/readhwaddr is present.

             -    The IP address for “usb0” on the Shelf Manager with the even hardware address is set by
                  the parameter REDUNDANCY_IP_ADDRESS from the file /etc/shelfman.conf if the file
                  /etc/readhwaddr is not present.

             -    To compute the IP address for “usb0” on the Shelf Manager with the even hardware
                  address when the file /etc/readhwaddr is present you should set the least significant bit of
                  REDUNDANCY_IP_ADDRESS to 0.

             -    To compute the IP address for “usb1” on the other Shelf Manager you should toggle the
                  least significant bit in the “usb0” IP address on the first Shelf Manager. This guarantees that
                  “usb0” on Shelf Manager with the even hardware address and “usb1” on the Shelf Manager
                  with the odd hardware address are in the same logical network and are not equal to each
                  other.

             -    To compute the IP address for “usb1” on the Shelf Manager with even hardware address
                  you should take the IP address for “usb0” on the same Shelf Manager and toggle the least
                  non-zero bit of the network mask. This guarantees that “usb0” and “usb1” on the Shelf
                  Manager with the even hardware address are in different logical networks.

             -    The last step is to compute the IP address for “usb0” on the Shelf Manager with the odd
                  hardware address. You should either toggle the least significant bit in the IP address for
                  “usb1” on the Shelf Manager with the even hardware address or toggle the least non-zero bit
                  of the network mask in the IP address for “usb1” on the Shelf Manager with odd hardware
                  address. The result will be the same. This guarantees that “usb0” on Shelf Manager with the
                  odd hardware address and “usb1” on Shelf Manager with the even hardware address are in
                  the same logical network and are not equal.

Here is an example of deriving IP addresses for the USB network interfaces, under the assumption that the
following definitions are in /etc/shelfman.conf:
REDUNDANCY_IP_ADDRESS = 192.168.1.2
REDUNDANCY_NETMASK = 255.255.255.128

The least significant non-zero bit in the network mask is the 7th bit (where smaller bit numbers are less
significant). To toggle this bit in an IP address it is sufficient to add 128 (if this bit is set to zero in the IP
address) or subtract 128 (if this bit is set to 1 in the IP address).

Pigeon Point Shelf Manager User Guide                                                                         19
To toggle the least significant bit in an IP address it is sufficient to add 1 if the IP address is even or subtract
1 if the IP address is odd. Since REDUNDANCY_IP_ADDRESS is even, the computations are the same whether the
file /etc/readhwaddr is present or not.
On the ShMM with the even hardware address the assignment of IP addresses will look like this:
• “usb0”: 192.168.1.2 (no changes)
• “usb1”: 192.168.1.130 (toggling the least significant non-zero bit of the netmask)
On the ShMM with the odd hardware address the assignment of IP addresses will look like this:
• “usb0”: 192.168.1.131 (toggling the least significant bit of the IP address and the least non-zero
bit of the netmask)
• “usb1”: 192.168.1.3 (toggling the least significant bit of the IP address)
Here is another example of deriving IP addresses for the USB network interfaces, under the assumption that
the following definitions are in /etc/shelfman.conf:
REDUNDANCY_IP_ADDRESS = 192.168.1.13
REDUNDANCY_NETMASK = 255.255.255.128
Suppose also that the file /etc/readhwaddr is present.
The least significant non-zero bit in the network mask is 7th bit. To toggle this bit in an IP address it is
sufficient to add 128 (if this bit is set to zero in the IP address) or subtract 128 (if this bit is set to 1 in the IP
address). To toggle the least significant bit in an IP address it is sufficient to add 1 if the IP address is even or
subtract 1 if the IP address is odd.
On the ShMM with the even hardware address the assignment of IP addresses will look like this:
• “usb0”: 192.168.1.12 (since the file /etc/readhwaddr is present, the least significant bit should be
set to zero)
• “usb1”: 192.168.1.140 (toggling the least significant non-zero bit of the netmask)
On the ShMM with the odd hardware address the assignment of IP addresses will look like this:
• “usb0”: 192.168.1.141 (toggling the least significant bit of the IP address and the least significant
non-zero bit of the netmask)
• “usb1”: 192.168.1.13 (toggling the least significant bit of the IP address)
2.2.4. Changing the Default ShMM Network Parameters
Configuring a ShMM to work in a specific network environment requires changing the following network
parameters:
RMCP IP address
RMCP GATEWAY address
RMCP Netmask
As discussed in section 2.2, changing the second dedicated redundancy Ethernet interface is not required
since this is a dedicated private network between redundant ShMMs.
Pigeon Point Shelf Manager User Guide 20Changing the RMCP network parameters is a two step process. First, the U-BOOT network environment
variables need to be updated, then the booted ACTIVE ShMM module network settings need to be updated
using the Shelf Manager command line interface (CLIA). Specific steps are shown below:
• Attach a serial port console connection to the ShMM module. This typically will be 9600 Baud,
N/8/1 for ShMM-300, and 115200 Baud, N/8/1 for ShMM-500. Reset the ShMM carrier and press
the space bar to interrupt the automatic boot-up process. You should see:
U-Boot 1.1.2 (Apr 27 2005 - 19:17:09)
CPU: Au1550 324 MHz, id: 0x02, rev: 0x00
Board: ShMM-500
S/N: 00 00 00 00 00 00 00 00 00 03 03 03
DRAM: 64 MB
Flash: 16 MB
In: serial
Out: serial
Err: serial
Net: Au1X00 ETHERNET
Hit any key to stop autoboot: 0
shmm500
• Echo current network settings:
shmm500 printenv rmcpaddr netmask gatewayip
rmcpaddr=192.168.0.44
netmask=255.255.255.0
gatewayip=192.168.0.1
shmm500
• Change settings and commit to non-volatile storage:
shmm500 setenv rmcpaddr 10.1.1.10
shmm500 setenv netmask 255.255.0.0
shmm500 setenv gatewayip 10.1.1.1
shmm500 saveenv
Saving Environment to EEPROM...
shmm500
• Boot the ShMM up to full operational state and log in as user root.
shmm500 reset
U-Boot 1.1.2 (Apr 27 2005 - 19:17:09)
CPU: Au1550 324 MHz, id: 0x02, rev: 0x00
Board: ShMM-500
S/N: 00 00 00 00 00 00 00 00 00 03 03 03
DRAM: 64 MB
Flash: 16 MB
In: serial
Out: serial
Err: serial
Net: Au1X00 ETHERNET
Hit any key to stop autoboot: 0
## Booting image at bfb00000 ...
Image Name: MIPS Linux-2.4.26
Created: 2005-05-07 17:35:21 UTC
Image Type: MIPS Linux Kernel Image (gzip compressed)
Data Size: 843144 Bytes = 823.4 kB
Load Address: 80100000
Entry Point: 802bc040
Verifying Checksum ... OK
Uncompressing Kernel Image ... OK
## Loading Ramdisk Image at bfc40000 ...
Pigeon Point Shelf Manager User Guide 21You can also read