Mother's Day Nature Craft - Friends of Hagerman
←
→
Page content transcription
If your browser does not render page correctly, please read the page content below
by Cindy Steele

Mother’s Day Nature Craft

Welcome back to Puddles’ Craft Corner. It’s May and it’s time to think about flowers, nature, and
honoring special ladies in kids’ lives. Mother’s Day is just around the corner and, if the kids are
looking for a pretty gift for mom, grandma, or a special lady, this flowerpot painting craft is the
perfect way to teach the kids a little bit about plants and pollination while making a beautiful
gift. With just a little help, they’ll have a gift for someone to treasure forever. Moms love
handmade gifts on Mother’s Day, and this fingerprint flowerpot truly is handmade or at
least “finger made”! Kids will have a blast making cute fingerprint critters and mom will
enjoy this lasting reminder of her little one’s darling little hands forever.

Puddles, the mascot of the National Wildlife Refuge System, is here to help us to learn a little bit
about plants and pollination while creating a fun gift. Let’s take a look INSIDE nature at the parts of a
flower and the role insects play in the pollination of flowers. Kids love to pick flowers, smell their
scents, and then give the bouquet to someone special. To receive a handful of wilted but picked-out-
of-love blooms is about as special as it gets!

This is a great activity to also sprinkle in a bit of information about
plants and flowers. Use this poster to learn about the parts of a plant                             and
and what the plant needs to help it grow healthy and strong. Next,                                  use
use the pollination poster to discuss a bit about how insects are so
important to the production of new flower plants.
Now, it’s time to gather a few materials to make a beautiful gift for Mother’s Day.

Mother’s Day Flowerpot

Materials

       1.   Small to medium size clay pot                        5.   A piece of newspaper
       2.   Sponge paintbrush                                    6.   Paper plate or paint holder
       3.   A couple of regular paintbrushes                     7.   Flower seeds or flower plant
       4.   Sharpie marker or other permanent marker             8.   Acrylic paints (I used black,
                                                                      white, green, light blue,
                                                                      yellow, orange, pink, and red.)

Instructions

   1. Gather all of your supplies.
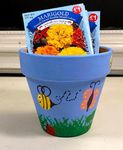
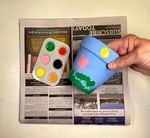
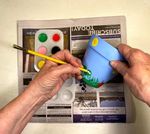
2. Paint the whole pot light blue with the sponge paintbrush. Let the blue paint dry. 3. Paint on the grass using a smaller paintbrush. Let the green paint dry. 4. Let the child use his/her fingers to make dots on the pot in different colors. (Examples: a yellow dot for a bee in the sky, a red dot in the grass for a ladybug, five or six green dots in a row for a caterpillar, four dots for a butterfly, three black dots for an ant, etc.) Let the dots dry. Here are some examples of fingerprint insects.
5. Dot larger white dots for the eyes on the ant, bee, caterpillar, and ladybug. Use the back end
   of the larger paintbrush to dot the white part of the eyes. You can also use white to add
   mouths or draw them on using the permanent marker. The back of the larger paintbrush can
   be used to add dots and decorations to the butterfly wings, too. Be sure to make the butterfly
   dots symmetrical as butterfly wings are symmetrically mirror-imaged!

6. Dot smaller black dots for the pupils of the eyes using the back end of the smaller paintbrush.
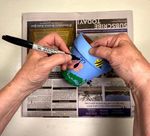
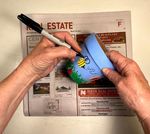
7. Use a sharpie or other permanent marker to add details to the insects. (Examples: Add a
   stinger, wings, stripes, mouth, and flying dots on the bee. Add antennae and feet to the
   caterpillar. Add the body and antennae to the butterfly. Add antennae, middle line, and dots to
   the ladybug. Hint…their dots are also symmetrical! Add antennae and feet to the ant.)

8. Your fantastic fingerprint flowerpot is finished! If you like, you can spray the exterior of the pot
   with a clear sealer or paint it with modge podge for protection and waterproofing. Add some
   flower seeds or plant a Mother’s Day flower in the pot. Any child’s special lady will treasure
   this “finger-made” gift!

Join Puddles in June for a sensational summer craft!
You can also read


