MOLDS & CASTS: FOSSILS AND CRAFTS - FEBRUARY 2020 FAMILY ART & SCIENCE ENCOUNTER
←
→
Page content transcription
If your browser does not render page correctly, please read the page content below
MOLDS AND CASTS: Fossils and Crafts
Welcome to Family Art & Science Encounters with the Kennedy                  On the left side, you’ll find
Museum of Art and the OHIO Museum Complex! This month, we’re                 all the instructions for the
                                                                             project. On the right, you’ll
exploring how to make molds and casts and how this process relates           find some interesting ways
to both art and science! This project doesn’t have a particular result, so   casting happens out in the
have fun with the process and see what you can come up with!                 world!

Materials                                                                    Artists use many materials
                                                                             to make artwork, including
                                                                             bronze, clay, and resin (a
       - Flour                                                               kind of plastic).

       - Salt
       - Cold Water
       - Found Objects
Optional:
       - Paint
       - Regular White Glue (Elmer’s Glue)
       - String

Step 1: Making Salt Dough                                                    Although fossils look like
                                                                             they’re made of bone,
First, we’ll mix our dough so we have something to work with! Here’s         they’re actually made of
                                                                             rock! This is the difference
the recipe.
                                                                             between a fossil and a
       - 2 parts flour                                                       skeleton.
       - 1 part salt
       - 1 part cold water
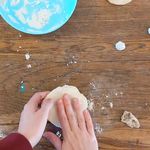
Mix the flour and salt together first.
Then mix in the water slowly until the dough is smooth.
Knead your dough for 10 minutes, and let it rest for 20 minutes.
(Stop here to make molds and casts)
Arrange molds and/or casts on a baking tray
Bake at 250° F (120° C) until dry and hard, or about 2 hours.
Allow to cool completely.
Step 2: Finding Objects
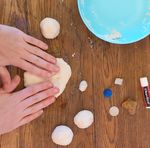
While your dough is resting, look for small objects from your
environment. These can come from inside or outside, like sticks,
toys, or bottle caps. Make sure that your object is not too fragile, so
that you can press it into the dough. Otherwise your object will be
unharmed!
Why do you think fragility
matters while making a
cast? Do the same rules
apply to bones, leaves, and
other natural materials that
can be made into fossils?
(Optional) Create your own object using salt dough. Make sure to Artists use lots of different
bake this before pressing it into raw dough. inpiration to make
sculptures or objects. What
inspires you? What objects
Step 3: Making a Mold do you like?
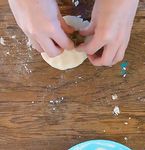
Set aside about a third of your dough for later.
Using the remaining two-thirds, separate your dough into small
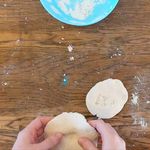
handfuls, and flatten these into discs, like cookies! Press one of your
objects into a raw salt dough disc.
Some fossils are made
this way too! Mold fossils
are imprints left by a hard
object on rock. These items
need to be buried under
layers of sediment to be
pressed hard enough for a
mold to be made.
(Optional) poke a hole through the top of your dough so that you can
display the mold later.Once you have a few molds, have an adult preheat your oven to Clay casts also need to be
250° F (120° C). Arrange molds on a baking sheet so that they are “baked” to harden. They’re
heated in a kiln at much
not touching. Bake until dry and hard. This will take around 2 hours higher temperatures for
depending on thickness. Once done, allow to cool completely. much longer.
Step 4: Making a Press Cast
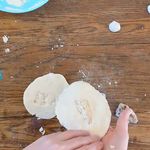
Press some of your remaining raw dough into a baked mold. Remove
your dough, and set aside to bake. When you’re finished making casts,
bake these just like the molds, at 250° F (120° C) for around 2 hours.
After a mold fossil is made,
a cast fossil can be formed.
These replicas of molds
fossils are formed naturally
when the space left
behind by a mold fills with
sediment.
Step 5: Experimenting! Bronze casting involves
pouring molten hot metal
into a mold and waiting
Try fitting a cast you’ve made back into its original mold.
for it to harden. Sort of like
Try using a mold of the front of an object and one of the back to make chocolate, but a lot hotter!
a replica. Try using meltable choc-
olate to create your own
Try making a mold of one of your casts. Is it very different from the cast. Be sure to use cocoa
original object? powder on your mold to
prevent the chocolate from
See what you can come up with! This project is about exploring pro- sticking.
cess, so there’s no right or wrong way to do it!
Step 6: Display Your Projects (Optional)
If you’d like to display your molds or casts, try painting on your baked
dough with acrylic or watercolor paint.
Before baking, you can also add a hole through the dough to thread a
string through.
A lot of decoration in
casting goes on after it’s
hardened. Find some
mugs or statues you might
have in you house, if it has
decoration, do you think it
was added after? Why?
Thank you for joining us on this month’s Virtual Family Art & Science
Encounter! Make sure to check out the online exhibition of Janus:
There’s More to What You See for inspiration on your casts at: https://
www.ohio.edu/museum/art/exhibitions/janus-theres-more-what-you-
see
Where are fossils usually
And when you finish your projects, make sure to tag us on Instagram displayed/found? Have
at: @KennedyArtMuseumEDU or tag post to our Facebook group: you seen fossils in person
Kennedy Museum of Art Experiences Group before? Where was it?You can also read


