PELT HANDLING For Prof it - Proper Pelt Handling Begins with the Proper Equipment - Fur Harvesters Auction
←
→
Page content transcription
If your browser does not render page correctly, please read the page content below
PELT HANDLING
                  Fo r P r o f i t

                Proper Pelt Handling
          Begins with the Proper Equipment
                        www.furharvesters.com

  Official Publication of Fur Harvesters Auction Inc.
To Our Fellow Fur Harvesters
Pelt Handling for Profit has been created as a quick and    need, from certified traps to knives to boards to fleshing
easy reference for those trappers who want to maximize      beams and more. Catalogs are available from Trans
the value of their fur harvest. The tips included are       Canada Trapline Company, 1867 Bond St., North Bay,
based on information obtained from some of our best         ON P1B 8K6, phone (705) 495-3511, fax (705) 495-
pelt handlers, with additional input from our team of       4939, e-mail traps@furharvesters.com, or by clicking
experienced fur graders. The combined effort allows any     on the Trap Store tab on www.furharvesters.com.
trapper to properly prepare fur the way the international
market wants it, leading to increased returns on your       We hope this quick and easy reference manual will
hard-earned catch.                                          assist you in obtaining the maximum value from your
                                                            fur harvest.
A combination of hands-on experience and having the
right tools will make the job of pelt preparation easier, Good luck on the trapline!
faster and more rewarding. Our trap department stocks
just about every fur handling tool that you are likely to The FHA Team

                         General Shipping Information
Over 11,000 trappers market their pelts through Fur         4. If you have more than one bag, only state the number
Harvesters Auction Inc. annually. Our extensive agent       of skins which are in each bag. Write your total number
network throughout Canada and the United States             of parcels ( 1 of 5 etc.) on the information side of tag.
allows trappers to easily and economically ship their
pelts to North Bay, Ontario. Your agent will obtain all     5. Beavers should be placed in bag flat, fur to fur, leather
the necessary permits and documentation required to         to leather. Never roll your beaver pelts.
ship your fur. While your fur is at our agent’s premises
or is on route to North Bay, your fur is insured against    6. Provinces or states have specific laws regarding
fire and theft.                                             furbearers. Please check with your local FHA agent
                                                            or your DNR/MNR officials regarding rules that may
Shipping Instructions                                       affect you.
1. All fur must be stretched and dried. Castoreum
must also be dried and shipped in either paper bag or Special Instructions for US Shippers
cardboard box. Never ship castoreum in plastic bags or 1. Due to US Fish and Wildlife rules, trappers cannot
plastic containers.                                         ship direct and therefore must ship through one of our
                                                            receiving agents.
2. Shipping bags and identification tags are provided
free of charge to FHA shippers. Please contact your 2. CITES Articles (Otter, Bobcat, Lynx): All pelts must
local agent.                                                be correctly tagged with the CITES tag through the pelt
                                                            and properly sealed.
3. Parcel Identification: FHA provides a 2 part shipping
tag. Attach the large portion to the outside of your 3. Please inform your agent of all CITES pelts when
parcel and insert the small portion of tag inside the bag. shipping. Package CITES pelts separately from your
It’s important that both tags are filled out correctly with Non-CITES pelts.
your name, complete mailing address, phone number,
and trapping license number. This information is used 4. There is a $2.00 per pelt handling charge for CITES
to process your fur cheque. On the reverse side state the pelts.
species and quantities that are in the bag.
This manual was written by trappers for     Table of Contents
 the benefit of trappers. We encourage      General Shipping Information                 Inside Cover
trappers to photocopy this manual and       Introduction                                           2
pass it on to fellow trappers. Additional
                                            General Fur Handling Tips                              3
 copies can be obtained by contacting:
                                            Grading Terminology                                    4

                                            Beaver                                                 5
Fur Harvesters Auction Inc.
                                            Beaver Castoreum                                       7
     1867 Bond Street, Box 1455
       North Bay, ON P1B 8K6                Beaver Tails                                           8

          Tel (705) 495-4688                Beaver Table                                           8
          Fax (705) 495-3099                Marten                                                 9
    E-mail: fha@furharvesters.com           Red Fox                                               10
        www.furharvesters.com               Fisher                                                12

                                            Lynx & Bobcat                                         13
 Production & Design: Luc Graveline
                                            Coyote                                                14
         Published June 2014
                                            Grey Fox                                              15

                                            Otter                                                 16

                                            Mink                                                  17

                                            Raccoon                                               18

                                            Muskrat                                               19

                                            Squirrel & Weasel                                     20

                                            Opossum & Skunk                                       21

                                            Wolf & Wolverine                                      22
              Cover Photo
    Walker Black from Sebright, ON          FHA’s Receiving Agents                                24
     skinning a muskrat at FHA’s            How to Prepare Pelts for Taxidermy      Inside Back Cover
     Annual Trappers Convention

                                      Canada’s Premier Supplier of Furbearer
                                      Management and Marketing Equipment
                                                            www.furharvesters.com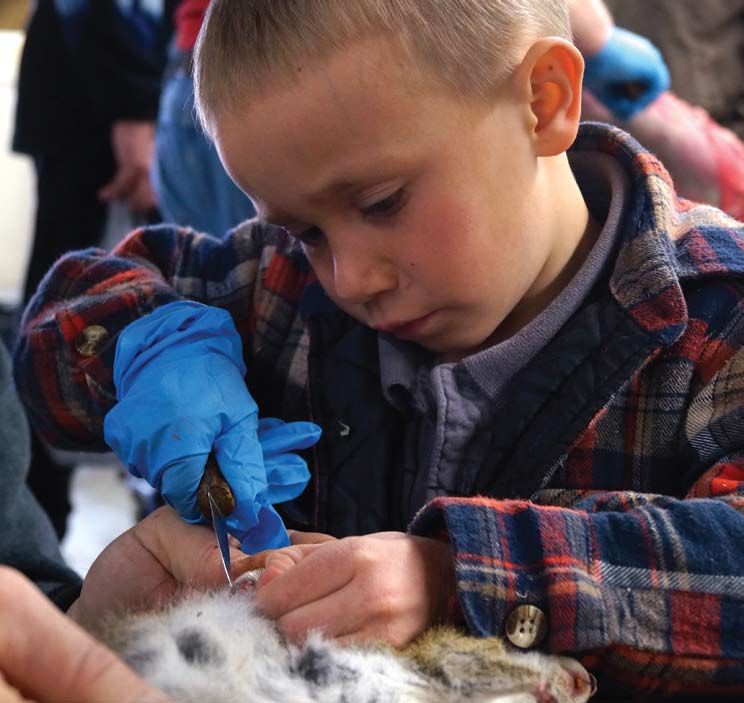
Introduction - Attending Fur Harvester’s Convention is a great way to get tips.
Each year thousands of dollars are lost due to improperly handled fur. This manual has been developed by trappers and fur graders to
assist trappers in achieving the best price possible for their fur by eliminating handling errors. There is a saying here at Fur Harvesters
Auction that states: You can’t turn a $10.00 pelt into a $100.00 pelt, but you can easily turn a $100.00 pelt into a $10.00 pelt. Hopefully
by reading this manual, even the most experienced fur handler can pick up a hint or two to help them realize the maximum price for
their furs.

Equipment and trap placement
                                                                                      Marketing of Pelts
To begin proper fur handling, the trapper must use the proper
equipment for the job. The proper size trap or snare for the
targeted species is a must. A trap of inadequate power or quality            Beaver: Open skinned, oval pattern.
will result in a poorly dispatched animal. This could lead to rubbed
fur, cut pelts and reduced value. Traps should be dyed or dipped and         Mink: Cased and fur in. It is recommended
checked to ensure they are performing properly. Rusty traps are not          that saddle be left on but remove all grease from
nearly as effective as dyed or dipped traps. Also, rust stains on pelts      under the saddle.
depending on their severity may cause them to be downgraded.
                                                                             Otter: Cased and fur in.
Next the trapper must look at where they set their traps. Make sure
that when an animal is caught the fur will not become damaged by             Raccoon: Cased and fur in.
surrounding conditions. Set traps in such a manner that trapped
animals will not come into contact with burrs, pine/spruce gum,
                                                                             Skunk: Cased and fur in.
excessive mud/dirt, become frozen to rocks, sticks, into ice, or be
susceptible to mice who will chew off fur for nest linings. Using
common sense and a little time in choosing trap placement can                Opossum: Cased and fur in.
eliminate some fur damage even before the animal is skinned.
                                                                             Muskrat: Cased and fur in, do not overscrape,
Removing animals from the trap                                               remove all surface grease but leave saddle on.

Special care must be taken when removing animals from traps and              Squirrel & Weasel: Cased and fur in.
snares. If not careful, fur can be torn out which will damage the
pelt. If an animal becomes frozen to the trap, take trap and all home        Marten: Cased and fur out.
to thaw out the animal. If an aquatic animal is partially frozen to
the trap sometimes swishing the animal and trap in the water will            Fisher: Cased and fur out.
loosen it from the trap. Do not try to force a snare off an animal’s
neck. Wait until the animal is flexible enough that the snare can
easily be removed or cut from the animal.
                                                                             Lynx: Cased and fur out.

Field care of animals                                                        Bobcat: Cased and fur out.

After the animal is removed from the trap make sure it is clean.             Fox: Cased and fur out.
If it is full of mud, wash it in water or hose it off. If there is ice
or snow on the animal do not remove it from trap, allow it to                Badger: Cased and fur in.
melt off in a warm place. If the weather is below freezing place
animals in a sack of some sort to keep them from freezing to the             Coyote: Cased and fur out.
bed of your truck, to the rack of a four-wheeler or snowmobile.
If carrying an animal without a pack sack, try to avoid walking it           Timber Wolf: Cased and fur out, claw attached,
through burrs. Remove excess water by shaking the animal by the
                                                                             ear cartilage out, lower lip on.
head or by squeezing it out with your hands. This will speed up the
drying process which would allow the animal to be skinned sooner.
Checking traps regularly during mild weather is another aspect of            Bear: Open skinned, claws and head and pads
good fur handling. Some animals such as muskrats, marten and                 attached, ear cartilage out.
fox will go bad quickly in warm weather. Depending on your local
trap checking laws traps should be checked every other day during            Wolverine: Cased and fur out, claws attached,
mild fall days or where a trapped animal will be subject to direct           lower lip on.
sunlight. Checking often also eliminates the chance of the trapped
animal being eaten by another animal or bird.                                Seals: Open skinned, oval pattern

2                                                                         TIP: Pelt your animals as quickly as possible.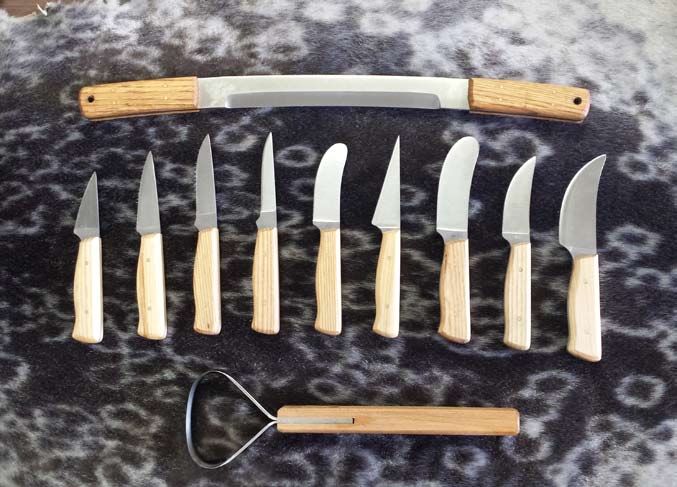
General Fur Handling Tips
PELT SIZES
While it is never wise to over-stretch fur, there are times when pelts will be on the borderline between two sizes when they are placed
on the board. Pelts shrink slightly in length during drying, so it may be to the trapper’s advantage to stretch these borderline pelts just
a little more to bring them up to the next largest size. To facilitate this, having the pelt sizes marked on our boards for each species may
be helpful.

FUR HANDLING AND MARKETING
Proper fur handling and orderly marketing mean more dollars in trappers’ pockets. Specific pelting procedures for each furbearer are
covered in the section pertaining to those furbearers, but there are important points that are common to all furbearers. Proper fur
handling commences with setting the proper traps for each species to ensure clean captures and minimal damage.

TRANSPORTING
Furbearers should be transported in clean burlap or nylon bags (eg. feed sack) to ensure that they remain clean and that blood or dirt
from one animal is not transferred to another. Never place wet furbearers directly onto metal racks of ATV’s or snowmobiles or the box
of a pick-up truck in freezing weather. They will become solidly frozen and difficult to remove without doing major damage to the fur.

CLEANING / STORAGE
In general, furbearers should be dry before pelting. Before pelting, furbearers should be brushed lightly with a proper fur comb to remove
burrs, mats and dirt, which may stain the fur, and cause cuts in the pelting process. If the fur is badly soiled, it should be washed lightly
with clean water and allowed to dry before pelting commences. If you cannot skin the animal shortly after harvesting or if you choose to
rough skin pelts and flesh at a later date, they should be frozen to preserve quality. Place furbearers or pelts in plastic bags and remove as
much air as possible. Tie tightly and place in a freezer. Pelts that are to be frozen should be rolled nose to tail, leather in. Thaw slowly to
prevent hair slip before pelting or fleshing. After fleshing and drying, pelts should be shipped to market as soon as possible. If you must
store pelts for long periods they should be placed in a freezer. For short periods of storage, keep in a dark, cool dry room. Pelts may be
wrapped lightly in newsprint, stored in burlap or nylon bags or hung from hooks or rafters. Ship to market in clean bags or cardboard
boxes, never in plastic bags.

Fur Combs
The proper use of fur combs will increase the value of your fur. Pictured here are a number of different combs and brushes available to
fur harvesters. On the right is a stone fur comb in the coarse model; next is a regular pet brush, followed by a slicker dog brush. Furs
should be combed at least 3 times: once before skinning, once more before you put the pelt on the stretcher and finally before you ship
your fur to auction.

                        Dog Brush                                                                      Sawdust
                                                                                                       To help clean wet fur, a good tip is
    Slicker Brush                                                         Course Stone                 to have dry clean sawdust on hand.
                                                                           Fur Comb                    Sawdust will help clean the fur of any
                                                                                                       dirt and grease. Use the sawdust by
                                                                                                       covering the pelt and then comb the
                                                                                                       pelt out. The sawdust will soak up
                                                                                                       the extra moisture and dirt. If using
                                                                                                       sawdust during the fleshing process,
                                                                                                       make sure the excess is removed prior
                                                                                                       to drying your pelt.

                                                                                                       Fans
                                                                                                       The use of a fan will help dry furs
                                                                                                       that are soaked and will also help dry
                                                                                                       the pelt once placed on a stretcher. It
                                                                                                       is safer to use a fan to help dry a pelt
                                                                                                       on the board than to use excessive
                                                                                                       heat. Using too much heat will cause
                                                                                                       the pelt to burn and become brittle.

TIP: A good fur comb is as important as a good knife.                                                                                       3
FHA Grading Terminology

    GRADES (EXCEPT MUSKRATS)
    SELECT:           Fully prime, above average in quality, texture and pelt preparation, no defects.
    I-II:		           Prime pelt of above average quality and texture.
    GOOD II:          Slightly early pelt with well finished guard hair but lacking underfur.
    II:		             Early or late pelt with incomplete guard hair and lacking underfur.
    III:		            Very early or late pelt with poor finish, little or no underfur, dark coloured leather.
    IV & V:           Inferior pelt of little or no commercial value.

    DEFECTS                                                                                                 ABBREVIATIONS

    GD SLT (Good Slight):		                            Good quality with small imperfections.               GD:       Good

    SLT DGD (Slight Damaged):		                        Good quality with larger imperfections.              SLT:      Slight

    GD DGD (Good Damaged):		                           Good quality with large imperfections.               BDLY:     Badly

    REG DGD (Regular Damaged):                         Average quality with large imperfections.            RBD:      Rubbed

    BDLY DGD (Badly Damaged):                          Extensive damage, little or no value.                GRSY: Greasy

    Tainted:          			                              Area of pelt has rotted, little or no value.         S:        Singed

                                                                                                            LT:       Light

                                                                                                            RR:       Red Rim
    SIZES
                                                                                                            BR:       Brown
    5X        Quintuple Extra Large
                                                                                                            ORD:      Ordinary
    4X        Quadruple Extra Large
                                                                                                            DGD:      Damaged
    3X:       Triple Extra Large
                                                                                                            PT:       Part
    2X:       Double Extra Large
                                                                                                            STND: Stained
    1X:       Extra Large
                                                                                                            HVY:      Heavy
    LG:       Large
                                                                                                            SH:       Straight Hair
    LM:       Large Medium
                                                                                                            ASST:     Assorted
    M:        Medium
    S:        Small                                                                                         DK:       Dark

    XS:       Extra Small                                                                                   T/S:      Ticks and Scars

    Weights                    Beaver                          Raccoon                   Red Fox                   Marten
                       prime, very dense underfur,       long nap length, deep
    Heavy (HVY)                                                                   long nap, deep underfur   deep, thick underfur
                       shearable                         underfur
                       dense underfur, suitable for      medium nap length,       medium nap length,
    Semi                                                                                                    medium density or underfur
                       short shear                       medium underfur          medium underfur
                       lacks underfur, not ideal for
    Light (LT)                                           coat, short nap          short nap, low underfur   low density, underfur
                       shearing

4          TIP: When drying pelts, use a constant source of heat of 55º to 65ºF or 14º to 18ºC.
Beaver -                   Open skinned, leg holes closed, cut off ears, trim nose & whiskers off.

Before skinning a beaver first make sure it is dry and clean. If the      THE DRYING BOARD
beaver needs to be dried it is best to lay it on its back on a grate or
something similar so that air can circulate around the whole beaver.      The drying boards are made from a single sheet of 4'x8'x3/4”
Putting a fan on the animal will speed up the drying process. Brush       plywood. Cut the sheet into three pieces measuring 32"X48". The
the beaver with a fur comb to remove any burrs, mud or mats.              drying board should be marked as shown on our template. This is
                                                                          done on both sides of the board, giving you six stretching surfaces
The next step is to remove the feet. Very close to the fringe of fur      from one sheet of plywood. The pattern templates are available at
above the feet on the front legs is the wrist joint. This joint can be    no cost from Fur Harvesters Auction. Choose the line appropriate
felt with the finger and thumb and one cut across the joint with a        to the size of the pelt, and fasten the head and tail to the drying
sharp knife will sever the foot. To cut off the hind foot, first, bend    board with the fur side down. The nails which are used to attach
the foot forward towards the belly of the beaver, bending it fully        the pelt should extend at least 1" above the pelt so that when the
forward at the heel. With the foot held this way, cut across the cords    nailing of the pelt is complete, it can be raised off the board. This
at the back of the foot and keep cutting all around the foot with it      allows the air to circulate between the fur and the board (2" box
still bent forward. A                                                     nails work well). Place one nail behind the nose and one at the tail,
snap sideways after                                                       and one at the mid-point on each side of the pelt.
this cut is finished
will usually break the                                                    IMPORTANT!! The lines on the board should only be used as a
foot free from the                                                        guide to give you a consistent uniform shape.
leg.
                                                                          Using a tape measure, measure from the nail at the nose to the tail.
The next step is to                                                       Add this to the width measurement. The sum of the two will give
slit the pelt from the                                                    you your GREEN size. Refer to size chart:
chin to the tail on the
belly side in a straight                                                  DRIED PELT SIZE
line. Cut around the
vent on both sides.                                                       3X-2X:		          Over 65"           Over 165.1cm
Cut the pelt around                                                       1X: 		            60" to 65"         152.4cm to 165.1cm
the tail being careful                                                    LG:		             55" to 60"         139.7cm to 152.4cm
not to cut too deep.                                                      LM:		             51" to 55"         129.5cm to 139.7cm
Cutting deep will                                                         MD:		             47" to 51"         119.4cm to 129.5cm
sever veins which will                                                    SM:		             42" to 47"         106.7cm to 119.4cm
cause much bleeding.                                                      XS:		             Under 42"          Under 106.7
Leave the tail on as it
will give you a place                                                     A beaver pelt will almost always shrink approximately 2" from the
to carry the carcass                                                      time you board it until you take it off. If the skin measures 61"
once skinned.                                                             GREEN, it is a 1X, but when it is dry it will most likely be a large
                                                                          size approximately 59" putting it down one size, at the upper limit
Note: Beaver castors, Slit the pelt from the chin to                      of the LG size tariff.
on both males and
females, are found the tail on the belly side in
on each side and just            a straight line.
forward of the vent.
These should be removed carefully with a knife or pulled free with
the thumb and finger so the sacs are not broken, which would let
the oil run out. They should be tied at the cords and hung until
dry. The more care used in removing and drying, the more castors
are worth. They are used in making scents and perfumes.

The pelt is then skinned back one side at a time to the back. When
the legs are reached, do not slit them open but pull them through,                                                       Note:
pulling the hide off the way you would take off a sock. Be careful
                                                                                                                         Nose and
with the skinning knife around the legs because the skin is easily
cut in these tender places. Skin the head carefully. Cut the ears                                                        whiskers are
off close to the skull. Skin around the eyes and nose and the pelt                                                       removed.
is free from the carcass.
                                                                                                                         It is important to
                                                                                                                         use an oval pattern.

TIP: Use 2 inch box nails when boarding beaver.                                                                                             5
Beaver - Oval stretching pattern recommended
This is where the trapper makes or loses money depending on how
MARKETING THE BEAVER
they board the pelt. Always board the pelt 2" to 3" above the size tariff
suited to the size of the pelt. The skin boarded at 61" GREEN, if it
can be boarded 2" larger and still remain LOOSE on the board would 1. SELECT
remain in the 1X category. Two beaver pelts of exactly the same quality 2. I-II HVY XDK Shearable
when boarded differently can easily sell for a $5 - $10 difference. Always 3. I-II HVY DK
remember that a freshly boarded beaver will almost always shrink 2 to 4. I-II HVY BRN
3 inches during the drying process. Both pelts will fall into the large 5. I-II SEMI XDK
category but the grade of the two could be quite different. An example 6. I-II SEMI DK Shearable
of this would be as follows: 7. I-II SEMI BRN
8. I-II LT XDK Non-shearable
SHEARABLE GRADES: 9. I-II LT DK
LG SEL B $40.00 10. I-II LT BRN
LG I-II HVY B $34.00 11. R/R XDK-DK Shearable, Red
LG I-II SEMI B $24.00 12. R/R BRN Stained Rumps
13. BLACK’S
NON-SHEARABLE GRADES: 14. GDSLT DGD XDK Shearable
LG I-II LT B $17.00 15. GD SLT DGD DK Slt Holes, Scars
16. GD SLT DGD BRN
The 56 inch beaver will have a far better chance of falling into one of the 17. SLT DGD XDK Shearable,
shearable grades than one at 59 inches. By boarding your beaver pelts 18. SLT DGD DK Multiple Holes,
properly, you will be getting the best quality grade possible. You will 19. SLT DGD BRN Scars
receive far more shearable grades by boarding your beaver loosely, than 20. REG SLT XDK Non-shearable
the person who stretches it tight. They may gain in size, but the market
21. REG SLT DK Multiple Holes,
is demanding a shearable product.
22. REG SLT BRN Scars
23. II’S Early Caught
Once you have determined your size, continue to nail the top half of the
Blue Leather
pelt to the board. Space the nails about 3/4" apart. When the top half is
completed, continue to place nails at the same intervals along the bottom 24. GD DGD 30% Pelt Damage
half of the pelt, until it has an even shape that follows the pattern on the 25. IV & DGD 50% Pelt Damage
board. This will help prevent over stretching which reduces the density
of the fur and lessens its value. PRIMENESS IN BEAVER
The underfur of the beaver is almost absent in the
The leg holes should not be left open because they give the pelt a rough summer. However, towards fall, these hairs start to
appearance. It is preferred to sew the leg holes, but nailing them closed grow. The last place on the animal where they finish
is also acceptable. After the leg holes have been closed, wash the leather growing is the back of the neck. In the fall, they are
lightly with water and some paper towels or cloth. This will remove quite short. However a full prime skin will have under
blood stains and light grease. The leather will take on a creamy, whitish fur on the back of the neck, approximately 3/4" long.
appearance. Next, lift the pelt up off the nails so the air can circulate This is why when grading, the back of the neck is felt.
under the skin. Many trappers who use boards prefer to do their fleshing The amount of resistance the hand feels in rubbing the
after the pelt has been tacked to the board. This should be done before beaver against the grain of the fur, indicates the density
the leg holes are closed. of the underfur. When it is very flat, it is called a II or
III. As it comes into prime, the hair thickens and it can
There are very few select pelts. A grade pattern is established primarily be classified as I-II HVY, SEMI or LT depending on
because all the pelts are intersorted. If you have a pelt worth $50.00 you how thick the fur grows. Once the full length of the
would not expect it to be put with pelts worth $40.00 as the maximum you hair has been reached, the fur and pelt start to become
would realize would be $40.00. This is what necessitates fine grading. over prime. The beaver, because of its long stay in the
house and sour feed source, has been using its body fat
DRYING
to produce fur and keep warm. Another defect which
occurs in the spring is red rims (or rumps). This colour
It is best to dry beaver pelts slowly. Temperatures of 55o - 65o degrees are
defect is caused by urine which burns and stains the
desirable. Never put drying pelts near stoves or expose them to sunlight.
belly fur of the beaver. It starts at the tail and progresses
As the pelt dries, wipe the leather from time to time with a clean cloth.
This removes any grease which may run from the leather. A fan directed up the flanks. The red stain goes into the underfur
towards drying pelts will help speed up the drying time without damaging causing the beaver to become less valuable for plucking
them. and shearing. This is the reason fall beaver are much
more desirable than spring pelts.
6 TIP: Beaver patterns are available at FHA.Beaver Castoreum - Ensure castor is completely dry before shipping.
A trapper can realize a greater profit from their beaver harvest by
properly removing the castoreum or scent gland.
Removing the castors
Remove the castors right after skinning the beaver. The castors are
located right above the vent hole and can easily be removed with
the help of a knife and your fingers. Make a cut about 2 inches
above the vent hole; you will see the castor glands, one on each
side. Be careful not to cut or tear the castors. Try to remove the
glands clean of any extra membranes or fat. Do not ship oil glands
as there is no market for them.
DRYING THE CASTOR GLANDS
Castor glands naturally have a high moisture content. The end
user wants the flesh inside each pod, not the water content. Once
you have removed the castor hang them to dry at 60- 70oF. The
humidity level in your skinning/drying room affects the amount of Make a cut about 2 inches
drying time needed to properly dry each pod. Humidity levels are above the vent hole.
high in the spring months, therefore they will take longer to dry.
The pod should be dry to touch, 7 days minimum with ideal low
humidity conditions.
After 2 days open them up to allow the center to dry between the
castors. After the pod is dried it should be stored in your freezer. As
you get closer to your shipping date the pods will need to be taken
out of the freezer and thawed. The pods will need to be dried again
by either placing them on cardboard and or re-hanging them.
Because castor glands will continue to shrink once your shipment
arrives at our warehouse the company will deduct shrinkage. The
amount deducted for shrinkage will be greater if the shipment is
received in a wet condition caused by the glands not being properly
dried.
Shipping castors
Do not ship oil glands
Shipping castors is easy. Just place in an onion bag or paper bag
and include it with your fur shipment. Larger shipments should be
shipped in a cardboard box. Place in the bottom of your fur bag. It
is a good idea to use a paper bag even if you have them in an onion
bag. NEVER SHIP CASTOR IN PLASTIC! Castor needs to
breathe, Castor shipped in plastic will cause rot. Rotten castor are
not saleable and will be declared no-value and will be disposed of.
Castoreum is sold by the ounce based on a
price per pound
Grades
No. 1 Castoreum pod is big and full, generally brownish in colour.
No. 2 Castoreum pod is darker in colour and not as full.
No. 3 Castoreum pod is virtually empty and very dry.
The greatest value for castors is realized when they are handled
properly. By properly handling castors, you can increase the profit
from your beaver harvest.
TIP: Ship castors in paper bag - not plastic bag. 7FHA Beaver Pattern Beaver Table Assembly
The use of the FHA oval beaver The following beaver table is a simple, inexpensive design, which
pattern ensures consistently allows you to utilize both sides of a board. The beaver board is
used as the top of the table and can be easily reversed and the next
uniform pelts in each size. Beaver
beaver can be nailed to the opposite side.
pattern templates are available Fig. 1
to our shippers by request at Materials for building table only:
no charge by contacting Fur -1 sheet of 4’x8’x1/2” plywood
-4 pieces of 2”x4”x8’
Harvesters Auction at 705-
-30 1 1/4” Wood Screws
495-4688, or by e-mailing your -20 3” Wood Screws
request to fha@furharvesters.
com. Each of the seven patterns
can be transferred from the paper
template to heavy cardboard
(Fig.1) and kept for future use.
Leave 3/4” lip
All seven templates can be made 12”
by simply using one beaver Fig. 2
pattern. To use the patterns,
mark the mid-point of your
beaver board on each side and 49 1/16”
draw a cross on the board. Then 32 1/4” 12”
trace around the edge of the
template representing ¼ of the
Cut legs to
oval pattern (Fig. 2). Continue
desired height
to do this until the entire oval
has been traced onto your board 31 1/2”
Fig. 3
(Fig. 3). Continue with each
of the seven patterns until the
board is complete (Fig. 4).
*Tip – The use of different
coloured markers, e.g. red, blue, 32” 32 1/4”
green, to mark the patterns on 29 1/4”
your board will greatly assist
in choosing the correct line on
which to nail your pelt. Fig. 4
Box Nails 48” 49 1/16” 48”
Box nails are almost identical to a
common nail; however, they have the
diameter of a finishing nail, they are 12”
2 in.
easier to nail into the board and are
easier to remove. The advantage of a
box nail compared to a finishing nail
is that a box nail has a bigger head For best results, use a 4’x8’x3/4” sheet of plywood.
like a common nail. This will produce 3 boards at 32”x48”. Trace pattern
on both sides of your board.
Actual Size
8 TIP: E-mail us any time at fha@furharvesters.comMarten - Cased fur out, front legs in, lower lip off.
Proper pelt handling for marten begins with using top-notch Clean off any excess fat around the belly and front legs. Pin out
equipment on the trapline. The use of conibears for harvesting the front legs using cardboard. This is to allow the legs to dry
marten is much more effective if the traps are dyed and waxed and before turning the pelt. Make sure the legs are dry before turning
have strong springs. Weak springs cause rub marks and rusty traps and leave them inside. This helps prevent damage during the
cause stains on the pelt, which downgrade the pelt. drumming process. The last thing to do when working with the
pelt is to cut off the lower lip. This helps the auction house attach
Marten should be pelted as quickly as possible to avoid tainting the identification tag on the pelt.
on the belly and back area. This is especially important when
harvesting in the fall when the temperature is above 50 F or 10 C. Allow roughly 4 hours to dry or until the pelt is dry to the touch.
If tainting occurs, the value of the pelt goes from top to bottom. Remove all pins and reverse the pelt starting at the nose. Push
When graders see a taint mark, they must downgrade the pelt. the pelt until you can reach the nose coming through, and then
carefully pull the pelt until the fur is completely out. Replace the
PELTING board, being careful to slide the board in without tearing the pelt.
Re-pin the tail and legs using only a few pins. Leave on the board
When pelting a marten, it is very important to brush the pelt from for two days to ensure pelt is completely dry. Carefully brush the
head to toe before skinning. Make sure the marten is completely pelt after turning and again after removing it from the board. Store
dry and clean of any dirt. in a cool dry place before shipping.
The first cut begins at the front paw. Cut from the paw to the
elbow on both front legs. Next, cut from the hind foot to the Marten Board Size
opposite foot. Make sure this cut is on the belly side of the vent
hole. This will add almost one inch to the pelt length. Next, pull
Board Length = 36 inches
the pelt from the carcass until the legs are clear. You must remove
the tailbone. The best way is with a tail puller. Next, pull the pelt
towards the front legs. When the pelt is pulled forward, the front
2” = 1 7/8”
legs can easily be pulled free because of your initial cut. The pelt
will easily pull off the carcass until you reach the ear cartilage. Cut
6” = 2 1/2”
close to the skull then trim around the eyes and nose.
BOARDING
12” = 3”
When boarding marten, it is very important to use the proper board
size. A male mink board would be preferred for all marten, keeping
the overall appearance of a large auction collection consistent.
Northern regions (Northwest Territories, Yukon, Labrador, and
Northern Ontario, Quebec and Manitoba) should use only the
larger board. Marten that are improperly boarded, too narrow or
24” = 3 3/4”
too wide will be sized accordingly.
To begin boarding the pelt, mark your board with the proper pelt
lengths: 16”, 18”, 21”, and 23”. This will help you decide how to
board the pelt for proper size. Remember the pelt must pass the
sizing line when dried and turned to be in that size.
36” = 4 1/2”
Pull the pelt down the board to the marks, tail side up. Pelts are
measured from the tip of the nose to the base of the tail. Begin to
Marten Pelt Size
pin the base of the tail first. Remember to pin past the sizing line
when the pelt is fur in on the board. If you pin on the line, the pelt 2X Over 23” Over 58.5cm
will shrink as it dries and you will lose size. Pin at least 6 places 1X 21” - 23” 53-58.5cm
with pins. Do not over stretch the tail. Turn the pelt over and pin LG 18” - 21” 46-53cm
out the hind legs - opposing the tail. Again, do not overstretch the
legs. If you overstretch the legs, you thin out the fur on the back MD 16” - 18” 41-46cm
of the pelt. Check for any holes or damages that need to be sewn SM Under 16” Under 41cm
up. When sewing holes, remember to sew as you would a beaver
leg hole, this gives a much cleaner looking repair.
TIP: Brush pelt before skinning. 9Red Fox - Cased fur out, front legs in, claws off, lower lip off, ear cartilage out.
While most fur harvesters do a good job of putting up their How to remove cartilage from the ears of the
red fox, a surprising number of them use boards that are the
wrong size. fox, coyote, lynx and bobcat.
In today’s marketplace, a wise fur producer uses every
advantage available to maximize his bottom line. The
techniques we are presenting in this article will help you
to improve your finished product by increasing fur density,
ensuring the largest size is attained and by giving a more
uniform finish.
In the wild fur business, fur comes into the auction house in Skin fox down to
every size and shape under the sun. This causes problems ears as usual.
for both graders and buyers. Because there is so much
variation in the size, the fur harvester loses out.
The first step in handling your fox is to have the proper
equipment. You need to have a proper skinning knife, draw
knife, fleshing beam, skinning gambrel, push pins, drying
board, sawdust, paper towels, a good fur comb and a tail
stripper. Insert screwdriver
Important Note: Fox are known rabies carriers, therefore between ear and
always use surgical gloves. Wash hands and equipment in skull.
warm soap and disinfectant after working on a fox. Never
skin any animal that you think was sick.
PELTING
The first step in pelting your fur is to brush from the head
to tip of the tail. Remove any dirt or mats as completely
as possible. Do not attempt to cut out mats. Next, lay the
fox on the table and grasp the front paw. Cut from the
Pull straight down
paw to the elbow joint in a straight line. The next step is until the cartilage
to cut from the hind leg to the belly side of the vent hole. and fur pull apart.
Cut from the paw to the vent hole using the natural fur
line (white and red colour of the fur). Cut completely
around the vent. By using your fingers, work around each
leg separating the hide. Place the fox in a skinning gambrel.
By using an adjustable set up, one can raise and lower the
fox to whatever level is required. A good set up helps save
The cartilage
on back pain and increases production. remains on the
carcass and the back
Using a tail stripper, free the tail from the tail bone. Begin
working the pelt forward toward the front legs. Ensure that of the ear remains
when skinning a male fox that the penis bone is cut out. on the pelt.
When you have worked the pelt all the way down to the
front legs, again use your fingers to pull the pelt free of the
front legs. Using your knife, ring around the front paws
when you have freed them from the pelt.
Repeat this process
Pull pelt down toward head. Ensure that your knife is sharp.
Gently pull the pelt forward toward the eyes, again cutting for the other ear and
close to the head. Finally, cut the nose and bottom lip off skin the rest of the
the pelt. If pelt is bloody or dirty, wash it in cold water and
mild soap. Remove excess water before boarding.
pelt down to the
nose.
10 TIP: Remove ear cartilage from the fox, coyote, lynx and bobcat.Red Fox Continued - It is always a good idea to wear skinning gloves.
BOARDING
to 65oF. Carefully brush the fox from head to tip of tail when you
To start with, we recommend the use of only one size board. first turn the pelt and once again when you remove it from the
The board must be 60" long and 51/4" wide, gently tapered from board. When shipping your fox pelts, please ensure all claws are
shoulders to nose. The use of a properly sized board is of great removed. Ship in a flat position. Do not ship between furs that are
importance for a uniform overall finish. The proper size board for fur in, as the grease will damage the fur of your fox pelts.
fox will enhance the density of the fur and increase the length of
the pelts.
A big concern at the auction house is the different widths of the Red Fox Board Size
pelts coming to market. Some fur harvesters use boards as wide as
racing paddles. These pelts have been improperly stretched. The Board Length = 60 inches
buyers do not want pelts in a lot that do not look similar.
2” = 2 5/8”
4” = 3 1/2”
6” = 4 1/4”
12” = 5 1/8”
Ears Pinned Forward Lower Lip Removed
The problem with a split board is that when you open it up at the
bottom, you are thinning out the fur on the flanks. Also, length is
lost because you are forcing the fur wider and back up towards the
head. The problem with wire stretchers is that some fur harvesters
turn the fox before it is dry. When the fox is turned around, the
wet skin comes in contact with the metal causing hair slip. Also,
the fur harvester cannot pin the fox properly.
The first step in boarding your fox is to place the pelt on the
stretcher, fur in. Centre the eyes and ears on the board in line with
the tail. Gently tap the bottom of the board on the floor to push
the nose and head as far down on the board as possible. If the fox
is excessively fat, you will have to flesh it on a beam before placing
it on a stretcher. Be very careful when beaming a fox as the pelt is
not as tough as that of a raccoon or beaver. Be sure to use plenty
of sawdust to absorb the grease and fat. Next, split the tail from the
base to the tip using a tail splitting guide and a sharp knife. Pin the
tail down using 5/8" push pins.
Next, pin the front and rear legs opposite the tail. Pin the legs
wide and short. In order to pin out front legs, you will have to
make small stretchers or you can use squirrel stretchers. 60” = 5 1/4”
Finally, cut the lower lip from the pelt. Make sure that the pelt
is centered on the board and the legs are opposite the tail. Use a Red Fox Pelt Size
small belly wedge to help in turning the pelt. Give the edges of the
fox a quick brush to separate the fur from the leather. Allow pelt
2X Over 34” Over 86 cm
to dry for 8 to 12 hours at a temperature between 50o to 60oF. Do 1X 32” - 34” 81-86cm
not over dry or use excessive heat. After the pelt is dried, turn it LG 28” - 32” 71-81cm
fur out. Be careful to centre the pelt on the board. Leave front legs
inside with the skin. Pin tail and hind legs on the board. Allow to
MD-SM Under 28” Under 71cm
dry for another two (2) to three (3) days at a temperature of 55o
TIP: Leave front legs inside. Ensure they are dry before turning. 11Fisher - Cased fur out, front legs in, lower lip off, saddle removed.
Fisher Board Size The fur must be dried and combed before
Board Length = 48 inches skinning takes place. This removes water,
dirt, burrs and matted fur. Never attempt
to remove spruce gum or pitch from a fisher
pelt if it fails to come off during combing.
2” = 2 3/4”
Fisher are case skinned. Cut across from the
6” = 4 1/4” hind foot pad to the other. Pull the bone out
of the tail using a tail puller and slit the tail
open on the underside. The feet and claws
are not to be left on the pelt. Cut the ears
12” = 4 3/8” free at the skull. Cut the fur free around the
eyes, lips and nose. Scrape all flesh and fat
from the pelt before boarding the skin. Fisher
generally have more fat and a fleshing beam
is the preferred method by many trappers in
handling large males.
Place the pelt, fur in, on a standard board and
fasten neatly using 5/8" push pins. Pins or
a piece of fine screen can be used to fasten
the tail in an open fashion to allow drying.
Fisher pelts are marketed fur out, thus the
pelts must be turned from leather out to
fur out, similar to red fox. Once the leather
has partially dried. Turn the pelt using the
same procedure as the fox until the pelt is
reversed. To turn the fur out, grasp the nose
and carefully pull until the pelt is reversed. If
it has dried too much, simply soften leather
by means of a damp towel.
Fisher Pelt Size
1X-LG Over 28” Over 71cm
LM 25” - 28” 63.5-71cm
48” = 5” SM Under 25” Under 63.5cm
Fleshing Beams and Skinning Tools
In order to achieve good fur handling results, there is absolutely no substitute for the right tools. Trans Canada Trapline Co. has a complete
line of fur handling equipment, everything from fleshing knives to fleshing beams. Visit www.furharvesters.com to view our catalogue.
12 TIP: Fisher are sold cased and fur out.Lynx & Bobcat - Cased fur out, front legs in, lower lip off, ear cartilage out.
Lynx and bobcat are valuable furbearers Lynx & Bobcat Board Size
which can realize a very good value for the
fur harvester when properly handled. Board Length = 72 inches Lynx & Bobcat
Lenght of Board = 72 in.
Great care should be taken right in the
field to ensure the skins are going to
receive their full potential price. Use 2” = 3”
the best harvesting tools possible and
check your traps often. Damage caused 6” = 4 5/8”
by improperly set snares or allowing the
cat to freeze to the ground can lower the
price. Care should be used by placing 12” = 5 1/4”
your catch in a clean burlap bag right
in the field and by pelting the animal as
quickly as possible. Before skinning the
cat, ensure that it is clean and dry, comb
the cat completely to remove any dirt or
24” = 6 3/8”
blood. The use of clean dry sawdust will
help in cleaning the fur of any mud or
dirt.
Cats are cased skinned. Start at one hind
leg and cut across to the other leg on the
belly side of the anus. Pull the pelt away
from the flesh with your fingers, until
you have exposed the flesh around the
tail bone and belly. Use your tail stripper
to remove the short tail bone. Split the
tail. Peel the pelt down to the front legs
and skin them out. Next, skin down
to the ears and eyes, finishing off with
trimming the nose cartilage close to the
hide. Remove the lower lip. Board pelt
after removing any excess fat or grease.
Remember to sew any bullet holes or
tears at this stage. Using mink boards,
pin the front legs to dry. Allow about
24 hours for the pelt to dry then turn the
pelt fur out and place back on the board
until dry. You can pin the ears flat to the
head. Once the pelt is dry, give the skin a 72” = 8”
good combing with a slicker style brush.
We recommend one size board for both
lynx and bobcat.
Lynx Pelt Size Bobcat Pelt Size
1X Over 39” Over 99cm 3X Over 44” Over 112cm
LG 35” - 39” 89-99cm 2X 40” - 44” 102-112cm
LM 34” - 35” 86-89cm 1X 36” - 40” 91-102cm
MD 31” - 34” 78-86cm LG 32” - 36” 81-91cm
SM Under 31” Under 78cm MD 28” - 32” 71-81cm
SM Under 28” Under 71cm
TIP: Wear skinning gloves to protect yourself. 13Coyote - Cased fur out, front legs in, lower lip off, ear cartilage out.
Coyote The handling of coyotes is basically the same as red fox except that the
animal is much larger and requires more effort in the skinning process.
Board Length = 72 inches The most important factor in the handling of coyote is to skin them as
quickly as possible. The belly on a coyote will quickly taint causing hair
2” = 3” slip and a nasty odour.
6’’ = 5” When skinning a coyote, the use of an adjustable skinning gambrel to
hang the carcass will greatly aid in the pelting process. Remember to clean
any dirt or blood from the pelt using sawdust or wash it with cold water
12” = 6 3/4”
and a mild soap.
Coyote are very susceptible to mange. The use of surgical gloves is highly
recommended. After skinning, always wash hands with a disinfectant, the
24” = 8 3/8” same as when handling fox.
Coyote pelts are used for trim and garments. The pelts are skinned without
the feet and claws. Remove the tail bone and split the tail to ensure it
dries. Remove the ear cartilage, as done for fox. Before boarding, ensure
the fur is dry, combed free of any burrs or mats and that you have removed
any extra fat or grease. If the pelt has any bullet holes or cuts, sew before
boarding.
Coyotes are dried fur in for about 24 hours then turned fur out and placed
back on the board until completely dry. Remember to give the coyote a
final combing with a slicker brush before shipping. Slicker brushes are
available at most pet supply stores. We recommend one-size wooden
stretchers for coyotes.
Coyote Pelt Size
3X Over 46” Over 117cm
2X 42” - 46” 107 - 117cm
1X-LG 36” - 42” 91 - 107cm
MD-SM Undwer 36” Under 91cm
72” = 11 1/4”
Badger - Cased fur out, lower lip off.
2” = 3” Board Size
6” = 5” Board Length = 60 inches
12” = 6 1/2” Badger are used mostly for trim in the fur trade. We recommend a badger be cased
skinned and sold fur out. You can use a raccoon board to stretch the pelt.
Please Note: Badger need to be properly fleshed as they have a heavy saddle.
24” = 7”
Badger Pelt Size
32” = 7 1/2”
3X Over 32” Over 81cm
2X 29” - 32” 74 - 81cm
36” = 8”
1X 27” - 29” 69 - 74cm
LG 24” - 27” 61 - 69cm
MD-SM Under 24” Under 61cm
48” = 8”
14 TIP: If the pelt is dirty, you can wash it in mild soapy water.Grey Fox - Cased fur out, front legs in, lower lip off, ear cartilage out.
Grey Fox Board Size
Board Length = 48 inches
2” = 2 5/8”
4” = 3 1/2”
6” = 4 1/4”
12” = 5 1/8”
Grey fox are skinned the same way as a red
fox, but must be fleshed. Grey fox have a
heavy saddle that must be removed before
being placed on the board.
Grey Fox Pelt Size
XL-LG Over 28” Over 71cm
MD-SM Under 28” Under 71cm
60” = 5 1/4”
Mark the pelt lengths on your boards
You will have noticed that the recommended sizes for stretcher boards and the pelt sizes are
marked on each page beside the image of the pelt. In order to achieve the best results we
recommend that you mark the pelt sizes on each board.
S
M
LM
L
This will allow you to properly stretch each pelt at the best possible size. Do not over stretch XL
the pelt, rather stretch to achieve the proper length. Remember that pelts shrink slightly in
length when they dry. Pinning something directly on the line will result in losing a size. Ensure
you pin over the line, enough so that it retains its size. You can not make a medium pelt into a
large pelt, or make a large pelt into an extra-large pelt, without over stretching. This tip is about
pinning borderline skins.
TIP: Mark the pelt lengths on stretching boards. 15Otter - Cased fur in, inspection window.
Most fur harvesters find otter one of the most difficult furbearers to handle. The first step in handling an otter is to have the proper
equipment. The basic tools required are a sharp skinning knife, a draw knife, fleshing beam, skinning gambrel, 5/8" push pins, water
bottle with a spray nozzle, a fur comb and a sharp pair of scissors along with clean saw dust and paper towels. The most common grades
that a fur harvester sees on his fur cheque are singed and straight hair. We all want to have straight haired otter but most of us end up
with singed otter. Singe is a form of hair damage. It occurs naturally in otter that are harvested late in the season. Singe also occurs in
the handling of otter after you harvest the fur bearer. The first step in avoiding singe begins out on your trap line. Make sure to keep
the otter wet, clean and out of the heat. Place the otter in a clean canvas or burlap bag. Do not allow it to freeze to the boat or vehicle
you are using. The next problem one can encounter is placing the otter too close to heat. Be careful not to place the otter too close to
the heater in your vehicle or to thaw in front of the wood stove. Both of these can cause singe on the fur.
PELTING
Begin by wetting down the otter with water using the spray bottle. Wet the otter from head to tail with a light spray. Avoid skinning the
otter when it is completely dry. After wetting the fur, brush from head to tail removing any dirt or mats. Place the otter on the skinning
gambrel. Using a sharp knife, cut from the hind foot to the tail side of the vent hole, and repeat for the other leg. Next, cut from the
bottom of the vent hole to the tip of the tail. Using your knife, carefully cut around the tail. Once you have the base of the tail free, you
will be able to pull the fur free of the tail. You must be very careful not to get grease on the pelt. Continue to skin the pelt down towards
the front legs. When pulling the pelt from the carcass, allow the saddle and fat to stay on the pelt. Pull front legs through. Pull pelt
forward until you reach the ear cartilage. Carefully cut ears close to head. Continue to skin until free of the carcass. Once the rough
skinning is complete, place the otter on the fleshing beam. Ensure that the fleshing beam is lightly sprayed with water. Slide the pelt
completely down on the beam and lightly cover with sawdust. Using a sharp knife, cut the saddle around the head. Next, using the draw
knife, begin fleshing the saddle towards the tail. As the saddle peels off, cut the larger pieces off with your skinning knife. You will find
that the fatter the otter, the easier it is to flesh. As you near the tail, be careful when trimming off any saddle or fat, using paper towels
to clean up any grease. When fleshing, be careful around the belly area. You will find the tail section difficult to flesh using your draw
knife, therefore, use your skinning knife carefully to finish off the
tail. Once the fleshing is completed, clean off any excess grease Otter Board Size
using paper towels.
Board Length = 66 inches
BOARDING
The next step in the handling process is the boarding. Again, we 2” = 3 1/4”
strongly recommend the use of a solid board. Make sure you use a 6” = 4 1/2”
belly wedge. Place the otter, fur in, on the board. Centre the pelt
on the board making sure the tail is opposite the front legs. Push
the head completely to the top of the board. Gently tap the board 12” = 5 1/2”
until the pelt is snug. Begin pinning the tail onto board. Push
as much fur into the inspection area as possible. Now pin the
back legs onto the tail side of the board. The next step is to trim
the belly area with your skinning knife. By pinning your otter in
this method, the inspection area will already be formed and by 24” = 6 3/8”
trimming the belly area you will have a perfect window. Next,
sew the front legs closed. The next step is to cut off the lower lip.
This is important when you are shipping to the auction house.
This is where the ticket identifying your pelt is stapled. Finally,
insert the belly wedge and allow to dry for three or four days at
a temperature of approximately 55oF. Every second day, wipe
off excess grease and oil from the pelt. After the pelt has dried,
remove from the board. Be careful not to run your hand over
the inspection area. This can cause otter to singe. Tuck the tail
inside the pelt to protect the
inspection area from singing. Otter Pelt Size
If you are not shipping the 1X Over 38”
pelt to market, store in a
cool dry place or even better,
in your freezer until you are
LG 34” - 38”
going to ship. This way, you LM 32” - 34”
know what size pelt you are MD-SM 30” - 32”
working with. 66” = 9”
XS Under
16 TIP: For otter, it is important to use a belly wedgeMink - Cased fur in, saddle left on, inspection window.
The very first step, as with any pelt handling, is to have a clean, dry the pelt size. Begin pinning the tail in a slight pleating method.
mink, free of mud, burrs and dirt. If your mink is completely dry, What you want to do is push as much fur into the inspection
one must pay attention to singe. Lightly dampen the pelt before area as possible. You can use push pins, wire mesh, cardboard or
removing it from the carcass. The best method is a spray bottle. whatever works best for you. Cut a piece of fur out of the belly side
Adjust the spray to a fine mist. Do not soak the pelt, but rather to enhance the inspection area. Next, tuck the front legs inside the
dampen the fur until it is moist when touched. pelt. Insert a belly board so that when the pelt dries it can be easily
removed from the stretcher. Finally, hang the pelt up with nose
SKINNING THE MINK down allowing the oil to run down toward the head. Allow two or
three days at 55o-60oF for drying. Remove from board and store in
Begin by removing the front legs. This makes the job easier when a cool dry place until shipping.
trying to pull the pelt free later on. Next, cut from one back leg to
the other. The cut is on the belly side of the vent hole. Place the
one leg in some form of holding device and pull on the other leg.
You will notice a natural line follows across from paw to paw. By
using this method, the fur harvester gains two things: increased
length and the inspection area is enhanced. Both help improve the
price paid. Remove the tail bone using a tail stripper. Proceed to
pull the pelt down towards the front legs. If the mink is a male,
you must remove the penis bone. After pulling the pelt down to
the front legs, work your fingers between the leg and body. Pull the
leg through. When the front paws are already removed, this step is Incorrect vs Correct Incorrect vs Correct
much easier. Finally, pull the pelt clear of the carcass using a knife Leg Handling Inspection Window
to cut the ears, eyes, and nose free.
FLESHING Mink Board Sizes
Before pinning the pelt with 5/8" push pins, it must be fleshed of
Board Length = 36 inches
fat and grease. Place the pelt on the board or fleshing beam with
each hind leg on opposite sides of the board. Remove fat from the Male Female
front leg area with a dull knife scraping the fat forward toward
the leg hole. Do not remove the red saddle. The saddle on mink 2” = 1 7/8” 2” = 1 1/2”
protects the skin from over scraping which can cause hair root
damage. A mink with the saddle removed usually brings $2 to 6” = 2 1/2” 6” = 2 3/8”
$3 less than a mink with the saddle on. If the saddle has excess fat
under it, gently scrape the saddle pushing the grease and oil out.
12” = 3” 12” = 2 5/8”
Next, turn the pelt so the legs are opposite the tail. Make sure the
pelt is straight on the board. Tip: Place the length measurement for
the mink on your boards. This way, you know what size pelt you’re
working with.
BOARDING 24” = 3 3/4” 24” = 3 1/4”
When boarding a mink we recommend a solid wood stretcher. Use
a male board for males and a female board for females. Putting
males on female boards to gain size will result in the skin being
downgraded in size. Mark the sizes on your boards so that you
36” = 4 1/2” 36” = 3 1/2”
don’t over- stretch the hide.
Scrape the fat and grease from the Male Female
belly area. Remember to wipe the fur Mink Pelt Size Mink Pelt Size
clean of any excess oil with a paper
2X Over 23” Over 58.5cm 1X Over 19” Over 48cm
towel. Mink fur can be singed so be
careful. Follow that by pinning the
1X 21” - 23” 53-58.5 cm LG 17” - 19” 43-48cm
hind legs on the back of the board with LG 19” - 21” 48-53cm MD-SMUnder 17” Under 43cm
the tail. Check the board measurement LM 17” - 19” 43-48cm
with the pelt, match the best line with MD-SMUnder 17” Under 43cm
TIP: Tuck front legs inside the pelt. 17Raccoon - Cased fur in, inspection window.
Because of the fat, it is often easier to rough skin a raccoon and CUTTING THE WINDOW
flesh it afterwards. Start skinning by slitting down from the heel On a male, cut the window up to just below the penis hole. On a
of each hind paw. The cut should pass 5 cm (2 inches) below the female, cut the window to the lower two teats. Keep your window
vent. This is the most important cut, sometimes called the money narrow - the flanks are very important when the manufacturers
cut. Using a tail stripper strip the tail by pulling downward. On make the garments. If the window is made too wide, it can hurt
big raccoons, it may be necessary to split the tail part way down. the value of the pelt. The window should be made right after the
Skin down to the front legs and cut the fur free at the wrist. pelt is put on the stretcher, never when the pelt is dry.
Skin carefully around the neck and cut the ears close to the skull.
Continue down, cutting around the eyes, lips and nose, until the
pelt becomes free. Leave the lower lip on the carcass. Pelts can be
frozen and fleshed at a later date. If this is done the pelt should be
turned fur out and rolled starting at the tail. This way when the
pelt is thawing it can be hung by the nose and allowed to unroll
as it thaws.
FLESHING AND DRYING
Pelts should be cool before attempting to flesh. Pull the pelt onto
the fleshing beam and scrape until all the fat and flesh is removed.
It is especially important to scrape all the gristle from the ears and
the back of the neck. Do not over scrape. Try to keep the grease
off the fur during fleshing. Sawdust can be used to soak up excess
grease. Ensure that all the sawdust is removed before the pelt dries.
The toughest part of fleshing a raccoon is the neck. Sometimes,
scoring the gristle with a knife, just below the ears, will help you TAKING THE RACCOON OFF STRETCHER
get started. Wipe the raccoon first with a rag or paper towel to remove excess
wet grease. Remove the pelt from the stretcher and comb out the
The tail must be split and fleshed!!! Pin the tail out so that it can inspection area.
dry properly. In the case of wire stretchers use large paper clips to
hold the tail open so it will dry. Sew or push pin the holes that may
appear in the pelt. Care should be taken not to over scrape pelts, Raccoon Board Size
especially early blue pelts where the hair roots can be damaged.
Board Length = 48 inches
Wipe the fleshed pelt with a dry cloth. Make sure the fur is
completely dry before placing it on a standard drying board. Insert 2” = 3”
a belly board to aid in removal of the pelt from the stetcher when
it dries. 6” = 5”
STRETCHING RACCOON
Clean wire frames and solid boards are suitable for drying raccoon. 12” = 6 1/2”
Northern heavy type raccoon, New York, Wisconsin, Michigan,
Minnesota, and Iowa look good on wood boards, while semi heavy
and coat type look better on wire stretchers. Smaller sizes and
northern raccoon also will look better on wire. Make sure the pelt
is centered properly on the stretcher. All raccoon should be put up
leather out. Raccoon are marketed leather out. Refer to the board 24” = 7”
size chart in the appendix for proper wooden stretcher size. Mark
raccoon sizes on your boards to prevent over-stretching.
Raccoon Pelt Size 32” = 7 1/2”
4X Over 35” Over 89cm
3X 32” - 35” 81-89cm 36” = 8”
2X 29” - 32” 74-81cm
1X 27” - 29” 69-74cm
LG 24” - 27” 61-69cm
LM 22” - 24” 56-61cm
MD-SM Under 22” Under 56cm 48” = 8”
18 TIP: Always ensure fur is dry before boarding pelt.You can also read


