Live Session Presenter Guide
←
→
Page content transcription
If your browser does not render page correctly, please read the page content below

Live Session Presenter Guide
                                  Table of Contents

Live Session Presentation Overview
Important Dates
Presentation Slide Requirements
Log in to the PAS Presentation Management Portal
(CadmiumCD Education Harvester)
Task Page
Recording your MP4 Video
  Download the Zoom Desktop App
  Update Zoom
  Record a Quality Check, then Record Your Presentation
Pre-Presentation Technical Check & Internet Requirements
What to Expect on Your Scheduled Session Day
Technical Tips & Troubleshooting
Additional Resources
Closed Captioning (Recommended)
  PowerPoint
  Google Slides

                       DISCOVER • ENGAGE • BELONG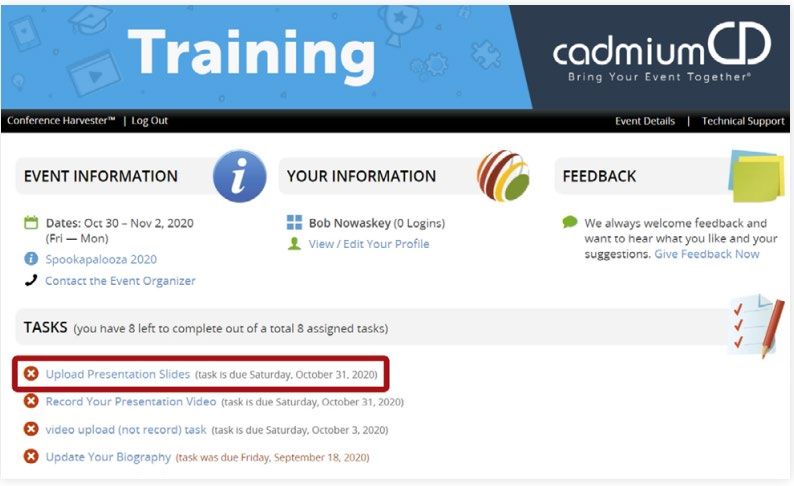
Live Session Presentation Overview
As a Live Session presenter, your presentation will be pre-recorded and played during the scheduled live
session as determined by PAS. A live moderator will introduce your presentation, and then the AV team will
press play on the pre-recorded video you submitted to the PAS Presentation Management Portal (Education
Harvester in CadmiumCD). After your pre-recorded video ends, you'll be asked to share your audio and
camera to respond to live Q&A prompted by the moderator. After Q&A, please turn off your camera and
mute your microphone. After the session ends, you may disconnect from the live session.

If you're presenting with a group, following the pre-recorded video, all members of your group will be
asked to share their audio and camera to respond to live Q&A.

Please note there will be a one-minute delay when the attendees view your presentation; therefore, we
cannot offer polling during the presentation. A delay means that what we are hosting live will be seen by the
audience 1 minute after we produce it.

Important Dates
   ●   Early March: Presenter guidelines and tech-check appointment link sent.
   ●   By March 18: Register as a Full Access Pass attendee to receive the early discount rate.
   ●   Week of March 22: Login credentials for PAS Presentation Management Portal (Education Harvester
       in CadmiumCD) are sent.
   ●   March 22-April 26: Live tech-check with AV.
   ●   April 16: Final presentation recordings, slides, handouts, and profiles due in PAS Presentation
       Management Portal (Education Harvester in CadmiumCD)

Presentation Slide Requirements
We recommend presenters download the PAS PowerPoint slide deck template from the PAS Presentation
Management Portal. This will be listed as "Download the PAS PowerPoint Template" on your presenter task
list. Even if the PAS PowerPoint template is not downloaded, all presentation slides must follow the
requirements below.

   ●   16:9 ratio.
   ●   Headings should be Arial font, color black & size 49.
   ●   Body font should be Arial font, color black & size 24.
   ●   A disclosure slide is required after your title slide.
   ●   Copyrighted images are not permitted.
   ●   No PowerPoint animations or videos are permitted.
   ●   Tables and images should be large enough for audience viewing.
   ●   A good rule of thumb is one slide per minute - For example, a 10-minute presentation would have a
       maximum of 10 slides.
   ●   Polling will not be available; please do not include any slides for polling.

                               DISCOVER • ENGAGE • BELONG
Log in to the PAS Presentation Management Portal (CadmiumCD Education
Harvester)
You will be sent a welcome email inviting you into the portal the week of March 22. That email will
contain the login credentials and a link for the portal. Click on the link and enter your login credentials.
If this is your first-time logging into the portal, you will need to read and sign the Privacy Notice. You will
only need to complete this notice once. Anytime after that, when you login, you will advance directly to your
task page.
Task Page
The Task page will outline the set of tasks that you are required to complete. Please follow the tasks in the
order they appear.
When you have completed your presentation slide deck, upload your presentation file to the PAS
Presentation Management Portal (CadmiumCD Education Harvester). Acceptable file types are: .ppt;
.pptx; .pps; .ppsx; .key; and .pdf.
DISCOVER • ENGAGE • BELONGRecording your MP4 Video
You are required to upload a recorded MP4 of your presentation. There are several ways to create an MP4.
We have provided in-depth instructions on how to do this using Zoom below. If you would like to record in
another software, such as PowerPoint, GoToWebinar, or Loom, please refer to their websites for instructions.
REMEMBER - After you finish recording, rename the file to your session ID number, followed by the
presentation title. Example: 12345 - How to Record in Zoom.MP4
1. Download the Zoom Desktop App
Go to zoom.us and click "Sign Up for Free," and follow the online prompts to sign up for an account.
You will receive a confirmation email with a link to "Activate your Account," where you can set up
your account and download the desktop application.
2. Update Zoom
Zoom regularly provides new versions to release new features and fix bugs. We strongly recommend
upgrading to the latest version. To update your Zoom desktop app, click your profile picture in the
right corner of the window. A drop-down menu will appear where you can select "check for updates."
3. Record a Quality Check, then Record Your Presentation
a. Open the Zoom desktop app.
b. Click "new meeting."
c. Once inside the meeting, complete a test recording and playback the video to ensure your
microphone and camera function properly.
i. If you are presenting as part of a panel, you must schedule a practice run-through with
all presenters present and create a screen sharing plan.
d. When you're ready to run your quality check, share your slides using the "share screen"
button, push "record," "record on this computer." Practice advancing your slides to ensure
your content can be seen clearly, and add some commentary to check your microphone is
functioning correctly.
e. The file will be converted to an MP4 when the meeting ends—Playback the test recording to
check quality.
f. Once you've made any necessary adjustments, record your final presentation.
DISCOVER • ENGAGE • BELONGh. After you finish recording, rename the file to your session ID number, followed by the
presentation title.
i. Example: 12345 - How to Record in Zoom.MP4
i. Log into your Education Harvester Profile and upload the file under the 'upload your
presentation' task.
i. If you have a group presentation, elect one presenter to log into the PAS Presentation
Management Portal (CadmiumCD Education Harvester) and upload the file under the
upload your presentation task section.
Pre-Presentation Technical Check & Internet Requirements
The second week of March, you will be sent a link to schedule your technical check appointment. Between
March 22 and April 26, 2021, you will have a brief technical check scheduled with the PAS audio-visual team.
The purpose of this technical check is to test your audio and video, not to rehearse your presentation. You
must join this technical check from the exact location you plan to present from to prevent unexpected issues
on your presentation day. When selecting your presentation location, test your internet connection to ensure
it is strong enough by using the link below. For the best results, hardwire your computer to the modem. If
you plan to use WiFi, get as close as possible to the modem. Close all non-essential programs before your
test and presentation.
Internet Speed Test
We recommend at least 25-50 MBPS Download for a strong connection. If you test your system and it is not
within this range, please identify a spot that meets the requirements before joining your tech check call.
This will limit any day of internet issues.
For additional information on internet and system requirements for Zoom, please click HERE.
What to Expect on Your Scheduled Session Day
You should plan to arrive 25 minutes before your session's published agenda start time for your "day of"
technical check; you will receive a calendar invitation for this event. This link will be unique to you. Please
do not share the link with others, including presenters in your session. Make sure you can leverage all the
bandwidth available at your location. This means limiting other conference calls, streaming, or online
gaming while you are presenting. If you're presenting from home, let everyone in your household know that
you will need dedicated internet access to achieve the best results.
Once the session is live, production will play the recorded presentation that you have provided. Throughout
the presentation, attendees will have the ability to ask questions in the Q&A tab, and upvoting is available to
give feedback on a question's popularity. After the recorded presentation, you'll be asked to enable your
webcam and conduct a live Q&A with the moderator's assistance. The moderator will read the questions in
the order they have been voted on. After the Q&A has been completed, turn off your camera, and
production will confirm when you can exit.
DISCOVER • ENGAGE • BELONGTechnical Tips & Troubleshooting
If you encounter difficulties connecting, please check the following:
● Use Google Chrome or Firefox to participate in the conference.
● Confirm that you are not on your company's VPN Security Settings (disable this setting). After
disabling, try logging out, closing your browser, and logging back in.
● If you are in the office, try another network (some offices have robust firewalls that restrict access).
● Clear your web browser history and cache.
● Check your Internet connection and use a hardwired internet connection if possible.
● If using WiFi, get as close to the modem as possible.
● Close any other tabs using a lot of bandwidth.
● If you are at home, make sure no one uses streaming services like Netflix, etc. that could impact your
available bandwidth.
Additional Resources
Tips, Tricks, & Best Practices
If you have any questions or concerns, please reach out to us at info@pas-meeting.org. In the subject line,
please indicate that your question is about your live session presentation.
Closed Captioning (Recommendation Only)
PowerPoint
PowerPoint 2016 or newer offers the option to turn on closed captioning. Once in the program, navigate to
the Slide Show tab. On the far right side of the ribbon, use the Captions and Subtitles menu to turn on the
captions.
Google Slides
Google slides is a free presentation program that is available for all Gmail users. To turn on closed
captioning in your Google Slides presentation, click the present button in the top right corner, then click the
"CC" button to turn on and adjust the captions.
DISCOVER • ENGAGE • BELONGYou can also read


